
使用 WebAuthn 在 Angular 應用程式中整合指紋和 Face ID 驗證:逐步指南
 瀏覽:229
Let’s be honest—we’ve all wished we could log into websites using our fingerprints or Face ID, just like on mobile apps, right? Well, thanks to web biometrics, that dream isn’t so far-fetched anymore. Imagine ditching those long, complicated passwords and simply using our fingerprint or face to sign in to our favorite websites. Sounds cool, doesn’t it?
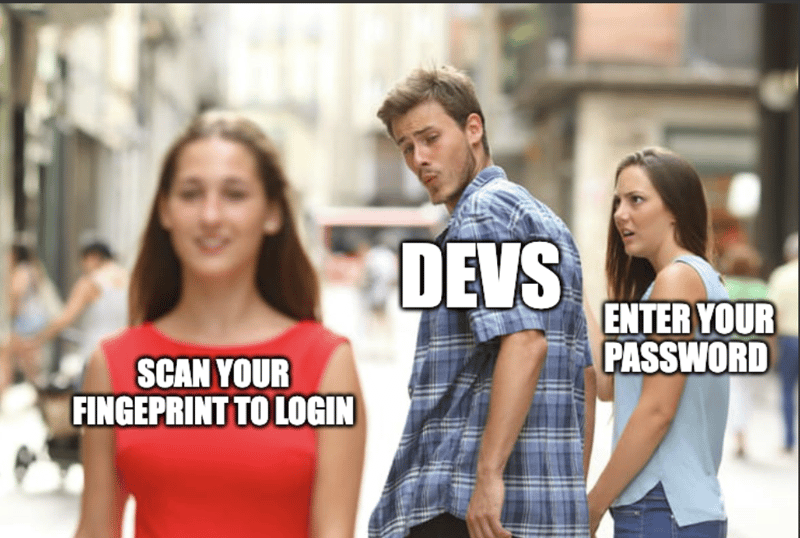
Web biometrics, powered by WebAuthn, is making this possible. It's a fancy name for something quite simple: authenticating us with the same kind of security as our phone’s fingerprint sensor or facial recognition, but directly in our web browser. No more worrying about passwords getting leaked or stolen—just a quick scan, and we’re in.
In this tutorial, we’re going to get hands-on with integrating fingerprint and Face ID login into our Angular apps. We’ll cover the essentials, like how the WebAuthn API works and what we need to do on the backend to keep everything secure and smooth. It’s easier than you might think, and by the end, we’ll have our app all set up for the future of authentication. So, let’s dive in and make logging in a breeze!
Understanding WebAuthn: The Basics for Fingerprints and Face-recognition in Angular Apps

Alright, before we jump into the code, let’s get a quick handle on what WebAuthn is all about. Think of WebAuthn as the bridge that connects our apps to the cool biometric features we love on our phones—like fingerprints and Face ID—right in our browsers. It uses public key cryptography to authenticate users, which means no more storing plain old passwords that hackers can easily snatch up. Instead, we’re talking about securely generated keys that make our logins both safe and seamless.
Key Objects and Their Roles
To get things rolling, we need to understand a couple of key players in the WebAuthn game: PublicKeyCredentialCreationOptions and PublicKeyCredentialRequestOptions. Don’t let the long names scare you—they’re just fancy ways to tell the browser how we want to register and authenticate users.
1. PublicKeyCredentialCreationOptions
This is our go-to object when setting up new user credentials. It includes:
- challenge: A unique, random value generated by the server to ensure the response is fresh and can’t be reused.
- rp: Stands for Relying Party (our app) and includes details like the app’s name and ID.
- user: Info about the user, like a unique ID, username, and display name.
- pubKeyCredParams: A list of public key algorithms we’ll allow.
- authenticatorSelection: Helps us choose the right type of authenticator based on things like attachment type (platform or cross-platform) and user verification level.
2. PublicKeyCredentialRequestOptions
When it’s time to verify our users, this object takes the spotlight. It includes:
- challenge: Just like before, this ensures our authentication request is fresh and unique.
- allowCredentials: Specifies which credentials are allowed for the user.
- userVerification: Dictates whether user verification (like a fingerprint scan) is required.
With these objects in hand, our Angular app will be able to guide users through registering their biometric data and authenticating quickly and securely. Next, we’ll get into the code and see how to make this magic happen in our app!
Setting Up the Angular App
In this section, we’ll guide you through setting up an Angular application with biometric authentication using WebAuthn. We’ll focus on using fingerprints and Face ID, so let's get our hands dirty!
Step 1: Setting Up Our Angular Project
To get started, let’s create a new Angular project. Open your terminal and type the following commands:
ng new web-biometrics-demo
cd web-biometrics-demo
ng serve
This sets up a basic Angular application, and running ng serve will start your app on http://localhost:4200/. You should see the default Angular welcome page. Now, we’re ready to integrate WebAuthn for biometric authentication.
Step 2: Creating the WebAuthn Service
We need a service in Angular to manage all our WebAuthn functionality, including registration and authentication using biometrics. Let’s create this service by running:
ng generate service services/webauthn
Now, open webauthn.service.ts and add the following code:
import { Injectable } from '@angular/core';

@Injectable({
  providedIn: 'root'
})
export class WebAuthnService {

  constructor() { }

  // Generates a random buffer to use as a challenge, which is a unique value needed for security
  private generateRandomBuffer(length: number): Uint8Array {
    const randomBuffer = new Uint8Array(length);
    window.crypto.getRandomValues(randomBuffer); // Fills the buffer with cryptographically secure random values
    return randomBuffer;
  }

  // Registers a new credential (like a fingerprint or Face ID) for the user
  async register() {
    // Generate a unique challenge for the registration process
    const challenge = this.generateRandomBuffer(32);

    // PublicKeyCredentialCreationOptions is the core object needed for registration
    const publicKey: PublicKeyCredentialCreationOptions = {
      challenge: challenge, // A random value generated by the server to ensure the request is fresh and unique
      rp: { // Relying Party (your app) information
        name: "OurAwesomeApp" // Display name of your app
      },
      user: { // User information
        id: this.generateRandomBuffer(16), // A unique identifier for the user
        name: "[email protected]", // User's email or username
        displayName: "User Example" // A friendly name for the user
      },
      pubKeyCredParams: [{ // Array of acceptable public key algorithms
        type: "public-key",
        alg: -7  // Represents the ES256 algorithm (Elliptic Curve Digital Signature Algorithm)
      }],
      authenticatorSelection: { // Criteria for selecting the appropriate authenticator
        authenticatorAttachment: "platform", // Ensures we use the device's built-in biometric authenticator like Touch ID or Face ID
        userVerification: "required" // Requires user verification (e.g., fingerprint or face scan)
      },
      timeout: 60000, // Timeout for the registration operation in milliseconds
      attestation: "direct" // Attestation provides proof of the authenticator's properties and is sent back to the server
    };

    try {
      // This will prompt the user to register their biometric credential
      const credential = await navigator.credentials.create({ publicKey }) as PublicKeyCredential;
      this.storeCredential(credential, challenge); // Store the credential details locally for demo purposes
      console.log("Registration successful!", credential);
      return credential; // Return the credential object containing the user's public key and other details
    } catch (err) {
      console.error("Registration failed:", err);
      throw err; // Handle any errors that occur during registration
    }
  }

  // Authenticates the user with stored credentials (like a fingerprint or Face ID)
  async authenticate() {
    const storedCredential = this.getStoredCredential(); // Retrieve stored credential information
    if (!storedCredential) {
      throw new Error("No stored credential found. Please register first."); // Error if no credentials are found
    }

    // PublicKeyCredentialRequestOptions is used to prompt the user to authenticate
    const publicKey: PublicKeyCredentialRequestOptions = {
      challenge: new Uint8Array(storedCredential.challenge), // A new challenge to ensure the request is fresh and unique
      allowCredentials: [{ // Specifies which credentials can be used for authentication
        id: new Uint8Array(storedCredential.rawId), // The ID of the credential to use
        type: "public-key"
      }],
      userVerification: "required", // Requires user verification (e.g., fingerprint or face scan)
      timeout: 60000 // Timeout for the authentication operation in milliseconds
    };

    try {
      // This will prompt the user to authenticate using their registered biometric credential
      const credential = await navigator.credentials.get({ publicKey }) as PublicKeyCredential;
      console.log("Authentication successful!", credential);
      return credential; // Return the credential object with authentication details
    } catch (err) {
      console.error("Authentication failed:", err);
      throw err; // Handle any errors that occur during authentication
    }
  }

  // Stores credential data in localStorage (for demo purposes only; this should be handled securely in production)
  private storeCredential(credential: PublicKeyCredential, challenge: Uint8Array) {
    const credentialData = {
      rawId: Array.from(new Uint8Array(credential.rawId)), // Converts the raw ID to an array for storage
      challenge: Array.from(challenge) // Converts the challenge to an array for storage
    };
    localStorage.setItem('webauthn_credential', JSON.stringify(credentialData)); // Store the data as a JSON string
  }

  // Retrieves stored credential data from localStorage
  private getStoredCredential(): any {
    const storedCredential = localStorage.getItem('webauthn_credential');
    return storedCredential ? JSON.parse(storedCredential) : null; // Parse the stored JSON back into an object
  }
}
What’s Happening in the Code?
generateRandomBuffer: Creates a random buffer that serves as a challenge to ensure each authentication or registration request is unique.
register: This method sets up the biometric registration process. It uses PublicKeyCredentialCreationOptions to define parameters like the challenge, relying party (your app), user information, and acceptable public key algorithms. When navigator.credentials.create() is called, the browser prompts the user to register their biometric data.
authenticate: This method handles user authentication with biometrics. It uses PublicKeyCredentialRequestOptions to define the authentication challenge and credentials that can be used. The method prompts the user to authenticate with their registered biometrics.
-
storeCredential and getStoredCredential: These methods handle storing and retrieving credentials in localStorage for demonstration purposes.
In a real-world app, you’d securely store this information on your backend.
Step 3: Building the UI
Now, let’s create a basic UI with buttons to trigger the registration and login functions. This UI will provide feedback based on whether the registration or login was successful.
Open app.component.ts and replace the content with the following:
import { Component } from '@angular/core';
import { WebAuthnService } from './services/webauthn.service';
@Component({
selector: 'app-root',
template: `
Web Biometrics in Angular
{{ message }}
`,
styles: [`
.auth-container {
text-align: center;
padding: 50px;
}
.success {
color: green;
}
.error {
color: red;
}
button {
margin: 10px;
padding: 10px 20px;
font-size: 16px;
}
p {
margin: 10px;
font-size: 16px;
}
`]
})
export class AppComponent {
message: string | null = null; // Message to display feedback to the user
isSuccess: boolean = false; // Indicates if the last action was successful
constructor(private webAuthnService: WebAuthnService) { }
// Trigger registration process and update the UI based on the outcome
async register() {
try {
await this.webAuthnService.register();
this.message = "Registration successful!"; // Success message if registration works
this.isSuccess = true;
} catch (err) {
this.message = "Registration failed. Please try again."; // Error message if something goes wrong
this.isSuccess = false;
}
}
// Trigger authentication process and update the UI based on the outcome
async login() {
try {
await this.webAuthnService.authenticate();
this.message = "Authentication successful!"; // Success message if authentication works
this.isSuccess = true;
} catch (err) {
this.message = "Authentication failed. Please try again."; // Error message if something goes wrong
this.isSuccess = false;
}
}
}
What’s Happening in the Component?
register and login methods: These methods call the respective register and authenticate methods from the WebAuthnService. If successful, a success message is displayed; otherwise, an error message is shown.
Template and Styling: The template includes buttons to trigger registration and login, and it displays messages to the user based on the operation's outcome. The buttons are styled for simplicity.
That’s it! We’ve built a basic Angular app with WebAuthn-based biometric authentication, supporting fingerprints and Face ID. This setup captures the core concepts and lays a foundation that can be expanded with additional features and security measures for a production environment.
Backend Considerations
When implementing biometric authentication like fingerprints or Face ID in web applications using WebAuthn, the backend plays a crucial role in managing the security and flow of data. Here’s a breakdown of how the backend processes work in theory, focusing on registration and login functionalities.
Registration: Sign-up
1. User Registration Flow:
User Data Capture: During registration, the user provides basic credentials, such as an email and password. If biometric data is also being registered, this is captured as part of the WebAuthn response.
Password Hashing: For security, passwords are never stored in plain text. Instead, they are hashed using a library like bcrypt before being stored in the database.
-
Storing WebAuthn Credentials:
- Challenge Handling: The server sends a challenge during the registration process, which is a randomly generated value to prevent replay attacks.
- Response Validation: When the client responds with the WebAuthn data, it includes clientDataJSON and attestationObject that need to be decoded and verified.
- Credential Storage: After validation, key data from the response—like the webauthnId (a unique identifier for the credential) and the publicKey (used to verify future authentications)—are stored in the database alongside the user record.
2. Backend Code Responsibilities:
The backend uses libraries like cbor to decode binary data formats from the WebAuthn response, extracting necessary elements like the public key and authenticator data.
It ensures that the challenge from the initial registration request matches what is returned in the WebAuthn response to verify the authenticity of the registration.
If the WebAuthn response passes all checks, the credentials are saved in the database, linked to the user account.
Login
1. User Login Flow:
Challenge Generation: Similar to registration, the server generates a challenge that must be responded to by the client’s authenticator during login.
-
Validating the WebAuthn Response:
- The client sends back a PublicKeyCredentialRequestOptions object containing the response to the challenge.
- The backend decodes and verifies this response, ensuring that the challenge and the credentials match what is stored in the database.
-
Credential Verification:
- The public key stored during registration is used to verify the signature in the login response.
- If the credentials match, the backend allows the login and generates an authentication token (like a JWT) for the session.
Error Handling:
Mismatch or Invalid Response: If the challenge response does not match the expected values, or if the WebAuthn credentials do not verify correctly, the backend responds with an error, preventing unauthorized access.
Fallback to Password: If WebAuthn fails or is unavailable, the system can revert to traditional password verification, ensuring users can still access their accounts.
Security Considerations
Data Integrity: The integrity of WebAuthn credentials is critical. Any modification in storage or transmission would cause verification to fail, thereby securing the authentication process.
Challenge Nonces: The use of unique, time-limited challenges ensures that responses cannot be reused, protecting against replay attacks.
Public Key Storage: Storing only public keys (which cannot be used to impersonate the user) enhances security, as private keys remain on the client device.
By following these principles, the backend effectively manages biometric authentication, ensuring a secure, seamless experience for users wanting to use features like fingerprint or Face ID in their Angular apps.
In Summary
In this tutorial, we walked into integrating biometric authentication with Angular using WebAuthn. We covered the essentials, from understanding key WebAuthn objects like PublicKeyCredentialCreationOptions and PublicKeyCredentialRequestOptions to setting up Angular services and UI components for a smooth registration and login process. We also discussed the backend considerations necessary for handling biometric authentication securely.
For those eager to see WebAuthn in action, I have provided a demo and a repository with a complete implementation. You can check out the demo here and explore the source code on GitHub at this repository.
Embracing biometric authentication not only enhances security but also simplifies the user experience, paving the way for a future where logging in is as easy as a fingerprint scan or a quick face recognition. As you integrate these features into your Angular apps, you'll be contributing to a more secure and user-friendly web. Happy coding!
-
 JavaScript計算兩個日期之間天數的方法How to Calculate the Difference Between Dates in JavascriptAs you attempt to determine the difference between two dates in Javascript, consider this s...程式設計 發佈於2025-07-02
 -
您如何在Laravel Blade模板中定義變量?在Laravel Blade模板中使用Elegance 在blade模板中如何分配變量對於存儲以後使用的數據至關重要。在使用“ {{}}”分配變量的同時,它可能並不總是最優雅的解決方案。 幸運的是,Blade通過@php Directive提供了更優雅的方法: $ old_section =...程式設計 發佈於2025-07-02
-
如何限制動態大小的父元素中元素的滾動範圍?在交互式接口中實現垂直滾動元素的CSS高度限制問題:考慮一個佈局,其中我們具有與用戶垂直滾動一起移動的可滾動地圖div,同時與固定的固定sidebar保持一致。但是,地圖的滾動無限期擴展,超過了視口的高度,阻止用戶訪問頁面頁腳。 映射{} 因此。我們不使用jQuery的“ .aimimate...程式設計 發佈於2025-07-02
-
如何有效地選擇熊貓數據框中的列?在處理數據操作任務時,在Pandas DataFrames 中選擇列時,選擇特定列的必要條件是必要的。在Pandas中,選擇列的各種選項。 選項1:使用列名 如果已知列索引,請使用ILOC函數選擇它們。請注意,python索引基於零。 df1 = df.iloc [:,0:2]#使用索引0和1 ...程式設計 發佈於2025-07-02
-
在Python中如何創建動態變量?在Python 中,動態創建變量的功能可以是一種強大的工具,尤其是在使用複雜的數據結構或算法時,Dynamic Variable Creation的動態變量創建。 Python提供了幾種創造性的方法來實現這一目標。 利用dictionaries 一種有效的方法是利用字典。字典允許您動態創建密鑰並...程式設計 發佈於2025-07-02
-
為什麼使用Firefox後退按鈕時JavaScript執行停止?導航歷史記錄問題:JavaScript使用Firefox Back Back 此行為是由瀏覽器緩存JavaScript資源引起的。要解決此問題並確保在後續頁面訪問中執行腳本,Firefox用戶應設置一個空功能。 警報'); }; alert('inline Alert')...程式設計 發佈於2025-07-02
-
如何從PHP中的數組中提取隨機元素?從陣列中的隨機選擇,可以輕鬆從數組中獲取隨機項目。考慮以下數組:; 從此數組中檢索一個隨機項目,利用array_rand( array_rand()函數從數組返回一個隨機鍵。通過將$項目數組索引使用此鍵,我們可以從數組中訪問一個隨機元素。這種方法為選擇隨機項目提供了一種直接且可靠的方法。程式設計 發佈於2025-07-02
-
在C#中如何高效重複字符串字符用於縮進?在基於項目的深度下固定字符串時,重複一個字符串以進行凹痕,很方便有效地有一種有效的方法來返回字符串重複指定的次數的字符串。使用指定的次數。 constructor 這將返回字符串“ -----”。 字符串凹痕= new String(' - ',depth); console.W...程式設計 發佈於2025-07-02
-
如何使用Depimal.parse()中的指數表示法中的數字?在嘗試使用Decimal.parse(“ 1.2345e-02”中的指數符號表示法表示的字符串時,您可能會遇到錯誤。這是因為默認解析方法無法識別指數符號。 成功解析這樣的字符串,您需要明確指定它代表浮點數。您可以使用numbersTyles.Float樣式進行此操作,如下所示:[&& && && ...程式設計 發佈於2025-07-02
-
解決MySQL插入Emoji時出現的\\"字符串值錯誤\\"異常Resolving Incorrect String Value Exception When Inserting EmojiWhen attempting to insert a string containing emoji characters into a MySQL database us...程式設計 發佈於2025-07-02
-
如何使用Python理解有效地創建字典?在python中,詞典綜合提供了一種生成新詞典的簡潔方法。儘管它們與列表綜合相似,但存在一些顯著差異。 與問題所暗示的不同,您無法為鑰匙創建字典理解。您必須明確指定鍵和值。 For example:d = {n: n**2 for n in range(5)}This creates a dict...程式設計 發佈於2025-07-02
-
Java的Map.Entry和SimpleEntry如何簡化鍵值對管理?A Comprehensive Collection for Value Pairs: Introducing Java's Map.Entry and SimpleEntryIn Java, when defining a collection where each element com...程式設計 發佈於2025-07-02
-
如何使用Regex在PHP中有效地提取括號內的文本php:在括號內提取文本在處理括號內的文本時,找到最有效的解決方案是必不可少的。一種方法是利用PHP的字符串操作函數,如下所示: 作為替代 $ text ='忽略除此之外的一切(text)'; preg_match('#((。 &&& [Regex使用模式來搜索特...程式設計 發佈於2025-07-02
-
查找當前執行JavaScript的腳本元素方法如何引用當前執行腳本的腳本元素在某些方案中理解問題在某些方案中,開發人員可能需要將其他腳本動態加載其他腳本。但是,如果Head Element尚未完全渲染,則使用document.getElementsbytagname('head')[0] .appendChild(v)的常規方...程式設計 發佈於2025-07-02
-
為什麼使用固定定位時,為什麼具有100%網格板柱的網格超越身體?網格超過身體,用100%grid-template-columns 為什麼在grid-template-colms中具有100%的顯示器,當位置設置為設置的位置時,grid-template-colly修復了? 問題: 考慮以下CSS和html: class =“ snippet-code”> ...程式設計 發佈於2025-07-02


學習中文
- 1 走路用中文怎麼說? 走路中文發音,走路中文學習
- 2 坐飛機用中文怎麼說? 坐飞机中文發音,坐飞机中文學習
- 3 坐火車用中文怎麼說? 坐火车中文發音,坐火车中文學習
- 4 坐車用中文怎麼說? 坐车中文發音,坐车中文學習
- 5 開車用中文怎麼說? 开车中文發音,开车中文學習
- 6 游泳用中文怎麼說? 游泳中文發音,游泳中文學習
- 7 騎自行車用中文怎麼說? 骑自行车中文發音,骑自行车中文學習
- 8 你好用中文怎麼說? 你好中文發音,你好中文學習
- 9 謝謝用中文怎麼說? 谢谢中文發音,谢谢中文學習
- 10 How to say goodbye in Chinese? 再见Chinese pronunciation, 再见Chinese learning


