
使用臉部身份驗證建立安全的員工儀表板:綜合 Next.js 教程
發佈於2024-07-31
 瀏覽:549
Are you ready to revolutionize your workplace management? In this comprehensive tutorial, we're diving deep into creating a state-of-the-art employee dashboard that leverages facial authentication. We'll be using some of the hottest tools in web development: Next.js, FACEIO, and Shadcn UI. By the end of this guide, you'll have a sleek, secure dashboard that'll make your employees feel like they're living in the future!
What You'll Need Before We Start
Before we dive in, let's make sure you've got all your ducks in a row:
- Node.js installed on your machine
- npm or yarn (whichever floats your boat)
Got all that? Great! Let's get this show on the road.
Setting Up Your Project: The First Steps
Step 1: Kickstarting Your Next.js Project
First things first, let's create our Next.js project. Open up your terminal and type in these magic words:
npx create-next-app@latest faceio-app
cd faceio-app
You'll be asked a few questions. Here's how to answer them:
- TypeScript? Heck yes!
- ESLint? Absolutely!
- Tailwind CSS? You bet!
- src/ directory? Nah, we're good.
- App Router? Yes, please!
- Customize default import alias? We'll pass on this one.
Step 2: Gathering Your Tools
Now, let's grab all the goodies we need. Run this command to install our dependencies:
npm install @faceio/fiojs @shadcn/ui class-variance-authority clsx tailwind-merge
Step 3: Setting Up Your Secret Sauce
Create a file called .env.local in your project's root. This is where we'll keep our secret FACEIO app ID:
NEXT_PUBLIC_FACEIO_APP_ID=your-super-secret-faceio-app-id
Remember to replace 'your-super-secret-faceio-app-id' with your actual FACEIO application ID. Keep it safe!
Step 4: File Structure
Your project structure should look like this:
faceio-app/
├── app/
│   ├── layout.tsx
│   ├── page.tsx
│   └── components/
│       ├── FaceAuth.tsx
│       └── EmployeeDashboard.tsx
├── public/
├── .env.local
├── next.config.js
├── package.json
├── tsconfig.json
└── tailwind.config.js
Step 5: Sprucing Up Tailwind CSS
Time to give Tailwind a makeover. Update your tailwind.config.js file with this fancy configuration:
/** @type {import('tailwindcss').Config} */
module.exports = {
  darkMode: ["class"],
  content: [
    './app/**/*.{ts,tsx}',
  ],
  theme: {
    container: {
      center: true,
      padding: "2rem",
      screens: {
        "2xl": "1400px",
      },
    },
    extend: {
      colors: {
        border: "hsl(var(--border))",
        input: "hsl(var(--input))",
        ring: "hsl(var(--ring))",
        background: "hsl(var(--background))",
        foreground: "hsl(var(--foreground))",
        primary: {
          DEFAULT: "hsl(var(--primary))",
          foreground: "hsl(var(--primary-foreground))",
        },
        secondary: {
          DEFAULT: "hsl(var(--secondary))",
          foreground: "hsl(var(--secondary-foreground))",
        },
        destructive: {
          DEFAULT: "hsl(var(--destructive))",
          foreground: "hsl(var(--destructive-foreground))",
        },
        muted: {
          DEFAULT: "hsl(var(--muted))",
          foreground: "hsl(var(--muted-foreground))",
        },
        accent: {
          DEFAULT: "hsl(var(--accent))",
          foreground: "hsl(var(--accent-foreground))",
        },
        popover: {
          DEFAULT: "hsl(var(--popover))",
          foreground: "hsl(var(--popover-foreground))",
        },
        card: {
          DEFAULT: "hsl(var(--card))",
          foreground: "hsl(var(--card-foreground))",
        },
      },
      borderRadius: {
        lg: "var(--radius)",
        md: "calc(var(--radius) - 2px)",
        sm: "calc(var(--radius) - 4px)",
      },
      keyframes: {
        "accordion-down": {
          from: { height: 0 },
          to: { height: "var(--radix-accordion-content-height)" },
        },
        "accordion-up": {
          from: { height: "var(--radix-accordion-content-height)" },
          to: { height: 0 },
        },
      },
      animation: {
        "accordion-down": "accordion-down 0.2s ease-out",
        "accordion-up": "accordion-up 0.2s ease-out",
      },
    },
  },
  plugins: [require("tailwindcss-animate")],
}
Building the Heart of Your Dashboard
Step 1: Crafting the FaceAuth Component
Let's create the star of our show - the FaceAuth component. Create a new file app/components/FaceAuth.tsx and paste in this code:
import { useEffect } from 'react';
import faceIO from '@faceio/fiojs';
import { Button, Card, CardHeader, CardTitle, CardContent } from '@shadcn/ui';
import { useToast } from '@shadcn/ui';
interface FaceAuthProps {
onSuccessfulAuth: (data: any) => void;
}
const FaceAuth: React.FC = ({ onSuccessfulAuth }) => {
const { toast } = useToast();
useEffect(() => {
const faceio = new faceIO(process.env.NEXT_PUBLIC_FACEIO_APP_ID);
const enrollNewUser = async () => {
try {
const userInfo = await faceio.enroll({
locale: 'auto',
payload: {
email: '[email protected]',
pin: '12345',
},
});
toast({
title: "Success!",
description: "You're now enrolled in the facial recognition system!",
});
console.log('User Enrolled!', userInfo);
} catch (errCode) {
toast({
title: "Oops!",
description: "Enrollment failed. Please try again.",
variant: "destructive",
});
console.error('Enrollment Failed', errCode);
}
};
const authenticateUser = async () => {
try {
const userData = await faceio.authenticate();
toast({
title: "Welcome back!",
description: "Authentication successful.",
});
console.log('User Authenticated!', userData);
onSuccessfulAuth({
name: 'John Doe',
position: 'Software Developer',
department: 'Engineering',
photoUrl: 'https://example.com/john-doe.jpg',
});
} catch (errCode) {
toast({
title: "Authentication failed",
description: "Please try again or enroll.",
variant: "destructive",
});
console.error('Authentication Failed', errCode);
}
};
const enrollBtn = document.getElementById('enroll-btn');
const authBtn = document.getElementById('auth-btn');
if (enrollBtn) enrollBtn.onclick = enrollNewUser;
if (authBtn) authBtn.onclick = authenticateUser;
return () => {
if (enrollBtn) enrollBtn.onclick = null;
if (authBtn) authBtn.onclick = null;
};
}, [toast, onSuccessfulAuth]);
return (
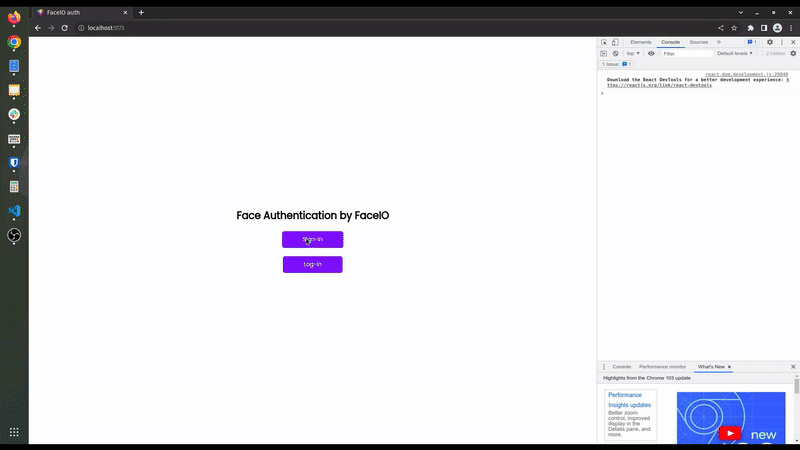
Facial Authentication
);
};
export default FaceAuth;
Step 2: Building the EmployeeDashboard Component
Now, let's create the dashboard that our employees will see. Create app/components/EmployeeDashboard.tsx:
import { useState } from 'react';
import { Card, CardHeader, CardTitle, CardContent } from '@shadcn/ui';
import { Button, Avatar, Badge, Table, TableBody, TableCell, TableHead, TableHeader, TableRow } from '@shadcn/ui';
import FaceAuth from './FaceAuth';
interface EmployeeData {
name: string;
position: string;
department: string;
photoUrl: string;
}
const EmployeeDashboard: React.FC = () => {
const [isAuthenticated, setIsAuthenticated] = useState(false);
const [employeeData, setEmployeeData] = useState(null);
const handleSuccessfulAuth = (data: EmployeeData) => {
setIsAuthenticated(true);
setEmployeeData(data);
};
const mockAttendanceData = [
{ date: '2024-07-14', timeIn: '09:00 AM', timeOut: '05:30 PM' },
{ date: '2024-07-13', timeIn: '08:55 AM', timeOut: '05:25 PM' },
{ date: '2024-07-12', timeIn: '09:05 AM', timeOut: '05:35 PM' },
];
return (
{!isAuthenticated ? (
Employee Profile
{employeeData?.name}
{employeeData?.position}
{employeeData?.department}
Quick Actions
Attendance Records
Date
Time In
Time Out
{mockAttendanceData.map((record, index) => (
{record.date}
{record.timeIn}
{record.timeOut}
))}
>
)}
);
};
export default EmployeeDashboard;
Step 3: Bringing It All Together
Finally, let's update our main page to show off our hard work. Update app/page.tsx:
import EmployeeDashboard from './components/EmployeeDashboard';

export default function Home() {
  return (


  );
}
Now, let's set up the layout that'll wrap our entire app. Add this code: app/layout.tsx
import './globals.css'
import type { Metadata } from 'next'
import { Inter } from 'next/font/google'
const inter = Inter({ subsets: ['latin'] })
export const metadata: Metadata = {
title: 'Employee Dashboard with Facial Authentication',
description: 'A cutting-edge employee dashboard featuring facial recognition for secure authentication and efficient workplace management.',
}
export default function RootLayout({
children,
}: {
children: React.ReactNode
}) {
return (
Faceio Solutions
{children}
)
}
This layout is like the frame of a house - it provides structure for your entire app. It includes a header with your company name, a main content area where your dashboard will appear, and a footer. Plus, it sets up some SEO magic with metadata!
Key Privacy and Security Practices for FACEIO Integration
Privacy by Design
- Use access controls, user consent, and opt-out options to protect privacy.
Meaningful Consent
- Ensure users are aware of data collection.
- Offer freedom of choice and control over their data.
- Allow revocation of consent and data deletion anytime.
Best Practices
- Obtain clear and appropriate consent, especially for minors.
- Make consent requests easy to find and understand.
- Avoid auto-enrollment and unauthorized enrollments.
- Notify users before collecting biometric data.
- Follow legal data privacy requirements.
Data Security
- Delete user data upon account deletion.
- Maintain strong data retention and disposal practices.
- Implement and review security safeguards regularly.
For more details, refer to FACEIO Best Practices.
Key Security Considerations for FACEIO Integration
Security by Design
- Application security is essential to preserve user trust.
- Follow FACEIO's security best practices to mitigate risks.
Core Security Features
-
Reject Weak PINs
- Prevent weak PINs like 0000 or 1234.
- Default: No.
-
Prevent Duplicate Enrollments
- Stops users from enrolling multiple times.
- Default: No.
-
Protect Against Deep-Fakes
- Detects and blocks spoofing attempts.
- Default: No.
-
Forbid Minor Enrollments
- Blocks users under 18 from enrolling.
- Default: No.
-
Require PIN for Authentication
- Requires PIN code for each authentication.
- Default: Yes.
-
Enforce Unique PINs
- Ensures each user's PIN is unique.
- Default: No.
-
Ignore Obscured Faces
- Discards faces under poor lighting or partially masked.
- Default: Yes.
-
Reject Missing Headers
- Blocks instantiation without proper HTTP headers.
- Default: Yes.
-
Restrict Instantiation
- Limits to specific domains and countries.
- Default: No.
-
Enable Webhooks
- Notifies your backend of FACEIO events.
- Default: No.
For more details, refer to FACEIO Security Best Practices.
Real-World Applications: Where Can You Use This?
Now that we've built this awesome dashboard, you might be wondering, "Where can I use this in the real world?" Well, let me tell you, the possibilities are endless! Here are just a few ideas:
Office Management: Say goodbye to old-school punch cards! This system can revolutionize how you track attendance, control access to different areas of your office, and manage employee information.
Security Systems: Imagine a world where your office is Fort Knox, but without the hassle. This facial recognition system can be the cornerstone of a robust security protocol.
Customer Service Kiosks: Picture this - a customer walks up to a kiosk, it recognizes them instantly, and provides personalized service. It's not science fiction anymore!
What's Next? The Sky's the Limit!
Congratulations, tech wizard! You've just built a cutting-edge employee dashboard with facial authentication. But why stop here? The beauty of this system is its flexibility. Here are some ideas to take it to the next level:
- Implement real-time notifications for important updates
- Add detailed reporting features for HR
- Integrate with other systems like payroll or project management tools
Remember, in the world of tech, the only limit is your imagination (and maybe your caffeine intake).
So, what do you think? Are you ready to bring your workplace into the future? Give this project a try and let me know how it goes. I'd love to hear about your experiences, any cool features you add, or any challenges you face along the way.
Happy coding, and may your facial recognition never mistake you for your office plant!
版本聲明
本文轉載於:https://dev.to/vyan/building-a-secure-employee-dashboard-with-facial-authentication-a-comprehensive-nextjs-tutorial-2c4g?1如有侵犯,請聯絡study_golang@163 .com刪除
最新教學
更多>
-
 如何處理PHP文件系統功能中的UTF-8文件名?在PHP的Filesystem functions中處理UTF-8 FileNames 在使用PHP的MKDIR函數中含有UTF-8字符的文件很多flusf-8字符時,您可能會在Windows Explorer中遇到comploreer grounder grounder grounder gro...程式設計 發佈於2025-03-28
 -
如何使用組在MySQL中旋轉數據?在關係數據庫中使用mySQL組使用mySQL組進行查詢結果,在關係數據庫中使用MySQL組,轉移數據的數據是指重新排列的行和列的重排以增強數據可視化。在這裡,我們面對一個共同的挑戰:使用組的組將數據從基於行的基於列的轉換為基於列。 Let's consider the following ...程式設計 發佈於2025-03-28
-
為什麼我的CSS背景圖像出現?故障排除:CSS背景圖像未出現 ,您的背景圖像儘管遵循教程說明,但您的背景圖像仍未加載。圖像和样式表位於相同的目錄中,但背景仍然是空白的白色帆布。 而不是不棄用的,您已經使用了CSS樣式: bockent {背景:封閉圖像文件名:背景圖:url(nickcage.jpg); 如果您的html,cs...程式設計 發佈於2025-03-28
-
如何在全高佈局中有效地將Flexbox和垂直滾動結合在一起?在全高佈局中集成flexbox和垂直滾動Traditional Flexbox Approach (Old Properties)Flexbox layouts using the old syntax (display: box) permit full-height apps with ver...程式設計 發佈於2025-03-28
-
如何使用Python理解有效地創建字典?在python中,詞典綜合提供了一種生成新詞典的簡潔方法。儘管它們與列表綜合相似,但存在一些顯著差異。 與問題所暗示的不同,您無法為鑰匙創建字典理解。您必須明確指定鍵和值。 For example:d = {n: n**2 for n in range(5)}This creates a dict...程式設計 發佈於2025-03-28
-
為什麼PYTZ最初顯示出意外的時區偏移?與pytz 最初從pytz獲得特定的偏移。例如,亞洲/hong_kong最初顯示一個七個小時37分鐘的偏移: 差異源利用本地化將時區分配給日期,使用了適當的時區名稱和偏移量。但是,直接使用DateTime構造器分配時區不允許進行正確的調整。 example pytz.timezone(&#...程式設計 發佈於2025-03-28
-
如何配置Pytesseract以使用數字輸出的單位數字識別?Pytesseract OCR具有單位數字識別和僅數字約束 在pytesseract的上下文中,在配置tesseract以識別單位數字和限制單個數字和限制輸出對數字可能會提出質疑。 To address this issue, we delve into the specifics of Te...程式設計 發佈於2025-03-28
-
如何檢查對像是否具有Python中的特定屬性?方法來確定對象屬性存在尋求一種方法來驗證對像中特定屬性的存在。考慮以下示例,其中嘗試訪問不確定屬性會引起錯誤: >>> a = someClass() >>> A.property Trackback(最近的最新電話): 文件“ ”,第1行, AttributeError: SomeClass...程式設計 發佈於2025-03-28
-
如何在Java中執行命令提示命令,包括目錄更改,包括目錄更改?在java 通過Java通過Java運行命令命令可能很具有挑戰性。儘管您可能會找到打開命令提示符的代碼段,但他們通常缺乏更改目錄並執行其他命令的能力。 solution:使用Java使用Java,使用processBuilder。這種方法允許您:啟動一個過程,然後將其標準錯誤重定向到其標準輸出...程式設計 發佈於2025-03-28
-
為什麼儘管有效代碼,為什麼在PHP中捕獲輸入?在php ;?>" method="post">The intention is to capture the input from the text box and display it when the submit button is clicked.但是,輸出...程式設計 發佈於2025-03-28
-
如何在Java的全屏獨家模式下處理用戶輸入?Handling User Input in Full Screen Exclusive Mode in JavaIntroductionWhen running a Java application in full screen exclusive mode, the usual event ha...程式設計 發佈於2025-03-28
-
Python讀取CSV文件UnicodeDecodeError終極解決方法在試圖使用已內置的CSV模塊讀取Python中時,CSV文件中的Unicode Decode Decode Decode Decode decode Error讀取,您可能會遇到錯誤的錯誤:無法解碼字節 在位置2-3中:截斷\ uxxxxxxxx逃脫當CSV文件包含特殊字符或Unicode的路徑逃...程式設計 發佈於2025-03-28
-
找到最大計數時,如何解決mySQL中的“組函數\”錯誤的“無效使用”?如何在mySQL中使用mySql 檢索最大計數,您可能會遇到一個問題,您可能會在嘗試使用以下命令:理解錯誤正確找到由名稱列分組的值的最大計數,請使用以下修改後的查詢: 計數(*)為c 來自EMP1 按名稱組 c desc訂購 限制1 查詢說明 select語句提取名稱列和每個名稱...程式設計 發佈於2025-03-28
-
為什麼使用固定定位時,為什麼具有100%網格板柱的網格超越身體?網格超過身體,用100%grid-template-columns 為什麼在grid-template-colms中具有100%的顯示器,當位置設置為設置的位置時,grid-template-colly修復了? 問題: 考慮以下CSS和html: class =“ snippet-code”> ...程式設計 發佈於2025-03-28
-
如何使用Java.net.urlConnection和Multipart/form-data編碼使用其他參數上傳文件?使用http request 上傳文件上傳到http server,同時也提交其他參數,java.net.net.urlconnection and Multipart/form-data Encoding是普遍的。 Here's a breakdown of the process:Mu...程式設計 發佈於2025-03-28


學習中文
- 1 走路用中文怎麼說? 走路中文發音,走路中文學習
- 2 坐飛機用中文怎麼說? 坐飞机中文發音,坐飞机中文學習
- 3 坐火車用中文怎麼說? 坐火车中文發音,坐火车中文學習
- 4 坐車用中文怎麼說? 坐车中文發音,坐车中文學習
- 5 開車用中文怎麼說? 开车中文發音,开车中文學習
- 6 游泳用中文怎麼說? 游泳中文發音,游泳中文學習
- 7 騎自行車用中文怎麼說? 骑自行车中文發音,骑自行车中文學習
- 8 你好用中文怎麼說? 你好中文發音,你好中文學習
- 9 謝謝用中文怎麼說? 谢谢中文發音,谢谢中文學習
- 10 How to say goodbye in Chinese? 再见Chinese pronunciation, 再见Chinese learning


