Resend と Zod を使用して Next.js で動的なメール連絡フォームを作成する方法
Introduction
Next.js is a powerful full-stack framework that allows us to build applications with both frontend and backend features. It's very flexible and can be used for everything from simple static websites to complex web apps. Today, we will use Next.js to build an email contact form.
Forms are a key part of any website, letting users interact with the application. Whether it's for signing up, logging in, giving feedback, or collecting data, forms are vital for user experience. Without forms, a full-stack application wouldn't be able to gather and process user input properly.
In this blog, I will show you how to create an email contact form using Next.js, Resend, and Zod (for form validation). We will cover setting up the project, designing the form, handling form submissions, and creating a separate API route. By the end, you will know how to build and add forms to your Next.js apps, ensuring your web app works well and is easy to use.
So, without further delay, let's get started.
What is Resend?
Resend is a modern email API for developers. It's designed to make sending emails from your applications simple, reliable, and scalable. Unlike traditional email services, Resend is built with developers in mind, offering a straightforward API that integrates seamlessly with various programming languages and frameworks, including Next.js.
In our Next.js form project, we'll use Resend to send emails. When a user submits the form, we'll use Resend's API to send a confirmation email or process the form data as needed.
What is Zod?
Zod is a powerful tool for your data. It's a TypeScript-first library that helps you define and check the shape of your data. Think of it as setting rules for your data and then making sure the data matches those rules before you use it.
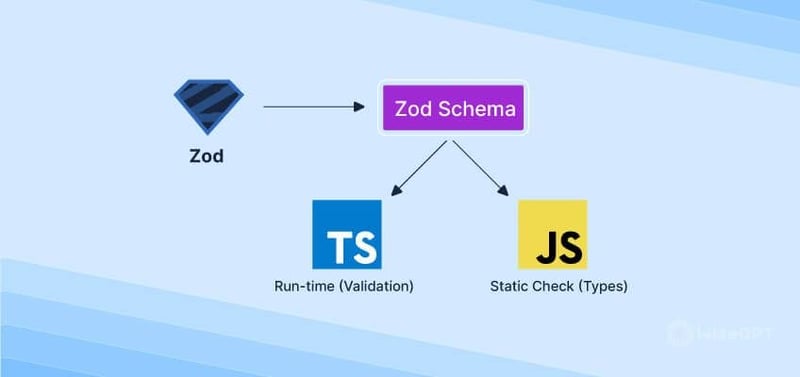
If you're using TypeScript (and if you're not, you should consider it!), Zod plays nicely with it. It can automatically infer TypeScript types from your schemas, which is a huge time-saver. While TypeScript checks types at compile-time, Zod does it at runtime. This means you can catch data issues that might slip through static type checking. You can use Zod for all sorts of data validation scenarios, from simple form inputs to complex API responses.
Project Setup
Let's start by setting up our Next.js project with all the necessary dependencies. We'll use TypeScript for type safety, Tailwind CSS for styling, Ant Design for UI components, Zod for form validation, and Resend for email functionality.
- Create a new Next.js project with TypeScript:
npx create-next-app@latest my-contact-form --typescript
cd my-contact-form
- Install additional dependencies:
yarn add antd zod resend react-icons
Setup Environment variables
For sending an email, we will use Resend, so we need the Resend API key. Before starting our server, let's go to Resend and get our API keys. Click here to go to the Resend site, and click the sign-in button.
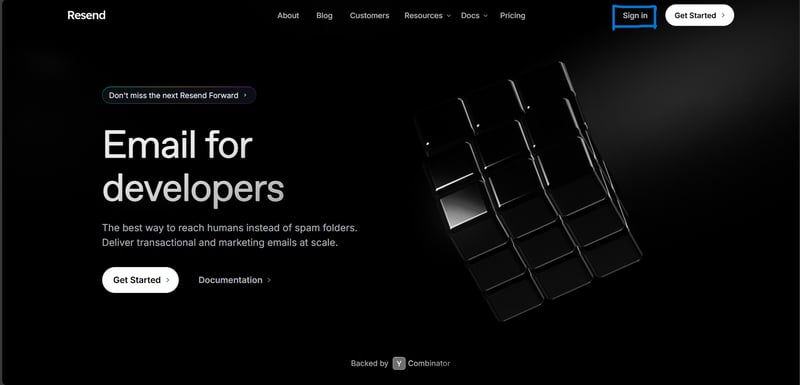
After signing in, you'll be redirected to this page. Here, you'll see all the emails you received from your form.
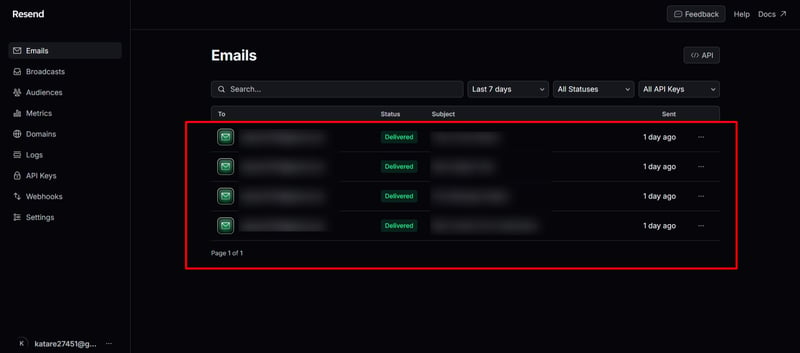
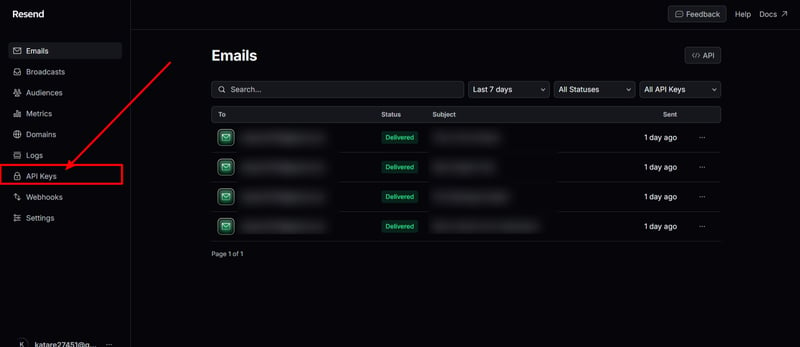
Here, click on the API Keys section
And, generate an API key by clicking on this ? button
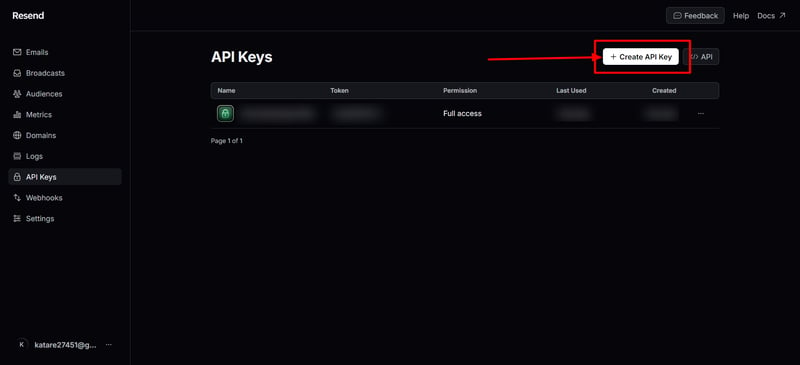
Now, copy that API key and keep it safe. Next, open VSCode and create a new file named .env in your root folder. Add an environment variable there.
RESEND_API_KEY=yourapikeywillbehere
Now you can also run your server using this command.
yarn dev
Email Template Component
Let's start by creating an email template. This will be the template you receive when someone sends you an email via the contact form.
import * as React from 'react';

interface EmailTemplateProps {
  firstName: string;
  message: string;
}

export const EmailTemplate: React.FC = ({
  firstName,
  message,
}) => (

    Hello, I am {firstName}!
    You have received a new message from your Portfolio:
    {message}

);
This simple React component defines the structure of the email that will be sent when someone submits the contact form. It takes two props: firstName and message. The component creates a personalized greeting using the first name and displays the submitted message.
Implementing Email Sending with Resend API
Here. we'll see how to implement email-sending functionality using the Resend API.
The Code Structure
First, let's look at where this code lives in our Next.js project:
app/
  ├── api/
  │   └── v1/
  │       └── send/
  │           └── route.ts
This structure follows Next.js 13's App Router convention, where API routes are defined as route handlers within the app directory.
This is our complete API route code ?
import { EmailTemplate } from 'app/components/email-template';
import { NextResponse } from 'next/server';
import { Resend } from 'resend';
import { v4 as uuid } from 'uuid';

const resend = new Resend(process.env.RESEND_API_KEY);

export async function POST(req: Request) {
  try {
    const { name, email, subject, message } = await req.json();

    const { data, error } = await resend.emails.send({
      from: 'Contact Form ',
      to: '[email protected]',
      subject: subject || 'New Contact Form Submission',
      reply_to: email,
      headers: {
        'X-Entity-Ref-ID': uuid(),
      },
      react: EmailTemplate({ firstName: name, message }) as React.ReactElement,
    });

    if (error) {
      return NextResponse.json({ error }, { status: 500 });
    }

    return NextResponse.json({ data, message: 'success' }, { status: 200 });
  } catch (error) {
    console.error('Error processing request:', error);
    return NextResponse.json({ error: 'Failed to process request' }, { status: 500 });
  }
}
Breaking Down the Code
Now, let's examine each part of the code:
import { EmailTemplate } from 'app/components/email-template';
import { NextResponse } from 'next/server';
import { Resend } from 'resend';
import { v4 as uuid } from 'uuid';
These import statements bring in the necessary dependencies:
- EmailTemplate: A custom React component for our email content(That we already built above.
- NextResponse: Next.js utility for creating API responses.
- Resend: The Resend API client.
- uuid: For generating unique identifiers.
const resend = new Resend(process.env.RESEND_API_KEY);
Here, we initialize the Resend client with our API key. It's crucial to keep this key secret, so we store it in an environment variable.
export async function POST(req: Request) {
  // ... (code inside this function)
}
This exports an async function named POST, which Next.js will automatically use to handle POST requests to this route.
const { name, email, subject, message } = await req.json();
We extract the form data from the request body. This assumes the client is sending a JSON payload with these fields.
const { data, error } = await resend.emails.send({
  from: 'Contact Form ',
  to: '[email protected]',
  subject: subject || 'New Contact Form Submission',
  reply_to: email,
  headers: {
    'X-Entity-Ref-ID': uuid(),
  },
  react: EmailTemplate({ firstName: name, message }) as React.ReactElement,
});
This is where we'll get our emails! We use Resend's send method to dispatch the email:
- from: The sender's email address.
- to: The recipient's email address.
- subject: The email subject, using the provided subject or a default.
- reply_to: Sets the reply-to address to the form submitter's email.
- headers: Includes a unique ID for tracking.
- react: Uses our custom EmailTemplate component to generate the email content.
if (error) {
  return NextResponse.json({ error }, { status: 500 });
}

return NextResponse.json({ data, message: 'success' }, { status: 200 });
Here, we handle the response from Resend. If there's an error, we return a 500 status with the error details. Otherwise, we send a success response.
catch (error) {
  console.error('Error processing request:', error);
  return NextResponse.json({ error: 'Failed to process request' }, { status: 500 });
}
This catch block handles any unexpected errors, logs them, and returns a generic error response.
And that's it! We've set up our API route. The only thing left is to set up our logic and UI. Let's do that too ?
Contact Page Component
In your app directory, create a new folder named contact-form and inside this folder, create a file named page.tsx.
app/
  ├── contact-form/
  │   └── page.tsx
Imports and Dependencies
First, import all necessary components from Ant Design, Next.js, and React Icons. We also import Zod for form validation.
import React from 'react';
import { Form, Input, Button, message, Space, Divider, Typography } from 'antd';
import Head from 'next/head';
import { FaUser } from 'react-icons/fa';
import { MdMail } from 'react-icons/md';
import { FaMessage } from 'react-icons/fa6';
import { z } from 'zod';
import Paragraph from 'antd/es/typography/Paragraph';
UI Layout and Design
Now, let's create our UI, and then we'll move on to the logic. Our form will look something like this.?
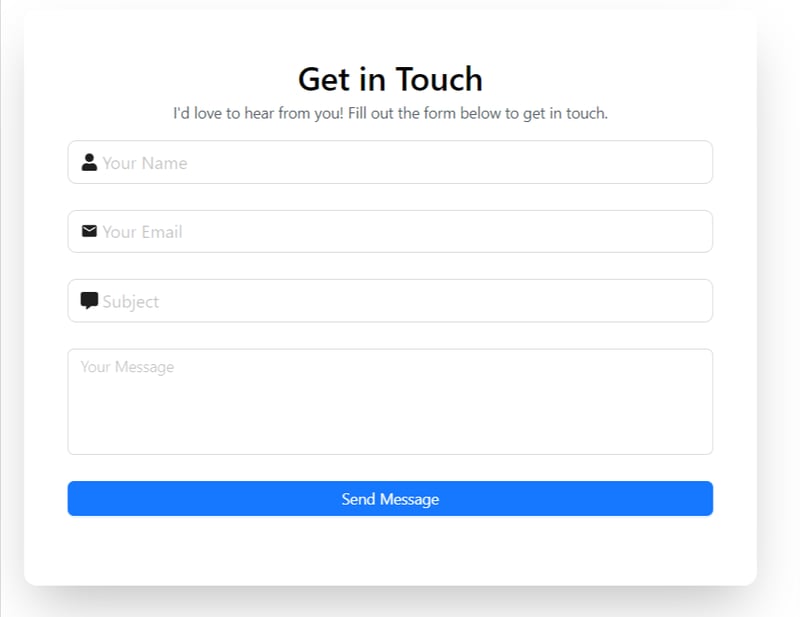
In your page.tsx, after all the import statements, define a component and add a return statement first.
const ContactPage: React.FC = () => {
  return (

       /* our code will be here */

  );
};

export default ContactPage;
Currently, we have just a simple div with a few tailwind styling now, we'll first add our heading part.
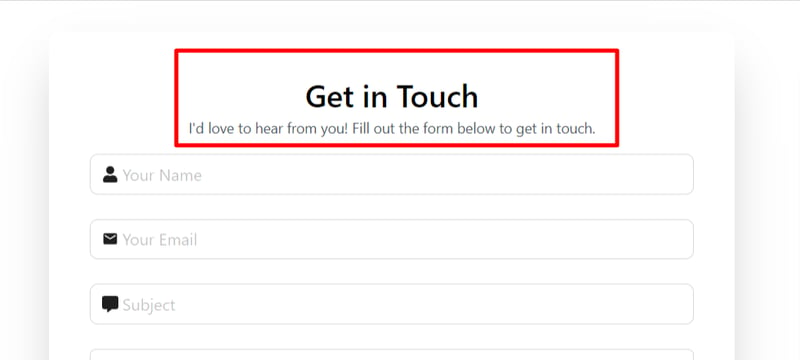
...


          Get in Touch

            I'd love to hear from you! Fill out the form below to get in touch.


...
Now, let's add our input fields
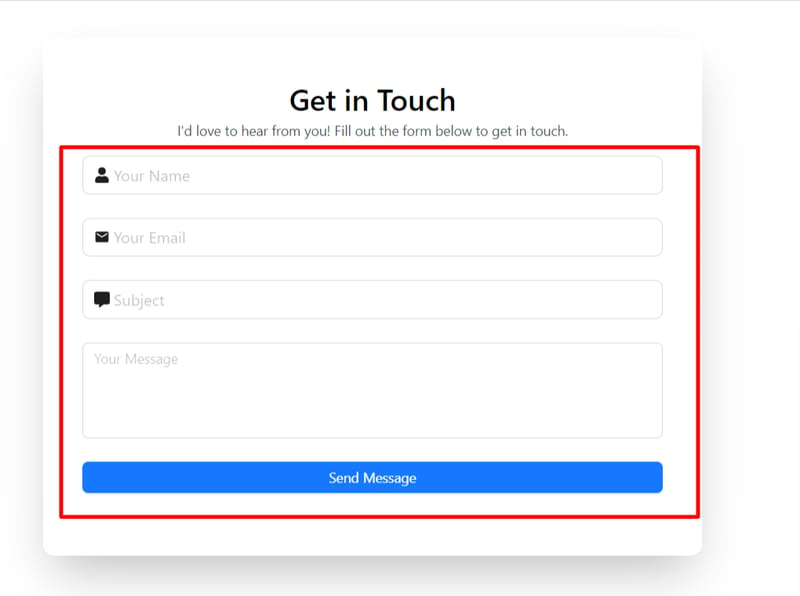
...
Here, in the above code firstly we added a Form Component. This is the main Form component from Ant Design. It has the following props:
- form: Links the form to the form object created using Form.useForm().
- name: Gives the form a name, in this case, "contact".
- onFinish(we'll declare this function in our next section): Specifies the function to be called when the form is submitted successfully.
- layout: Sets the form layout to "vertical".
- className: Applies CSS classes for styling.
Then, we added a Form Items. Each Form.Item represents a field in the form. Let's look at the "name" field as an example.
- name: Specifies the field name.
- rules: An array of validation rules. Here, it's set as required.
- The Input component is used for text input, with a user icon prefix and a placeholder.
Similarly, we have Email and other fields.
This field has an additional rule to ensure the input is a valid email address.
Subject and Message Fields: These are similar to the name field, with the message field using a TextArea component for multi-line input.
Then, we have a Submit Button to submit our form
This is the submit button for the form. It's disabled when isSubmitting (we'll add this state in our next section) is true, and its text changes to "Sending..." during submission.
Form Submission Logic
So, in the logic part, we have a few things to do:
- Setting up Zod schema for form validation
- Adding new states
- and, implementing a onFinish function
We'll start with setting up our schema first.
// Zod schema for form validation
const contactSchema = z.object({
  name: z.string().min(4, 'Name must be at least 4 characters').max(50, 'Name must not exceed 50 characters'),
  email: z.string().email('Invalid email address').regex(/^[\w-\.] @([\w-] \.) [\w-]{2,4}$/, "Email must be a valid format"),
  subject: z.string().min(5, 'Subject must be at least 5 characters').max(100, 'Subject must not exceed 100 characters'),
  message: z.string().min(20, 'Message must be at least 20 characters').max(1000, 'Message must not exceed 1000 characters'),
});

type ContactFormData = z.infer;
This part defines a Zod schema for form validation. As we already learned, Zod is a TypeScript-first schema declaration and validation library. The contactSchema object defines the structure and validation rules for the contact form:
- name: Must be a string between 4 and 50 characters.
- email: Must be a valid email address and match the specified regex pattern.
- subject: Must be a string between 5 and 100 characters.
- message: Must be a string between 20 and 1000 characters.
The ContactFormData type is inferred from the Zod schema, providing type safety for the form data.
Now, let's add 2 new states and implement our onFinish function.
const ContactPage: React.FC = () => {
  const [form] = Form.useForm();
  const [isSubmitting, setIsSubmitting] = React.useState(false);

  const onFinish = async (values: ContactFormData) => {
    setIsSubmitting(true);
    try {
      contactSchema.parse(values);

      const response = await fetch('/api/v1/send', {
        method: 'POST',
        headers: {
          'Content-Type': 'application/json',
        },
        body: JSON.stringify(values),
      });

      if (!response.ok) {
        message.error('Failed to send message. Please try again.');
        setIsSubmitting(false);
      }

      const data = await response.json();

      if (data.message === 'success') {
        message.success('Message sent successfully!');
        setIsSubmitting(false);
        form.resetFields();
      } else {
        throw new Error('Failed to send message');
      }
    } catch (error) {
      if (error instanceof z.ZodError) {
        error.errors.forEach((err) => {
          message.error(err.message);
          setIsSubmitting(false);
        });
      } else {
        message.error('Failed to send message. Please try again.');
        setIsSubmitting(false);
      }
    } finally {
      setIsSubmitting(false);
    }
  };
This part defines the ContactPage functional component:
- It uses the Form.useForm hook to create a form instance.
- It manages a isSubmitting state to track form submission status.
- The onFinish function is called when the form is submitted:
- It sets isSubmitting to true.
- It uses contactSchema.parse(values) to validate the form data against the Zod schema.
- If validation passes, it sends a POST request to /api/v1/send with the form data.
- It handles the response, showing success or error messages accordingly.
- If there's a Zod validation error, it displays the error message.
- Finally, it sets isSubmitting back to false.
This setup ensures that the form data is validated on both the client-side (using Antd's form validation) and the server-side (using Zod schema validation) before sending the data to the server. It also manages the submission state and provides user feedback through success or error messages.
And, this is the complete code of our contact-form file ?
"use client";
import React from 'react';
import { Form, Input, Button, message, Space, Divider, Typography } from 'antd';
import Head from 'next/head';
import { FaUser } from 'react-icons/fa';
import { MdMail } from 'react-icons/md';
import { FaMessage } from 'react-icons/fa6';
import { z } from 'zod';
import { Container } from 'app/components/container';
import Paragraph from 'antd/es/typography/Paragraph';
const { TextArea } = Input;
const { Text } = Typography;
// Zod schema for form validation
const contactSchema = z.object({
name: z.string().min(4, 'Name must be at least 4 characters').max(50, 'Name must not exceed 50 characters'),
email: z.string().email('Invalid email address').regex(/^[\w-\.] @([\w-] \.) [\w-]{2,4}$/, "Email must be a valid format"),
subject: z.string().min(5, 'Subject must be at least 5 characters').max(100, 'Subject must not exceed 100 characters'),
message: z.string().min(20, 'Message must be at least 20 characters').max(1000, 'Message must not exceed 1000 characters'),
});
type ContactFormData = z.infer;
const ContactPage: React.FC = () => {
const [form] = Form.useForm();
const [isSubmitting, setIsSubmitting] = React.useState(false);
const onFinish = async (values: ContactFormData) => {
setIsSubmitting(true);
try {
contactSchema.parse(values);
const response = await fetch('/api/v1/send', {
method: 'POST',
headers: {
'Content-Type': 'application/json',
},
body: JSON.stringify(values),
});
if (!response.ok) {
message.error('Failed to send message. Please try again.');
setIsSubmitting(false);
}
const data = await response.json();
if (data.message === 'success') {
message.success('Message sent successfully!');
setIsSubmitting(false);
form.resetFields();
} else {
throw new Error('Failed to send message');
}
} catch (error) {
if (error instanceof z.ZodError) {
error.errors.forEach((err) => {
message.error(err.message);
setIsSubmitting(false);
});
} else {
message.error('Failed to send message. Please try again.');
setIsSubmitting(false);
}
} finally {
setIsSubmitting(false);
}
};
return (
Get in Touch
I'd love to hear from you! Fill out the form below to get in touch.
} placeholder="Your Name" size="large" />
} placeholder="Your Email" size="large" />
} placeholder="Subject" size="large" />
);
};
export default ContactPage;
Testing
Till now, we're all set, now it's time to run and test our application.
Start your server:
yarn dev
First, let's try to hit the endpoint without filling out the form. As expected, the API doesn't get called, and we receive error messages.
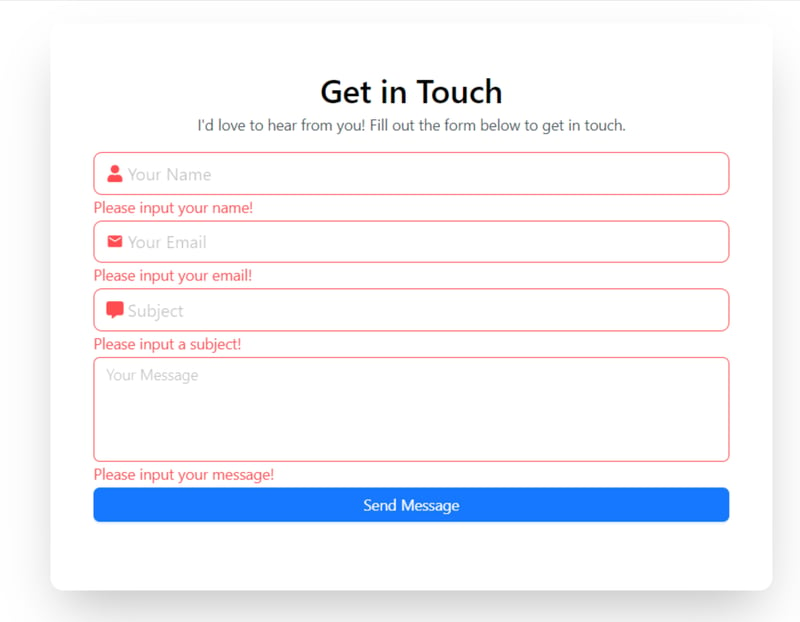
Now, let's fill out the form
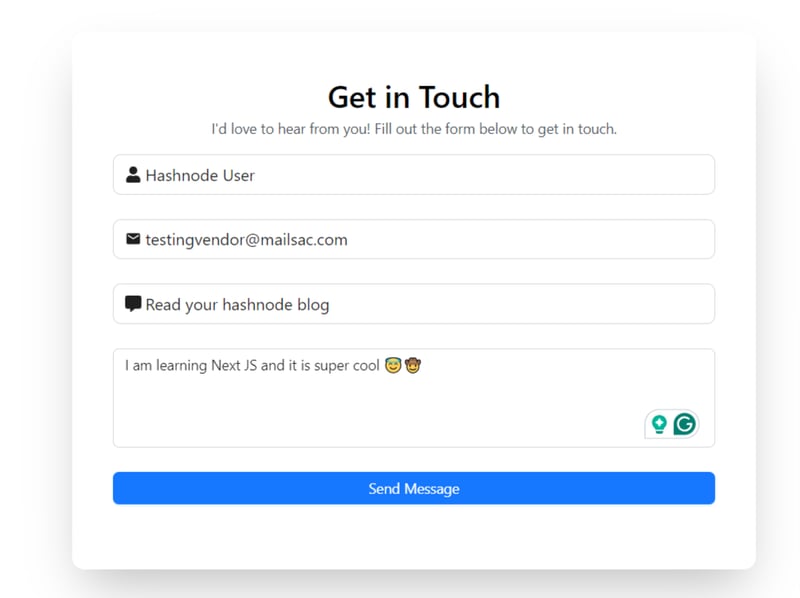
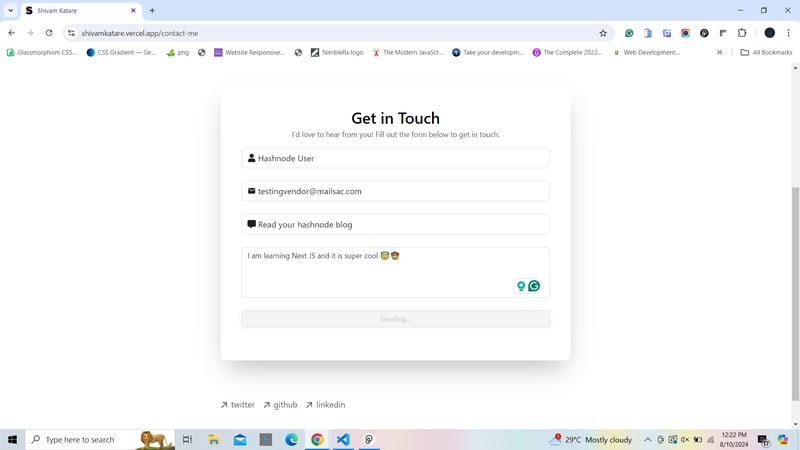
and hit the send button. It's in process.
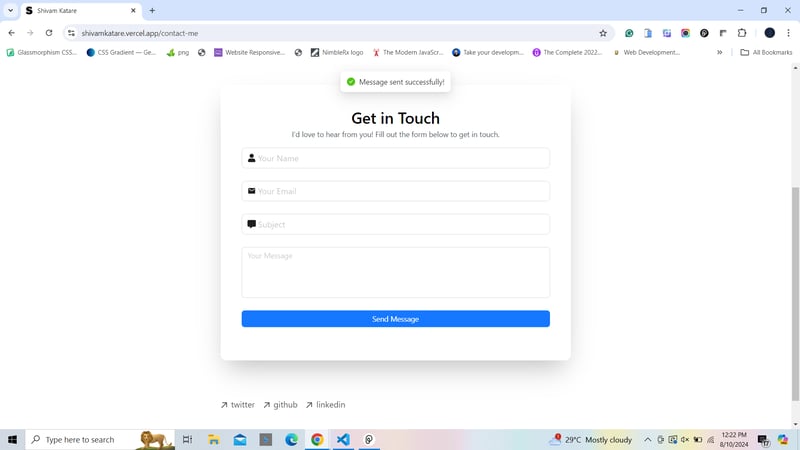
Here we go, the message is sent. The sender receives a notification saying "Message sent," and the form is also refreshed.
The receiver also gets the message?
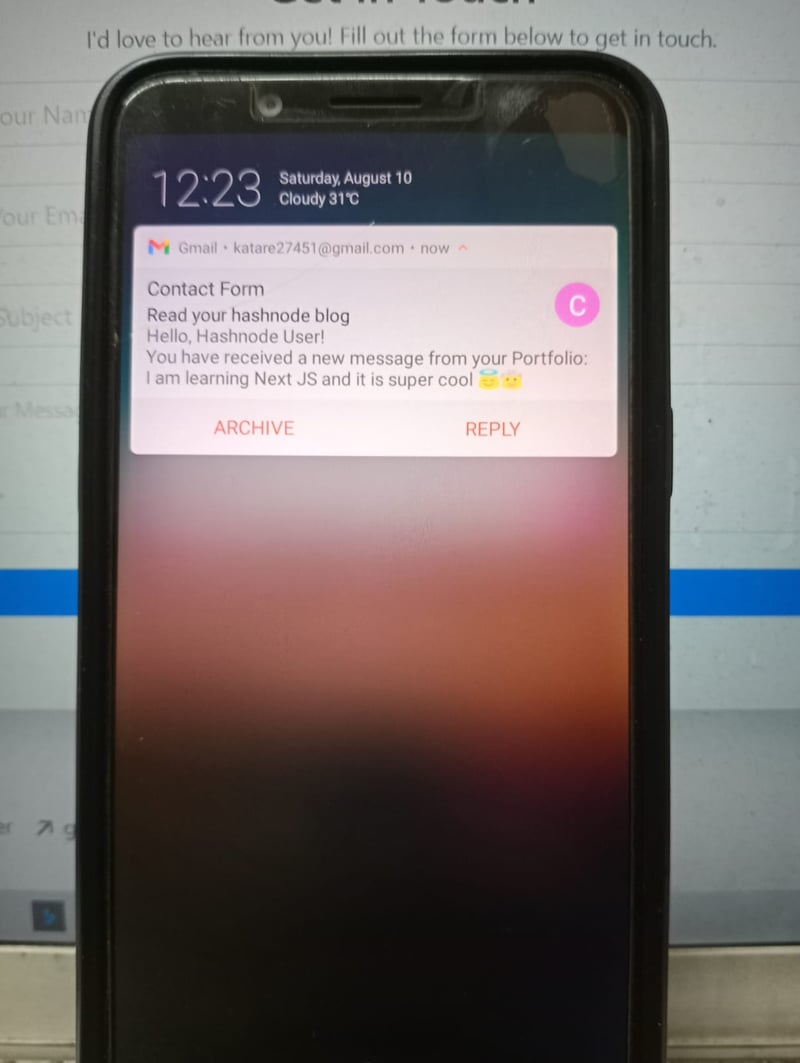
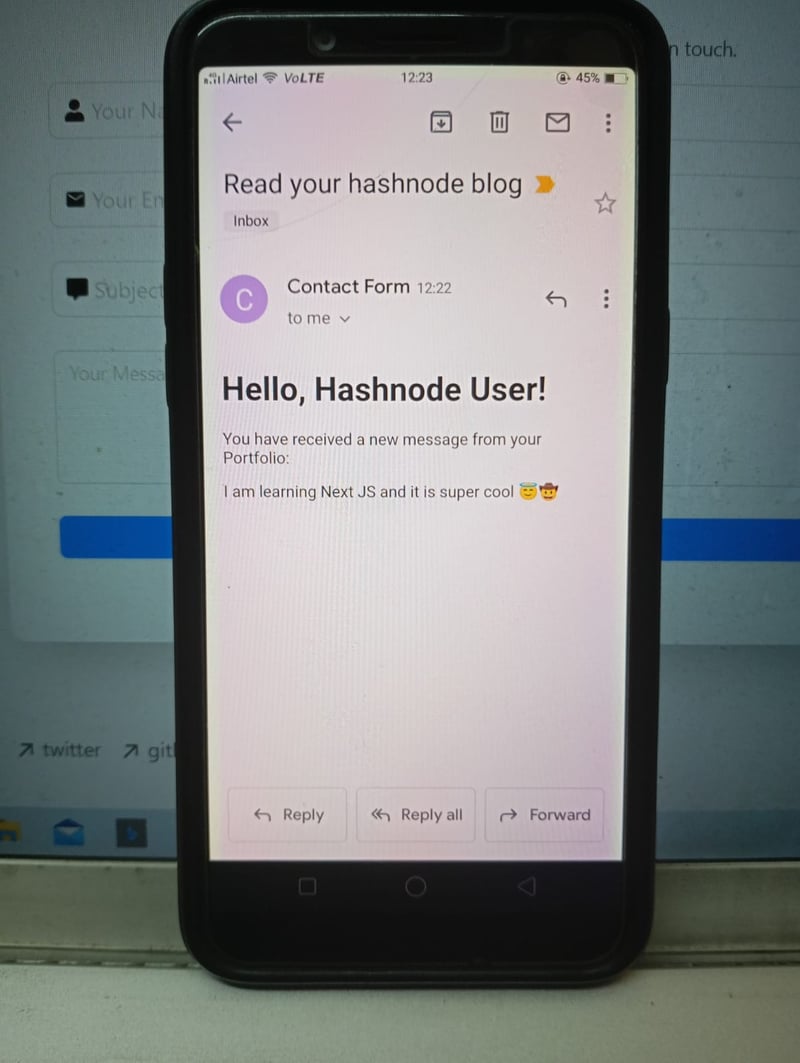
And that's it. We have successfully built an email contact form in Next.js using Resend and Zod.
Conclusion
In this article, we built a contact form using Next.js and implemented features like form validation with Zod and email functionality with Resend. We start by setting up the Next.js project, configuring necessary dependencies, and managing environment variables for secure API access.
Then, we designed the email template, set up an API route for handling email submissions, and implemented the frontend form with Ant Design components.
If you want to see a live preview of it, you can check it out here. I have implemented the same form in my portfolio.
Thanks for reading this blog. If you learned something from it, please like and share it with your friends and community. I write blogs and share content on JavaScript, TypeScript, Open Source, and other web development-related topics. Feel free to follow me on my socials. I'll see you in the next one. Thank You :)
GitHub
-
 バッファ: Node.jsNode.js のバッファーの簡単なガイド Node.js の A Buffer は、生のバイナリ データを処理するために使用されます。これは、ストリーム、ファイル、またはネットワーク データを操作するときに役立ちます。 バッファの作成方法 文字列から: co...プログラミング 2024 年 11 月 5 日に公開
 -
 Node.js でのバージョン管理をマスターする開発者として、私たちは異なる Node.js バージョンを必要とするプロジェクトに頻繁に遭遇します。このシナリオは、Node.js プロジェクトに定期的に関与していない新人開発者と経験豊富な開発者の両方にとって落とし穴です。各プロジェクトに正しい Node.js バージョンが使用されていることを確認...プログラミング 2024 年 11 月 5 日に公開
 -
 トラブルシューティングのために Go バイナリに Git リビジョン情報を埋め込む方法Go バイナリでの Git リビジョンの決定コードをデプロイするとき、バイナリをビルド元の Git リビジョンに関連付けると便利です。トラブルシューティングの目的。ただし、リビジョン番号を使用してソース コードを直接更新することは、ソースが変更されるため現実的ではありません。解決策: ビルド フラグ...プログラミング 2024 年 11 月 5 日に公開
 -
 一般的な HTML タグ: 視点HTML (HyperText Markup Language) は Web 開発の基礎を形成し、インターネット上のすべての Web ページの構造として機能します。 2024 年には、最も一般的な HTML タグとその高度な使用法を理解することで、開発者はより効率的でアクセスしやすく、視覚的に魅力的...プログラミング 2024 年 11 月 5 日に公開
 -
 CSSメディアクエリWeb サイトがさまざまなデバイス間でシームレスに機能することを保証することが、これまで以上に重要になっています。ユーザーがデスクトップ、ラップトップ、タブレット、スマートフォンから Web サイトにアクセスするようになったため、レスポンシブ デザインが必須となっています。レスポンシブ デザインの中...プログラミング 2024 年 11 月 5 日に公開
 -
 JavaScript でのホイスティングを理解する: 包括的なガイドJavaScript でのホイスティング ホイストは、変数と関数の宣言が、含まれるスコープ (グローバル スコープまたは関数スコープ) の先頭に移動 (または「ホイスト」) される動作です。コードが実行されます。これは、コード内で実際に宣言される前に変数や関数を使用できることを意味...プログラミング 2024 年 11 月 5 日に公開
 -
 Stripe を単一製品の Django Python ショップに統合するIn the first part of this series, we created a Django online shop with htmx. In this second part, we'll handle orders using Stripe. What We'll...プログラミング 2024 年 11 月 5 日に公開
 -
 Laravel でキューに入れられたジョブをテストするためのヒントLaravel アプリケーションを使用する場合、コマンドが負荷の高いタスクを実行する必要があるシナリオに遭遇するのが一般的です。メインプロセスのブロックを避けるために、キューで処理できるジョブにタスクをオフロードすることを決定することもできます。 例を見てみましょう。コマンド app:import-...プログラミング 2024 年 11 月 5 日に公開
 -
 人間レベルの自然言語理解 (NLU) システムを作成する方法Scope: Creating an NLU system that fully understands and processes human languages in a wide range of contexts, from conversations to literature. ...プログラミング 2024 年 11 月 5 日に公開
 -
 JSTL を使用して HashMap 内で ArrayList を反復するにはどうすればよいですか?JSTL を使用した HashMap 内の ArrayList の反復Web 開発では、JSTL (JavaServer Pages Standard Tag Library) は、JSP での一般的なタスクを簡素化するためのタグのセットを提供します ( Javaサーバーページ)。そのようなタスクの...プログラミング 2024 年 11 月 5 日に公開
 -
 Encore.ts — ElysiaJS や Hono よりも高速数か月前、私たちは TypeScript 用のオープンソース バックエンド フレームワークである Encore.ts をリリースしました。 すでに多くのフレームワークが存在するため、私たちが行った珍しい設計上の決定のいくつかと、それがどのようにして驚くべきパフォーマンス数値につながるのかを共有したい...プログラミング 2024 年 11 月 5 日に公開
 -
 + を使用した文字列連結が文字列リテラルで失敗するのはなぜですか?文字列リテラルと文字列の連結C では、演算子を使用して文字列と文字列リテラルを連結できます。ただし、この機能には混乱を招く可能性のある制限があります。質問の中で、作成者は文字列リテラル「Hello」、「,world」、および「!」を連結しようとしています。 2つの異なる方法で。最初の例:const ...プログラミング 2024 年 11 月 5 日に公開
 -
 React の再レンダリング: 最適なパフォーマンスのためのベスト プラクティスReact の効率的なレンダリング メカニズムは、その人気の主な理由の 1 つです。ただし、アプリケーションが複雑になるにつれて、コンポーネントの再レンダリングの管理がパフォーマンスを最適化するために重要になります。 React のレンダリング動作を最適化し、不必要な再レンダリングを回避するためのベ...プログラミング 2024 年 11 月 5 日に公開
 -
 条件付き列の作成を実現する方法: Pandas DataFrame で If-Elif-Else を探索する?条件付き列の作成: Pandas の If-Elif-Else指定された問題では、新しい列を DataFrame に追加することが求められます一連の条件付き基準に基づいて決定されます。課題は、コードの効率性と可読性を維持しながらこれらの条件を実装することにあります。関数アプリケーションを使用したソリ...プログラミング 2024 年 11 月 5 日に公開
 -
 秋さんのご紹介です!Qiu のリリースを発表できることを嬉しく思います。これは、生の SQL を再び楽しくするために設計された、実用的な SQL クエリ ランナーです。正直に言うと、ORM にはその役割がありますが、単純な SQL を書きたいだけの場合は、少し圧倒されてしまう可能性があります。私は生の SQL クエリ...プログラミング 2024 年 11 月 5 日に公開
中国語を勉強する
- 1 「歩く」は中国語で何と言いますか? 走路 中国語の発音、走路 中国語学習
- 2 「飛行機に乗る」は中国語で何と言いますか? 坐飞机 中国語の発音、坐飞机 中国語学習
- 3 「電車に乗る」は中国語で何と言いますか? 坐火车 中国語の発音、坐火车 中国語学習
- 4 「バスに乗る」は中国語で何と言いますか? 坐车 中国語の発音、坐车 中国語学習
- 5 中国語でドライブは何と言うでしょう? 开车 中国語の発音、开车 中国語学習
- 6 水泳は中国語で何と言うでしょう? 游泳 中国語の発音、游泳 中国語学習
- 7 中国語で自転車に乗るってなんて言うの? 骑自行车 中国語の発音、骑自行车 中国語学習
- 8 中国語で挨拶はなんて言うの? 你好中国語の発音、你好中国語学習
- 9 中国語でありがとうってなんて言うの? 谢谢中国語の発音、谢谢中国語学習
- 10 How to say goodbye in Chinese? 再见Chinese pronunciation, 再见Chinese learning


