
使用 Flight 构建简单的博客 - 第 1 部分
 浏览:968
Hey everyone! I figured it was time to showcase some of the new features that have been added to the Flight Framework for PHP. Earlier this year the original creator of Flight Mike Cao graciously offered to transfer ownership of mikecao/flight over to a new Flight PHP organization. Since it's been moved we've added features like middleware, route grouping, DIC, and other features. This post will be a little longer, but it's just because I've included a lot of code examples so you can have the right context into how your blog will get built.
First off, let's just get this out of the way. Flight is meant to be a simple framework with a few bells and whistles. It will not compete with Laravel or Symfony or Yii or Cake or [fill in the blank]. This framework is really built towards simple to medium size projects. It also caters to those who don't like "magic" in their code that's hard to understand or train to. It's geared more towards developers who are just starting to branch into frameworks instead of raw PHP with a lot of random include statements.
tl;dr
Lots of cool features, nice simple implementation, blah blah blah here's the code. Go to part 2 for the cool stuff!
Installation
Let's use Composer to get this party started.
composer create-project flightphp/skeleton blog/
cd blog/
Configure your New Project
First thing to do is to go to the app/config/config.php file where we can put any config like API keys, database credentials, and other important credentials for our app. For this blog, we'll uncomment the line with file_path for our SQLite database path:
return [
    'database' => [
        // 'host' => 'localhost',
        // 'dbname' => 'dbname',
        // 'user' => 'user',
        // 'password' => 'password'
        'file_path' => __DIR__ . $ds . '..' . $ds . 'database.sqlite'
    ],
];
Create the Blog Database
Flight now comes with a command line utility called runway. This allows you to create custom commands for a plugin for Flight, or even for your own project.
As part of the skeleton, it comes with a SampleDatabaseCommand that will give us a starting point with this blog project we are creating.
Run the below command and it should populate your database for you!
php runway init:sample-db
Next we'll open up the app/config/services.php file and uncomment the line for SQLite.
// see how the $config variable references the config line we uncommented earlier?
$dsn = 'sqlite:' . $config['database']['file_path'];
Just to make sure we've got everything setup correctly, run composer start and then go to http://localhost:8000/ in your browser. You should see the following screen:
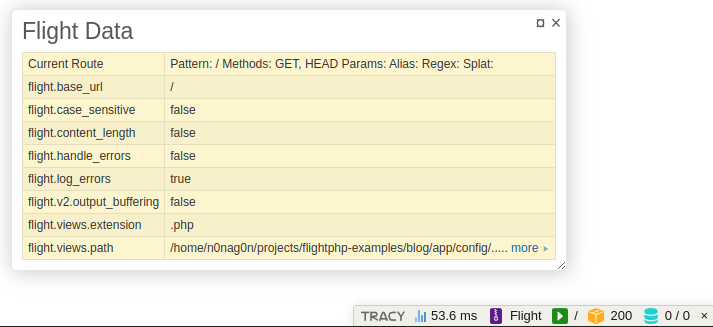
You'll also notice in the corner you have a handy debug toolbar with some custom Flight panels to help you understand what's going on in your application. If you hover over the various items in the toolbar, you'll see a variety of hovers that you can click on to keep sticky on the page (more on that later).
Building the HTML Templates
Flight does come with a very basic HTML templating solution already in the framework. This is just fine for very simple sites or just to return a simple piece of HTML. It is recommended to use another templating platform such as Latte, Twig, or Blade. In this tutorial, we're going to use Latte because it is awesome and has no dependencies (you'll notice in Flight we do not like unnecessary dependencies)!
Go ahead and install Latte
composer require latte/latte
Add this to your services.php
$Latte = new \Latte\Engine;
$Latte->setTempDirectory(__DIR__ . '/../cache/');

// This is fun feature of Flight. You can remap some built in functions with the framework
// to your liking. In this case, we're remapping the Flight::render() method.
$app->map('render', function(string $templatePath, array $data = [], ?string $block = null) use ($app, $Latte) {
    $templatePath = __DIR__ . '/../views/'. $templatePath;
    $Latte->render($templatePath, $data, $block);
});
Now that we have a templating engine in place, we can create a base HTML file. Let's create a layout.latte file:
        {$page_title ? $page_title.' - '}Blog Built with Flight!


        {block content}{/block}
Active Record Database Class
Flight has a plugin for interacting with a database called Flight Active Record. This plugin helps you not write as much raw SQL in your apps (although sometimes it is more efficient to write a raw SQL query instead of forcing an active record/ORM/mapper to run it for you). Basically the active record extension helps you interact with rows within tables in your database: one row in a database can be mapped to an object in PHP (with autocomplete for the columns) saving time and sanity. Let's get it installed in our project.
composer require flightphp/active-record
Now you can use runway to create your active record classes automatically for you and it will create your properties as comments automatically (for autocomplete)!
First let's create the posts class. The first time you run this, it needs to setup the connection for the database.
$ php runway make:record posts
Database configuration not found. Please provide the following details:
Driver (mysql/pgsql/sqlite): sqlite
Database file path [database.sqlite]: app/database.sqlite
Username (for no username, press enter) []:
Password (for no password, press enter) []:
Writing database configuration to .runway-config.json
Creating directory app/records
Active Record successfully created at app/records/PostRecord.php
Now we'll create the comments record class:
$ php runway make:record comments
It's Time for your First Page!
Flight uses the MVC pattern. In order to create a new page you need to define a route in your routes.php file, create a new method in a controller, and then create the HTML file that the browser will serve. You can use runway to help you get started with a new controller class:
php runway make:controller Home
And you should see something similar to the following:
$ php runway make:controller Home
Controller successfully created at app/controllers/HomeController.php
If you go to app/controllers/HomeController.php go ahead and add this new method to your HomeController:
/**
 * Index
 *
 * @return void
 */
public function index(): void
{
    $this->app->render('home.latte', [ 'page_title' => 'Home' ]);
}
And create a new file in app/views/home.latte and put in this code:
{extends 'layout.latte'}
{block content}
My Home Page
{/block}
Finally let's change up the routes to the routes.php file. Go ahead and remove any code in the routes file that begins with $router-> and add a new route for your home router:
$router->get('/', \app\controllers\HomeController::class . '->index');
Make sure you run composer start so that your development server is up. If you go to http://localhost:8000/ in your browser, you should see something like this!
Now we're cookin'!
Adding Routes for the Blog
Let's go ahead and add all the methods in your controller, routes, and html files. Let's start with adding the routes in your routes.php file:
// Blog
$router->group('/blog', function(Router $router) {

    // Posts
    $router->get('', \app\controllers\PostController::class . '->index');
    $router->get('/create', \app\controllers\PostController::class . '->create');
    $router->post('', \app\controllers\PostController::class . '->store');
    $router->get('/@id', \app\controllers\PostController::class . '->show');
    $router->get('/@id/edit', \app\controllers\PostController::class . '->edit');
    $router->post('/@id/edit', \app\controllers\PostController::class . '->update');
    $router->get('/@id/delete', \app\controllers\PostController::class . '->destroy');
});
So you'll notice we use a group() method here to group all the routes together that start with /blog. We could actually rewrite the routes like the following with the group() method and the same thing would happen:
// Posts
$router->get('/blog', \app\controllers\PostController::class . '->index');
$router->get('/blog/create', \app\controllers\PostController::class . '->create');
With the controller, first let's create an empty controller with runway:
php runway make:controller Post
You can copy the code below for your PostController.php:
app = $app;
    }

    /**
     * Index
     *
     * @return void
     */
    public function index(): void
    {
        $PostRecord = new PostRecord($this->app->db());
        $posts = $PostRecord->order('id DESC')->findAll();
        $CommentRecord = new CommentRecord($this->app->db());
        foreach($posts as &$post) {
            $post->comments = $CommentRecord->eq('post_id', $post->id)->findAll();
        }
        $this->app->render('posts/index.latte', [ 'page_title' => 'Blog', 'posts' => $posts]);
    }

    /**
     * Create
     *
     * @return void
     */
    public function create(): void
    {
        $this->app->render('posts/create.latte', [ 'page_title' => 'Create Post']);
    }

    /**
     * Store
     *
     * @return void
     */
    public function store(): void
    {
        $postData = $this->app->request()->data;
        $PostRecord = new PostRecord($this->app->db());
        $PostRecord->title = $postData->title;
        $PostRecord->content = $postData->content;
        $PostRecord->username = $postData->username;
        $PostRecord->created_at = gmdate('Y-m-d H:i:s');
        $PostRecord->updated_at = null;
        $PostRecord->save();
        $this->app->redirect('/blog');
    }

    /**
     * Show
     *
     * @param int $id The ID of the post
     * @return void
     */
    public function show(int $id): void
    {
        $PostRecord = new PostRecord($this->app->db());
        $post = $PostRecord->find($id);
        $CommentRecord = new CommentRecord($this->app->db());
        $post->comments = $CommentRecord->eq('post_id', $post->id)->findAll();
        $this->app->render('posts/show.latte', [ 'page_title' => $post->title, 'post' => $post]);
    }

    /**
     * Edit
     *
     * @param int $id The ID of the post
     * @return void
     */
    public function edit(int $id): void
    {
        $PostRecord = new PostRecord($this->app->db());
        $post = $PostRecord->find($id);
        $this->app->render('posts/edit.latte', [ 'page_title' => 'Update Post', 'post' => $post]);
    }

    /**
     * Update
     *
     * @param int $id The ID of the post
     * @return void
     */
    public function update(int $id): void
    {
        $postData = $this->app->request()->data;
        $PostRecord = new PostRecord($this->app->db());
        $PostRecord->find($id);
        $PostRecord->title = $postData->title;
        $PostRecord->content = $postData->content;
        $PostRecord->username = $postData->username;
        $PostRecord->updated_at = gmdate('Y-m-d H:i:s');
        $PostRecord->save();
        $this->app->redirect('/blog');
    }

    /**
     * Destroy
     *
     * @param int $id The ID of the post
     * @return void
     */
    public function destroy(int $id): void
    {
        $PostRecord = new PostRecord($this->app->db());
        $post = $PostRecord->find($id);
        $post->delete();
        $this->app->redirect('/blog');
    }
}
Let's kill some time and talk about a few things that are going on in the controller.
First off we are now using our new active record classes:
$PostRecord = new PostRecord($this->app->db());
$posts = $PostRecord->order('id DESC')->findAll();
We are injecting the database we setup in the services.php file above with $this->app->db();. Technically we could also just use Flight::db() as this points to the global $app variable.
Active Record classes are really helpful to simplify interactions with a database. We could rewrite the above in the following code:
$posts = $this->app->db()->fetchAll("SELECT * FROM posts ORDER BY id DESC");
This might not be the best example of how helpful an active record could be. But in part 2 I'll show you some hidden gems inside these classes that make it so much better than writing raw SQL.
Now let's talk HTML files. Here are the files we'll need for the post routes:
app/views/posts/index.latte
{extends '../layout.latte'}
{block content}
My Amazing Blog
Welcome to my blog!
{foreach $posts as $post}
{first}
Recent Posts
{/first}
{$post->title}
By: {$post->username} on {$post->created_at|date:'d.m.Y G:i a'}
Comments: {count($post->comments)}
{$post->content|truncate:100}
Update - Delete
{/foreach}
{/block}
app/views/posts/show.latte
{extends '../layout.latte'}

{block content}
< Back to blog
{$post->title}
Created by: {$post->username} on {$post->created_at|date:'d.m.Y G:i a'}.

    {$post->content|breakLines}

Last update: {$post->update_at|date:'d.m.Y G:i a'}.

Comments
{foreach $post->comments as $comment}

    {$comment->username} on {$comment->created_at|date:'d.m.Y G:i a'}.

        {$comment->content|breakLines}


    Delete

{else}
No comments yet.
{/foreach}

Add comment
{/block}
app/views/posts/create.latte
{extends '../layout.latte'}

{block content}
Create a Post
{/block}
app/views/posts/edit.latte
{extends '../layout.latte'}

{block content}
Update a Post
{/block}
Create a new post
Now that we've got all the pieces in place, you should be able to load up your blog page, create a new post, see a post, and delete a post. You may have noticed we've included a comment form but the form doesn't actually work. We can fix that real quick! Let's create a controller with runway:
php runway make:controller Comment
Now you can make the CommentController.php look like the following:
app = $app;
    }

    /**
     * Store
     *
     * @param int $id The post ID
     *
     * @return void
     */
    public function store(int $id): void
    {
        $postData = $this->app->request()->data;
        $CommentRecord = new CommentRecord($this->app->db());
        $CommentRecord->post_id = $id;
        $CommentRecord->username = $postData->username;
        $CommentRecord->content = $postData->content;
        $CommentRecord->created_at = gmdate('Y-m-d H:i:s');
        $CommentRecord->updated_at = null;
        $CommentRecord->save();
        $this->app->redirect('/blog/' . $id);
    }

    /**
     * Destroy
     *
     * @param int $id The post ID
     * @param int $comment_id The comment ID
     *
     * @return void
     */
    public function destroy(int $id, int $comment_id): void
    {
        $CommentRecord = new CommentRecord($this->app->db());
        $CommentRecord->find($comment_id);
        $CommentRecord->delete();
        $this->app->redirect('/blog/' . $id);
    }

}
Now let's add a couple other routes in the group chunk of code in routes.php
// Blog
$router->group('/blog', function(Router $router) {

    // Posts

    // post routes...

    // Comments
    $router->post('/@id/comment', \app\controllers\CommentController::class . '->store');
    $router->get('/@id/comment/@comment_id/delete', \app\controllers\CommentController::class . '->destroy');
});
Conclusion (sort of)
With these two additions to the code, you have a fully functioning blog built with Flight! This got the job done and you now have a blog, but the code is somewhat clunky and could be improved to have some pretty nifty features like middleware, permissions, and writing less code! Hop over to part 2
Go ahead and leave any questions in comments below or join us in the chatroom!
If you want to see the final product with all the improvements here's the code!
-
 将图片浮动到底部右侧并环绕文字的技巧在Web设计中围绕在Web设计中,有时可以将图像浮动到页面右下角,从而使文本围绕它缠绕。这可以在有效地展示图像的同时创建一个吸引人的视觉效果。 css位置在右下角,使用css float and clear properties: img { 浮点:对; ...编程 发布于2025-07-02
 -
如何为PostgreSQL中的每个唯一标识符有效地检索最后一行?postgresql:为每个唯一标识符提取最后一行,在Postgresql中,您可能需要遇到与在数据库中的每个不同标识相关的信息中提取信息的情况。考虑以下数据:[ 1 2014-02-01 kjkj 在数据集中的每个唯一ID中检索最后一行的信息,您可以在操作员上使用Postgres的有效效率: ...编程 发布于2025-07-02
-
为什么我在Silverlight Linq查询中获得“无法找到查询模式的实现”错误?查询模式实现缺失:解决“无法找到”错误在银光应用程序中,尝试使用LINQ建立错误的数据库连接的尝试,无法找到以查询模式的实现。”当省略LINQ名称空间或查询类型缺少IEnumerable 实现时,通常会发生此错误。 解决问题来验证该类型的质量是至关重要的。在此特定实例中,tblpersoon可能需...编程 发布于2025-07-02
-
在Ubuntu/linux上安装mysql-python时,如何修复\“ mysql_config \”错误?mysql-python安装错误:“ mysql_config找不到”“ 由于缺少MySQL开发库而出现此错误。解决此问题,建议在Ubuntu上使用该分发的存储库。使用以下命令安装Python-MysqldB: sudo apt-get安装python-mysqldb sudo pip in...编程 发布于2025-07-02
-
PHP未来:适应与创新PHP的未来将通过适应新技术趋势和引入创新特性来实现:1)适应云计算、容器化和微服务架构,支持Docker和Kubernetes;2)引入JIT编译器和枚举类型,提升性能和数据处理效率;3)持续优化性能和推广最佳实践。 引言在编程世界中,PHP一直是网页开发的中流砥柱。作为一个从1994年就开始发展...编程 发布于2025-07-02
-
Java中如何使用观察者模式实现自定义事件?在Java 中创建自定义事件的自定义事件在许多编程场景中都是无关紧要的,使组件能够基于特定的触发器相互通信。本文旨在解决以下内容:问题语句我们如何在Java中实现自定义事件以促进基于特定事件的对象之间的交互,定义了管理订阅者的类界面。以下代码片段演示了如何使用观察者模式创建自定义事件: args)...编程 发布于2025-07-02
-
如何使用不同数量列的联合数据库表?合并列数不同的表 当尝试合并列数不同的数据库表时,可能会遇到挑战。一种直接的方法是在列数较少的表中,为缺失的列追加空值。 例如,考虑两个表,表 A 和表 B,其中表 A 的列数多于表 B。为了合并这些表,同时处理表 B 中缺失的列,请按照以下步骤操作: 确定表 B 中缺失的列,并将它们添加到表的末...编程 发布于2025-07-02
-
如何使用Java.net.urlConnection和Multipart/form-data编码使用其他参数上传文件?使用http request 上传文件上传到http server,同时也提交其他参数,java.net.net.urlconnection and Multipart/form-data Encoding是普遍的。 Here's a breakdown of the process:Mu...编程 发布于2025-07-02
-
用户本地时间格式及时区偏移显示指南在用户的语言环境格式中显示日期/时间,并使用时间偏移在向最终用户展示日期和时间时,以其localzone and格式显示它们至关重要。这确保了不同地理位置的清晰度和无缝用户体验。以下是使用JavaScript实现此目的的方法。方法:推荐方法是处理客户端的Javascript中的日期/时间格式化和时...编程 发布于2025-07-02
-
如何简化PHP中的JSON解析以获取多维阵列?php 试图在PHP中解析JSON数据的JSON可能具有挑战性,尤其是在处理多维数组时。 To simplify the process, it's recommended to parse the JSON as an array rather than an object.To do...编程 发布于2025-07-02
-
如何使用Python有效地以相反顺序读取大型文件?在python 中,如果您使用一个大文件,并且需要从最后一行读取其内容,则在第一行到第一行,Python的内置功能可能不合适。这是解决此任务的有效解决方案:反向行读取器生成器 == ord('\ n'): 缓冲区=缓冲区[:-1] ...编程 发布于2025-07-02
-
查找当前执行JavaScript的脚本元素方法如何引用当前执行脚本的脚本元素在某些方案中理解问题在某些方案中,开发人员可能需要将其他脚本动态加载其他脚本。但是,如果Head Element尚未完全渲染,则使用document.getElementsbytagname('head')[0] .appendChild(v)的常规方...编程 发布于2025-07-02
-
Python中嵌套函数与闭包的区别是什么嵌套函数与python 在python中的嵌套函数不被考虑闭合,因为它们不符合以下要求:不访问局部范围scliables to incling scliables在封装范围外执行范围的局部范围。 make_printer(msg): DEF打印机(): 打印(味精) ...编程 发布于2025-07-02
-
如何使用Depimal.parse()中的指数表示法中的数字?在尝试使用Decimal.parse(“ 1.2345e-02”中的指数符号表示法表示的字符串时,您可能会遇到错误。这是因为默认解析方法无法识别指数符号。 成功解析这样的字符串,您需要明确指定它代表浮点数。您可以使用numbersTyles.Float样式进行此操作,如下所示:[&& && && ...编程 发布于2025-07-02
-
如何在其容器中为DIV创建平滑的左右CSS动画?通用CSS动画,用于左右运动 ,我们将探索创建一个通用的CSS动画,以向左和右移动DIV,从而到达其容器的边缘。该动画可以应用于具有绝对定位的任何div,无论其未知长度如何。问题:使用左直接导致瞬时消失 更加流畅的解决方案:混合转换和左 [并实现平稳的,线性的运动,我们介绍了线性的转换。这...编程 发布于2025-07-02


学习中文
- 1 走路用中文怎么说?走路中文发音,走路中文学习
- 2 坐飞机用中文怎么说?坐飞机中文发音,坐飞机中文学习
- 3 坐火车用中文怎么说?坐火车中文发音,坐火车中文学习
- 4 坐车用中文怎么说?坐车中文发音,坐车中文学习
- 5 开车用中文怎么说?开车中文发音,开车中文学习
- 6 游泳用中文怎么说?游泳中文发音,游泳中文学习
- 7 骑自行车用中文怎么说?骑自行车中文发音,骑自行车中文学习
- 8 你好用中文怎么说?你好中文发音,你好中文学习
- 9 谢谢用中文怎么说?谢谢中文发音,谢谢中文学习
- 10 How to say goodbye in Chinese? 再见Chinese pronunciation, 再见Chinese learning


