
使用 OpenAI GPT 和 DALL·E 模型,使用 AI/ML API、Next.js、React 和 Tailwind CSS 构建 AI 贴纸制作平台。
 浏览:355
I got bored. You too? ?
Hmm... ?
What about creating an AI Sticker Maker platform? To be honest, it's a really interesting idea. And hey, we might even generate some profit by simply integrating Stripe as a payment provider. ? Yeah, why not?
So, let's get started. Or at least give it a shot! ?
Quick Introduction ?
First things first, let's sketch out some pseudocode or make a plan (unless you're a true builder who codes from the hip). It should go something like this:
- User enters a prompt (a text description of how the sticker should look).
- Our AI Sticker Maker will generate a really cutesy sticker. Ta-da! ?
Easy-peasy, isn't it? ?
But wait, let me clarify. We're going to use two models: GPT-4o and DALL·E 3, both from OpenAI. They're hyped, for real! ?
We'll be using the AI/ML API, which provides access to 200 AI models with a single API. Let me briefly tell you about it.
Meet AI/ML API ??
AI/ML API is a game-changing platform for developers and SaaS entrepreneurs looking to integrate cutting-edge AI capabilities into their products. It offers a single point of access to over 200 state-of-the-art AI models, covering everything from NLP to computer vision.
Key Features for Developers:
- Extensive Model Library: 200 pre-trained models for rapid prototyping and deployment. ?
- Customization Options: Fine-tune models to fit your specific use case. ?
- Developer-Friendly Integration: RESTful APIs and SDKs for seamless incorporation into your stack. ?️
- Serverless Architecture: Focus on coding, not infrastructure management. ☁️
Get Started for FREE ($0 US dollars): aimlapi.com ?
Deep Dive into AI/ML API Documentation (very detailed, can't agree more): docs.aimlapi.com ?
Tech Stack Ingredients ?
We'll use TypeScript, Next.js, React, and Tailwind CSS to build and design our AI Sticker Maker platform.
- TypeScript is just a programming language—but a really great one! ?
- Next.js is the React Framework for the web. It enables us to create high-quality web applications with the power of React components. ?
- React is the library for web and native user interfaces. ?️
- Tailwind CSS is the best for styling—just build whatever you want, seriously. ?
That was just a quick overview of what we're going to use. Feel free to learn more about each of them here:
- TypeScript: typescriptlang.org ?
- Next.js: nextjs.org ⏭️
- React: react.dev ⚛️
- Tailwind CSS: tailwindcss.com ?️
Cooking Has Started ?
Let's get our hands dirty! First, create a folder. Open your terminal and enter this:
mkdir aiml-tutorial
cd aiml-tutorial
Now, let's create a new Next.js app:
npx create-next-app@latest
It will ask you a few questions:
✔ What is your project named? Here, you should enter your app name. For example: aistickermaker. For the rest of the questions, simply hit enter.
Here's what you'll see:
✔ Would you like to use TypeScript? … No / Yes
✔ Would you like to use ESLint? … No / Yes
✔ Would you like to use Tailwind CSS? … No / Yes
✔ Would you like your code inside a `src/` directory? … No / Yes
✔ Would you like to use App Router? (recommended) … No / Yes
✔ Would you like to use Turbopack for `next dev`? … No / Yes
✔ Would you like to customize the import alias (`@/*` by default)? … No / Yes
Pro Tip: Feel free to choose Yes or No based on your preferences. I won't judge! ?
Let's open the project with VSCode:
code .
Now, Visual Studio Code should launch directly with this app. Time to start coding! ?
Implementing APIs ?️
First things first, let's create APIs for enhancing the user prompt and generating the sticker. Go to the app folder, then create a new folder called api, and within it, create two new folders: enhancePrompt and generateSticker. For each, create a route.ts file.
The enhancePrompt Endpoint ?♂️
Now, let's start with the enhancePrompt endpoint. Open route.ts inside the enhancePrompt folder and enter the following code:
import { NextResponse } from 'next/server';

const systemPrompt = `
You are tasked with enhancing user prompts to generate clear, detailed, and creative descriptions for a sticker creation AI. The final prompt should be imaginative, visually rich, and aligned with the goal of producing a cute, stylized, and highly personalized sticker based on the user's input.

Instructions:

Visual Clarity: The enhanced prompt must provide clear visual details that can be directly interpreted by the image generation model. Break down and elaborate on specific elements of the scene, object, or character based on the user input.

Example: If the user says "A girl with pink hair," elaborate by adding features like "short wavy pink hair with soft, pastel hues."
Style & Theme:

Emphasize that the final output should reflect a cute, playful, and approachable style.
Add terms like "adorable," "cartoonish," "sticker-friendly," or "chibi-like" to guide the output to a lighter, cuter aesthetic.
Include styling prompts like “minimalistic lines,” “soft shading,” and “vibrant yet soothing colors.”
Personalization:

If a reference or context is given, enhance it to make the sticker feel personalized.
Add context-appropriate descriptors like “wearing a cozy blue hoodie,” “soft pink blush on cheeks,” or “a playful expression.”
Expression & Pose:

Where applicable, refine prompts with suggestions about facial expressions or body language. For example, “Smiling softly with big sparkling eyes” or “A cute wink and a slight tilt of the head.”
Background & Accessories:

Optionally suggest simple, complementary backgrounds or accessories, depending on user input. For instance, "A light pastel background with small, floating hearts" or "Holding a tiny, sparkling star."
Colors:

Emphasize the color scheme based on the user's description, making sure it's consistent with a cute, playful style.
Use descriptors like “soft pastels,” “bright and cheerful,” or “warm and friendly hues” to set the mood.
Avoid Overcomplication:

Keep the descriptions short enough to be concise and not overly complex, as the output should retain a sticker-friendly quality.
Avoid unnecessary details that could clutter the design.
Tone and Language:

The tone should be light, imaginative, and fun, matching the playful nature of stickers.

Example:
User Input:
"A girl with pink hair wearing a hoodie."

Enhanced Prompt:
"An adorable girl with short, wavy pink hair in soft pastel hues, wearing a cozy light blue hoodie. She has a sweet smile with big, sparkling eyes, and a playful expression. The sticker style is cartoonish with minimalistic lines and soft shading. The background is a simple light pastel color with small floating hearts, creating a cute and inviting look."
`;

export async function POST(request: Request) {
    try {
        const { userPrompt } = await request.json();
        console.log("/api/enhancePrompt/route.ts userPrompt: ", userPrompt);

        // Make the API call to the external service
          const response = await fetch('https://api.aimlapi.com/chat/completions', {
            method: 'POST',
            headers: {
              'Content-Type': 'application/json',
              'Authorization': `Bearer ${process.env.NEXT_PUBLIC_AIML_API_KEY}`
            },
            body: JSON.stringify({
              model: 'gpt-4o-mini',
              messages: [
                {
                  role: 'system',
                  content: systemPrompt
                },
                {
                  role: 'user',
                  content: userPrompt
                }
              ]
            })
          });

        console.log("response: ", response);

        if (!response.ok) {
            // If the API response isn't successful, return an error response
            return NextResponse.json({ error: "Failed to fetch completion data" }, { status: response.status });
        }

        const data = await response.json();
        console.log("data: ", data);

        const assistantResponse = data.choices[0]?.message?.content || "No response available";

        // Return the assistant's message content
        return NextResponse.json({ message: assistantResponse });
    } catch (error) {
        console.error("Error fetching the data:", error);
        return NextResponse.json({ error: "An error occurred while processing your request." }, { status: 500 });
    }
}
Here's separated prompt:
You are tasked with enhancing user prompts to generate clear, detailed, and creative descriptions for a sticker creation AI. The final prompt should be imaginative, visually rich, and aligned with the goal of producing a cute, stylized, and highly personalized sticker based on the user's input.

Instructions:

Visual Clarity: The enhanced prompt must provide clear visual details that can be directly interpreted by the image generation model. Break down and elaborate on specific elements of the scene, object, or character based on the user input.

Example: If the user says "A girl with pink hair," elaborate by adding features like "short wavy pink hair with soft, pastel hues."
Style & Theme:

Emphasize that the final output should reflect a cute, playful, and approachable style.
Add terms like "adorable," "cartoonish," "sticker-friendly," or "chibi-like" to guide the output to a lighter, cuter aesthetic.
Include styling prompts like “minimalistic lines,” “soft shading,” and “vibrant yet soothing colors.”
Personalization:

If a reference or context is given, enhance it to make the sticker feel personalized.
Add context-appropriate descriptors like “wearing a cozy blue hoodie,” “soft pink blush on cheeks,” or “a playful expression.”
Expression & Pose:

Where applicable, refine prompts with suggestions about facial expressions or body language. For example, “Smiling softly with big sparkling eyes” or “A cute wink and a slight tilt of the head.”
Background & Accessories:

Optionally suggest simple, complementary backgrounds or accessories, depending on user input. For instance, "A light pastel background with small, floating hearts" or "Holding a tiny, sparkling star."
Colors:

Emphasize the color scheme based on the user's description, making sure it's consistent with a cute, playful style.
Use descriptors like “soft pastels,” “bright and cheerful,” or “warm and friendly hues” to set the mood.
Avoid Overcomplication:

Keep the descriptions short enough to be concise and not overly complex, as the output should retain a sticker-friendly quality.
Avoid unnecessary details that could clutter the design.
Tone and Language:

The tone should be light, imaginative, and fun, matching the playful nature of stickers.

Example:
User Input:
"A girl with pink hair wearing a hoodie."

Enhanced Prompt:
"An adorable girl with short, wavy pink hair in soft pastel hues, wearing a cozy light blue hoodie. She has a sweet smile with big, sparkling eyes, and a playful expression. The sticker style is cartoonish with minimalistic lines and soft shading. The background is a simple light pastel color with small floating hearts, creating a cute and inviting look."
What's Happening Here? ?
- Importing NextResponse: To handle our HTTP responses smoothly.
- Defining the POST function: This is where the magic happens when someone hits this endpoint.
- Fetching the userPrompt: We're grabbing the prompt the user provided.
- Calling AI/ML API's API: We're making a request to enhance the user's prompt using GPT-4o.
- Handling Responses: We check if the response is okay, parse the data, and extract the assistant's response.
- Error Handling: Because nobody likes unhandled errors ruining the party.
Here's an actual example of how the AI enhances the user's prompt. ???
You just entered a prompt:
A cute panda eating ice cream under a rainbow
The AI will enhance it to make it more detailed and visually rich. As a result, you should ger a response like:
An adorable, chibi-like panda with big, sparkling eyes and a joyful expression, savoring a colorful scoop of ice cream. The panda is fluffy and round, with classic black-and-white markings, sitting contentedly. The ice cream cone features vibrant, swirling flavors in pastel pink, mint green, and sunny yellow. Above, a playful, cartoonish rainbow arcs across a soft blue sky, adding a cheerful splash of color. The design is sticker-friendly with minimalistic lines and soft shading, ensuring a cute and delightful aesthetic perfect for capturing the joyful scene.
Alright, let's dive back into the code cauldron and continue cooking up our AI Sticker Maker! ?
The generateSticker Endpoint ?️
So, we've got our enhancePrompt endpoint simmering nicely. Time to spice things up with the generateSticker endpoint. Head over to the api/generateSticker folder and open up route.ts. Replace whatever's in there (probably nothing) with this fresh code:
// api/generateSticker/route.ts
import { NextResponse } from 'next/server';

export async function POST(request: Request) {
    try {
        const { userPrompt } = await request.json();
        console.log("/api/generateSticker/route.ts userPrompt: ", userPrompt);

        // Make the API call to the external service
        const response = await fetch('https://api.aimlapi.com/images/generations', {
          method: 'POST',
          headers: {
            'Content-Type': 'application/json',
            'Authorization': `Bearer ${process.env.NEXT_PUBLIC_AIML_API_KEY}`
          },
          body: JSON.stringify({
            provider: 'openai',
            prompt: userPrompt,
            model: 'dall-e-3',
            n: 1,
            quality: 'hd',
            response_format: 'url',
            size: '1024x1024',
            style: 'vivid'
          })
        });

        console.log("response: ", response);

        if (!response.ok) {
            // If the API response isn't successful, return an error response
            return NextResponse.json({ error: "Failed to fetch completion data" }, { status: response.status });
        }

        const data = await response.json();
        console.log("data: ", data);

        const assistantResponse = data.data[0]?.url || "No response available";

        console.log("assistantResponse: ", assistantResponse);

        // Return the assistant's message content
        return NextResponse.json({ message: assistantResponse });
    } catch (error) {
        console.error("Error fetching the data:", error);
        return NextResponse.json({ error: "An error occurred while processing your request." }, { status: 500 });
    }
}
What's Happening Here? ?
- Importing NextResponse: To handle our HTTP responses smoothly.
- Defining the POST function: This is where the magic happens when someone hits this endpoint.
- Fetching the userPrompt: We're grabbing the prompt the user provided.
- Calling AI/ML API's API: We're making a request to generate an image based on the prompt using DALL·E 3.
- Handling Responses: We check if the response is okay, parse the data, and extract the image URL.
- Error Handling: Because nobody likes unhandled errors ruining the party.
Let's try above prompt with panda in action! ?
Here's our cutesy panda sticker! ???

Other examples ?
Prompt:
A girl with short white grey hair wearing a oversize shirt

Prompt:
A girl with short black pink hair wearing a oversize pink shirt

Seems, like really WOW! ?
We need a frontend, GUYS! ?
Building the Frontend ?
Time to put a face on our app! Let's create a user interface where users can input their prompt and get a shiny new sticker.
The page.tsx File ?
Navigate to app/page.tsx and update it with the following code:
// app/page.tsx
'use client';
import Image from "next/image";
import { useState } from 'react';
import { faArrowUp, faDownload, faTimes } from '@fortawesome/free-solid-svg-icons';
import { FontAwesomeIcon } from '@fortawesome/react-fontawesome';
import Notification from './utils/notify';
import { Analytics } from "@vercel/analytics/react"
export default function Home() {
const [notification, setNotification] = useState(null); // notification message
const [loading, setLoading] = useState(false);
const [prompt, setPrompt] = useState('');
const [stickerUrl, setStickerUrl] = useState("");
  const loader = () => (


  );
const enhanceUserPrompt = async (prompt: string) => {
setNotification({ message: 'Enhancing user prompt...', type: 'info' });
// Make the API call to the /api/enhancePrompt route and return the enhanced prompt
const response = await fetch('/api/enhancePrompt', {
method: 'POST',
headers: {
'Content-Type': 'application/json',
},
body: JSON.stringify({ userPrompt: prompt }),
});
if (!response.ok) {
throw new Error('Failed to fetch completion data');
}
const data = await response.json();
return data.message;
};
const generateCuteSticker = async (prompt: string) => {
setNotification({ message: 'Generating cute sticker...', type: 'info' });
// Make the API call to the /api/generateSticker route and return the generated sticker URL
const response = await fetch('/api/generateSticker', {
method: 'POST',
headers: {
'Content-Type': 'application/json',
},
body: JSON.stringify({ userPrompt: prompt }),
});
if (!response.ok) {
throw new Error('Failed to fetch completion data');
}
const data = await response.json();
return data.message;
};
const generateSticker = async () => {
if (!prompt) return;
setLoading(true);
setNotification({ message: 'Processing request...', type: 'info' });
try {
// Enhance user prompt
const enhancedPrompt = await enhanceUserPrompt(prompt);
if (!enhancedPrompt) {
setNotification({ message: 'Failed to enhance user prompt.', type: 'error' });
return;
}
// Generate cute sticker
const sticker = await generateCuteSticker(enhancedPrompt);
if (!sticker) {
setNotification({ message: 'Failed to generate cute sticker.', type: 'error' });
return;
}
setStickerUrl(sticker);
console.log('Sticker URL:', sticker);
setNotification({ message: 'Cute sticker generated successfully!', type: 'success' });
} catch (error) {
console.error('An unexpected error occurred:', error);
setNotification({ message: 'An unexpected error occurred.', type: 'error' });
} finally {
setLoading(false);
}
};
const handleDownload = () => {
if (!stickerUrl) return;
const link = document.createElement('a');
link.href = stickerUrl;
link.download = 'cute-sticker.png'; // You can set a default filename
document.body.appendChild(link);
link.click();
document.body.removeChild(link);
};
const handleClose = () => {
setStickerUrl("");
setPrompt("");
};
return (
setNotification(null)}
/>
)}
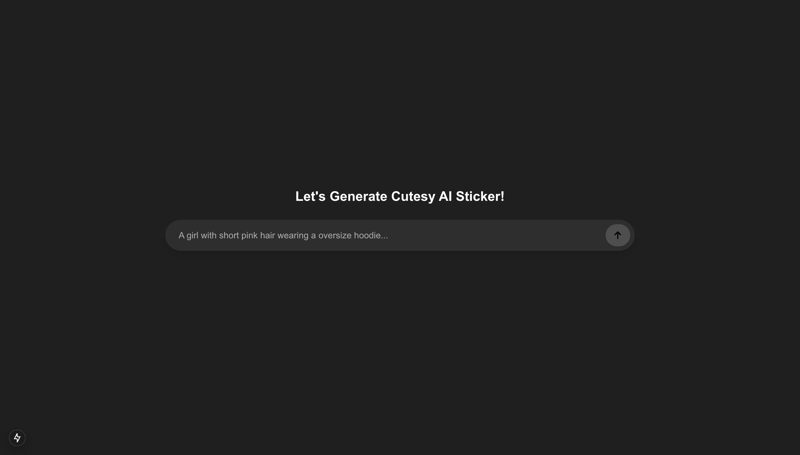
Let's Generate Cutesy AI Sticker!
setPrompt(e.target.value)}
placeholder="A girl with short pink hair wearing a oversize hoodie..."
className="placeholder:text-[#aeaeae] bg-transparent focus:outline-none text-white outline-none w-full px-4"
disabled={loading}
/>
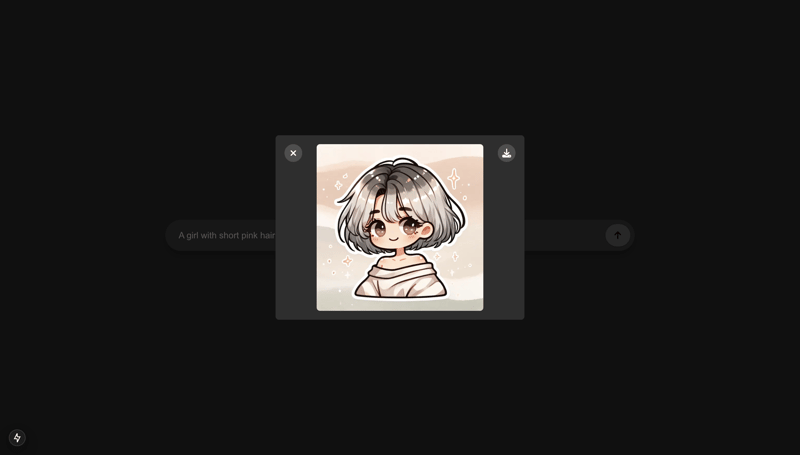
{/* Modal */}
{stickerUrl && (
{/* Download Button */}
{/* Close Button */}
{/* Sticker Image */}
);
}
Breaking It Down ?
- Loader: We are using really simple, but nice loader; three horizontal dots with some nice animaton:
const loader = () => (
);
- State Management: Using useState to handle notifications, loading state, the user's prompt, and the sticker URL.
-
Functions:
- enhanceUserPrompt: Calls our /api/enhancePrompt endpoint to make the user's prompt more... well, prompting.
- generateCuteSticker: Hits the /api/generateSticker endpoint to get that adorable sticker.
- generateSticker: Orchestrates the whole process when the user clicks the magic button.
- handleDownload: Allows the user to download their new sticker.
- handleClose: Closes the sticker modal.
-
UI Components:
- Input Field: Where the user types their wildest sticker dreams.
- Generate Button: Triggers the sticker generation.
- Modal: Displays the sticker with options to download or close.
- Notifications: Pops up messages to inform the user what's going on.
A Sprinkle of FontAwesome ?
We're using FontAwesome for icons. Make sure to install it:
npm i --save @fortawesome/fontawesome-svg-core
npm i --save @fortawesome/free-solid-svg-icons
npm i --save @fortawesome/free-regular-svg-icons
npm i --save @fortawesome/free-brands-svg-icons
npm i --save @fortawesome/react-fontawesome@latest
You may also check the FontAwesome documentation for more details. Or search for other icons Search icons.
Handling Notifications ?
Remember that notification component we imported? Let's create it.
Creating the Notification Component ?
Create a new folder called utils inside your app directory. Inside utils, create a file called notify.tsx and paste:
// app/utils/notify.tsx
import React, { useEffect } from 'react';

type NotificationProps = {
  message: string;
  type: 'error' | 'success' | 'info';
  onClose: () => void;
};

const Notification: React.FC = ({ message, type, onClose }) => {
  useEffect(() => {
    const timer = setTimeout(() => {
      onClose();
    }, 3000); // Auto-close after 3 seconds
    return () => clearTimeout(timer);
  }, [onClose]);

  const bgColor = type === 'error' ? 'bg-red-500' : type === 'success' ? 'bg-green-500' : 'bg-blue-500';

  return (

      {message}

  );
};

export default Notification;
What's This For? ?
- Purpose: To display temporary messages to the user, like "Generating cute sticker..." or "An error occurred."
- Auto-Close Feature: It disappears after 3 seconds, just like my motivation on Monday mornings.
- Styling: Changes color based on the type of notification.
Configuring Image Domains ?️
Since we're fetching images from OpenAI's servers, Next.js needs to know it's okay to load them. Open up next.config.ts and add:
// next.config.ts
import type { NextConfig } from "next";

const nextConfig: NextConfig = {
  /* config options here */
  images: {
    remotePatterns: [
      {
        protocol: 'https',
        hostname: 'oaidalleapiprodscus.blob.core.windows.net',
        port: '',
      },
    ],
  },
};

export default nextConfig;
Why Do This? ?♂️
Because Next.js is a bit overprotective (like a helicopter parent) and won't load images from external domains unless you specifically allow it. This setting tells Next.js, "It's cool, these images are with me."
Environment Variables ?
Now, before you excitedly run your app and wonder why it's not working, let's set up our environment variables.
Setting Up Your AI/ML API Key ?️
Create a file called .env.local in the root of your project and add:
NEXT_PUBLIC_AIML_API_KEY=your_api_key_here
Replace your_api_key_here with your actual AI/ML API key. If you don't have one, you might need to sign up at AI/ML API and grab it. It's absolutely FREE to get started!
Here's a Quick Tutorial on how to get your API key: How to get API Key from AI/ML API. Quick step-by-step tutorial with screenshots for better understanding.
Warning: Keep this key secret! Don't share it publicly or commit it to Git. Treat it like your Netflix password.
Fire It Up! ?
Time to see this baby in action.
Running the Development Server ?♀️
In your terminal, run:
npm run dev
This starts the development server. Open your browser and navigate to http://localhost:3000.
You should see your AI Sticker Maker platform. ?
Testing It Out ?
- Enter a Prompt: Something like "A girl with short white grey hair wearing a oversize shirt". Go wild!
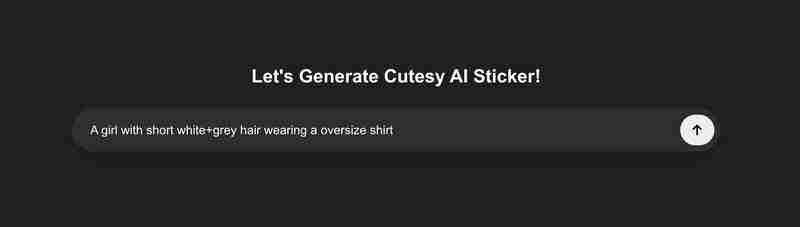
- Click the Button: Hit that generate button and watch the magic unfold.
- Wait for It...: You'll see notifications keeping you posted.
- Voilà!: Your AI-generated sticker should appear. Bask in its glory.
Troubleshooting ?️
- "Failed to fetch completion data": Double-check your API key and make sure it's set correctly.
- Images Not Loading: Ensure your next.config.ts file is set up as shown above.
- App Crashes: Open your console and see what errors pop up. Google is your friend!
Wrapping Up ?
Congratulations! You've just built an AI Sticker Maker that's both fun and functional. Not only did you delve into the world of AI and Next.js, but you also made something that can bring a smile to people's faces.
What's Next? ?
- Styling: Customize the look and feel. Make it as fabulous or minimalist as you like.
- Features: Add user accounts, sticker galleries, or even a feature to create sticker packs.
- Monetization: Integrate Stripe and start charging for premium stickers. Time to make some moolah!
Final Thoughts ?
Building this app was like making a sandwich with layers of tech goodness. We've got AI models as the filling, Next.js as the bread, and a sprinkle of humor as the secret sauce.
Remember, the world is your oyster (or sticker). Keep experimenting, keep building, and most importantly, have fun!
Happy coding! ?
Full implementation available on Github AI Sticker Maker.
It’s Absolutely FREE to get started! Try It Now click
Also check out this tutorial, it's very interesting! Building a Chrome Extension from Scratch with AI/ML API, Deepgram Aura, and IndexedDB Integration
Should you have any questions or need further assistance, don’t hesitate to reach out via email at [email protected].
-
 如何修复\“常规错误:2006 MySQL Server在插入数据时已经消失\”?How to Resolve "General error: 2006 MySQL server has gone away" While Inserting RecordsIntroduction:Inserting data into a MySQL database can...编程 发布于2025-04-01
 -
如何在Java中正确显示“ DD/MM/YYYY HH:MM:SS.SS”格式的当前日期和时间?如何在“ dd/mm/yyyy hh:mm:mm:ss.ss”格式“ gormat 解决方案: args)抛出异常{ 日历cal = calendar.getInstance(); SimpleDateFormat SDF =新的SimpleDateFormat(“...编程 发布于2025-04-01
-
您可以使用CSS在Chrome和Firefox中染色控制台输出吗?在javascript console 中显示颜色是可以使用chrome的控制台显示彩色文本,例如红色的redors,for for for for错误消息?回答是的,可以使用CSS将颜色添加到Chrome和Firefox中的控制台显示的消息(版本31或更高版本)中。要实现这一目标,请使用以下模...编程 发布于2025-04-01
-
哪种在JavaScript中声明多个变量的方法更可维护?在JavaScript中声明多个变量:探索两个方法在JavaScript中,开发人员经常遇到需要声明多个变量的需要。对此的两种常见方法是:在单独的行上声明每个变量: 当涉及性能时,这两种方法本质上都是等效的。但是,可维护性可能会有所不同。 第一个方法被认为更易于维护。每个声明都是其自己的语句,使其...编程 发布于2025-04-01
-
如何使用node-mysql在单个查询中执行多个SQL语句?Multi-Statement Query Support in Node-MySQLIn Node.js, the question arises when executing multiple SQL statements in a single query using the node-mys...编程 发布于2025-04-01
-
PHP阵列键值异常:了解07和08的好奇情况PHP数组键值问题,使用07&08 在给定数月的数组中,键值07和08呈现令人困惑的行为时,就会出现一个不寻常的问题。运行print_r($月份)返回意外结果:键“ 07”丢失,而键“ 08”分配给了9月的值。此问题源于PHP对领先零的解释。当一个数字带有0(例如07或08)的前缀时,PHP将...编程 发布于2025-04-01
-
如何正确使用与PDO参数的查询一样?在pdo 中使用类似QUERIES在PDO中的Queries时,您可能会遇到类似疑问中描述的问题:此查询也可能不会返回结果,即使$ var1和$ var2包含有效的搜索词。错误在于不正确包含%符号。通过将变量包含在$ params数组中的%符号中,您确保将%字符正确替换到查询中。没有此修改,PDO...编程 发布于2025-04-01
-
如何使用Depimal.parse()中的指数表示法中的数字?在尝试使用Decimal.parse(“ 1.2345e-02”中的指数符号表示法时,您可能会出现错误。这是因为默认解析方法无法识别指数符号。 成功解析这样的字符串,您需要明确指定它代表浮点数。您可以使用numbersTyles.Float样式进行此操作,如下所示:[&& && && &&华氏度D...编程 发布于2025-04-01
-
如何从PHP中的数组中提取随机元素?从阵列中的随机选择,可以轻松从数组中获取随机项目。考虑以下数组:; 从此数组中检索一个随机项目,利用array_rand( array_rand()函数从数组返回一个随机键。通过将$项目数组索引使用此键,我们可以从数组中访问一个随机元素。这种方法为选择随机项目提供了一种直接且可靠的方法。编程 发布于2025-04-01
-
如何在GO编译器中自定义编译优化?在GO编译器中自定义编译优化 GO中的默认编译过程遵循特定的优化策略。 However, users may need to adjust these optimizations for specific requirements.Optimization Control in Go Compi...编程 发布于2025-04-01
-
Java是否允许多种返回类型:仔细研究通用方法?在Java中的多个返回类型:一种误解类型:在Java编程中揭示,在Java编程中,Peculiar方法签名可能会出现,可能会出现,使开发人员陷入困境,使开发人员陷入困境。 getResult(string s); ,其中foo是自定义类。该方法声明似乎拥有两种返回类型:列表和E。但这确实是如此吗...编程 发布于2025-04-01
-
如何在php中使用卷发发送原始帖子请求?如何使用php 创建请求来发送原始帖子请求,开始使用curl_init()开始初始化curl session。然后,配置以下选项: curlopt_url:请求 [要发送的原始数据指定内容类型,为原始的帖子请求指定身体的内容类型很重要。在这种情况下,它是文本/平原。要执行此操作,请使用包含以下标头...编程 发布于2025-04-01
-
如何从Google API中检索最新的jQuery库?从Google APIS 问题中提供的jQuery URL是版本1.2.6。对于检索最新版本,以前有一种使用特定版本编号的替代方法,它是使用以下语法:获取最新版本:未压缩)While these legacy URLs still remain in use, it is recommended ...编程 发布于2025-04-01
-
如何从PHP中的Unicode字符串中有效地产生对URL友好的sl。为有效的slug生成首先,该函数用指定的分隔符替换所有非字母或数字字符。此步骤可确保slug遵守URL惯例。随后,它采用ICONV函数将文本简化为us-ascii兼容格式,从而允许更广泛的字符集合兼容性。接下来,该函数使用正则表达式删除了不需要的字符,例如特殊字符和空格。此步骤可确保slug仅包含...编程 发布于2025-04-01
-
如何在鼠标单击时编程选择DIV中的所有文本?在鼠标上选择div文本单击带有文本内容,用户如何使用单个鼠标单击单击div中的整个文本?这允许用户轻松拖放所选的文本或直接复制它。 在单个鼠标上单击的div元素中选择文本,您可以使用以下Javascript函数: function selecttext(canduterid){ if(do...编程 发布于2025-04-01


学习中文
- 1 走路用中文怎么说?走路中文发音,走路中文学习
- 2 坐飞机用中文怎么说?坐飞机中文发音,坐飞机中文学习
- 3 坐火车用中文怎么说?坐火车中文发音,坐火车中文学习
- 4 坐车用中文怎么说?坐车中文发音,坐车中文学习
- 5 开车用中文怎么说?开车中文发音,开车中文学习
- 6 游泳用中文怎么说?游泳中文发音,游泳中文学习
- 7 骑自行车用中文怎么说?骑自行车中文发音,骑自行车中文学习
- 8 你好用中文怎么说?你好中文发音,你好中文学习
- 9 谢谢用中文怎么说?谢谢中文发音,谢谢中文学习
- 10 How to say goodbye in Chinese? 再见Chinese pronunciation, 再见Chinese learning


