
使用 Flight 建立簡單的部落格 - 第 1 部分
 瀏覽:726
Hey everyone! I figured it was time to showcase some of the new features that have been added to the Flight Framework for PHP. Earlier this year the original creator of Flight Mike Cao graciously offered to transfer ownership of mikecao/flight over to a new Flight PHP organization. Since it's been moved we've added features like middleware, route grouping, DIC, and other features. This post will be a little longer, but it's just because I've included a lot of code examples so you can have the right context into how your blog will get built.
First off, let's just get this out of the way. Flight is meant to be a simple framework with a few bells and whistles. It will not compete with Laravel or Symfony or Yii or Cake or [fill in the blank]. This framework is really built towards simple to medium size projects. It also caters to those who don't like "magic" in their code that's hard to understand or train to. It's geared more towards developers who are just starting to branch into frameworks instead of raw PHP with a lot of random include statements.
tl;dr
Lots of cool features, nice simple implementation, blah blah blah here's the code. Go to part 2 for the cool stuff!
Installation
Let's use Composer to get this party started.
composer create-project flightphp/skeleton blog/
cd blog/
Configure your New Project
First thing to do is to go to the app/config/config.php file where we can put any config like API keys, database credentials, and other important credentials for our app. For this blog, we'll uncomment the line with file_path for our SQLite database path:
return [
    'database' => [
        // 'host' => 'localhost',
        // 'dbname' => 'dbname',
        // 'user' => 'user',
        // 'password' => 'password'
        'file_path' => __DIR__ . $ds . '..' . $ds . 'database.sqlite'
    ],
];
Create the Blog Database
Flight now comes with a command line utility called runway. This allows you to create custom commands for a plugin for Flight, or even for your own project.
As part of the skeleton, it comes with a SampleDatabaseCommand that will give us a starting point with this blog project we are creating.
Run the below command and it should populate your database for you!
php runway init:sample-db
Next we'll open up the app/config/services.php file and uncomment the line for SQLite.
// see how the $config variable references the config line we uncommented earlier?
$dsn = 'sqlite:' . $config['database']['file_path'];
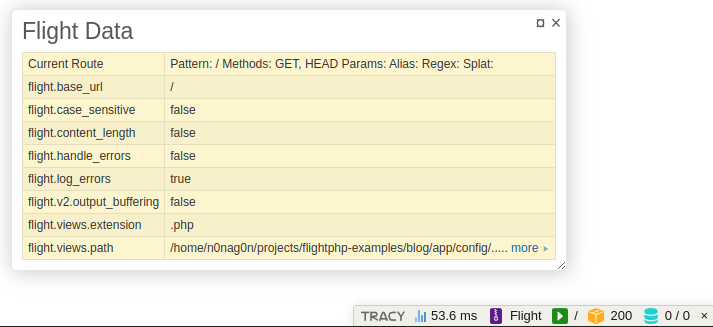
Just to make sure we've got everything setup correctly, run composer start and then go to http://localhost:8000/ in your browser. You should see the following screen:
You'll also notice in the corner you have a handy debug toolbar with some custom Flight panels to help you understand what's going on in your application. If you hover over the various items in the toolbar, you'll see a variety of hovers that you can click on to keep sticky on the page (more on that later).
Building the HTML Templates
Flight does come with a very basic HTML templating solution already in the framework. This is just fine for very simple sites or just to return a simple piece of HTML. It is recommended to use another templating platform such as Latte, Twig, or Blade. In this tutorial, we're going to use Latte because it is awesome and has no dependencies (you'll notice in Flight we do not like unnecessary dependencies)!
Go ahead and install Latte
composer require latte/latte
Add this to your services.php
$Latte = new \Latte\Engine;
$Latte->setTempDirectory(__DIR__ . '/../cache/');

// This is fun feature of Flight. You can remap some built in functions with the framework
// to your liking. In this case, we're remapping the Flight::render() method.
$app->map('render', function(string $templatePath, array $data = [], ?string $block = null) use ($app, $Latte) {
    $templatePath = __DIR__ . '/../views/'. $templatePath;
    $Latte->render($templatePath, $data, $block);
});
Now that we have a templating engine in place, we can create a base HTML file. Let's create a layout.latte file:
        {$page_title ? $page_title.' - '}Blog Built with Flight!


        {block content}{/block}
Active Record Database Class
Flight has a plugin for interacting with a database called Flight Active Record. This plugin helps you not write as much raw SQL in your apps (although sometimes it is more efficient to write a raw SQL query instead of forcing an active record/ORM/mapper to run it for you). Basically the active record extension helps you interact with rows within tables in your database: one row in a database can be mapped to an object in PHP (with autocomplete for the columns) saving time and sanity. Let's get it installed in our project.
composer require flightphp/active-record
Now you can use runway to create your active record classes automatically for you and it will create your properties as comments automatically (for autocomplete)!
First let's create the posts class. The first time you run this, it needs to setup the connection for the database.
$ php runway make:record posts
Database configuration not found. Please provide the following details:
Driver (mysql/pgsql/sqlite): sqlite
Database file path [database.sqlite]: app/database.sqlite
Username (for no username, press enter) []:
Password (for no password, press enter) []:
Writing database configuration to .runway-config.json
Creating directory app/records
Active Record successfully created at app/records/PostRecord.php
Now we'll create the comments record class:
$ php runway make:record comments
It's Time for your First Page!
Flight uses the MVC pattern. In order to create a new page you need to define a route in your routes.php file, create a new method in a controller, and then create the HTML file that the browser will serve. You can use runway to help you get started with a new controller class:
php runway make:controller Home
And you should see something similar to the following:
$ php runway make:controller Home
Controller successfully created at app/controllers/HomeController.php
If you go to app/controllers/HomeController.php go ahead and add this new method to your HomeController:
/**
 * Index
 *
 * @return void
 */
public function index(): void
{
    $this->app->render('home.latte', [ 'page_title' => 'Home' ]);
}
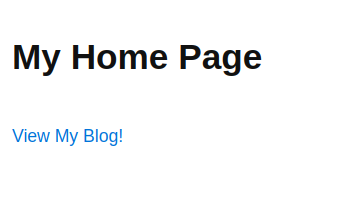
And create a new file in app/views/home.latte and put in this code:
{extends 'layout.latte'}
{block content}
My Home Page
{/block}
Finally let's change up the routes to the routes.php file. Go ahead and remove any code in the routes file that begins with $router-> and add a new route for your home router:
$router->get('/', \app\controllers\HomeController::class . '->index');
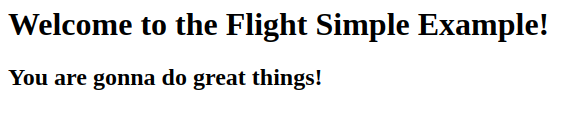
Make sure you run composer start so that your development server is up. If you go to http://localhost:8000/ in your browser, you should see something like this!
Now we're cookin'!
Adding Routes for the Blog
Let's go ahead and add all the methods in your controller, routes, and html files. Let's start with adding the routes in your routes.php file:
// Blog
$router->group('/blog', function(Router $router) {

    // Posts
    $router->get('', \app\controllers\PostController::class . '->index');
    $router->get('/create', \app\controllers\PostController::class . '->create');
    $router->post('', \app\controllers\PostController::class . '->store');
    $router->get('/@id', \app\controllers\PostController::class . '->show');
    $router->get('/@id/edit', \app\controllers\PostController::class . '->edit');
    $router->post('/@id/edit', \app\controllers\PostController::class . '->update');
    $router->get('/@id/delete', \app\controllers\PostController::class . '->destroy');
});
So you'll notice we use a group() method here to group all the routes together that start with /blog. We could actually rewrite the routes like the following with the group() method and the same thing would happen:
// Posts
$router->get('/blog', \app\controllers\PostController::class . '->index');
$router->get('/blog/create', \app\controllers\PostController::class . '->create');
With the controller, first let's create an empty controller with runway:
php runway make:controller Post
You can copy the code below for your PostController.php:
app = $app;
    }

    /**
     * Index
     *
     * @return void
     */
    public function index(): void
    {
        $PostRecord = new PostRecord($this->app->db());
        $posts = $PostRecord->order('id DESC')->findAll();
        $CommentRecord = new CommentRecord($this->app->db());
        foreach($posts as &$post) {
            $post->comments = $CommentRecord->eq('post_id', $post->id)->findAll();
        }
        $this->app->render('posts/index.latte', [ 'page_title' => 'Blog', 'posts' => $posts]);
    }

    /**
     * Create
     *
     * @return void
     */
    public function create(): void
    {
        $this->app->render('posts/create.latte', [ 'page_title' => 'Create Post']);
    }

    /**
     * Store
     *
     * @return void
     */
    public function store(): void
    {
        $postData = $this->app->request()->data;
        $PostRecord = new PostRecord($this->app->db());
        $PostRecord->title = $postData->title;
        $PostRecord->content = $postData->content;
        $PostRecord->username = $postData->username;
        $PostRecord->created_at = gmdate('Y-m-d H:i:s');
        $PostRecord->updated_at = null;
        $PostRecord->save();
        $this->app->redirect('/blog');
    }

    /**
     * Show
     *
     * @param int $id The ID of the post
     * @return void
     */
    public function show(int $id): void
    {
        $PostRecord = new PostRecord($this->app->db());
        $post = $PostRecord->find($id);
        $CommentRecord = new CommentRecord($this->app->db());
        $post->comments = $CommentRecord->eq('post_id', $post->id)->findAll();
        $this->app->render('posts/show.latte', [ 'page_title' => $post->title, 'post' => $post]);
    }

    /**
     * Edit
     *
     * @param int $id The ID of the post
     * @return void
     */
    public function edit(int $id): void
    {
        $PostRecord = new PostRecord($this->app->db());
        $post = $PostRecord->find($id);
        $this->app->render('posts/edit.latte', [ 'page_title' => 'Update Post', 'post' => $post]);
    }

    /**
     * Update
     *
     * @param int $id The ID of the post
     * @return void
     */
    public function update(int $id): void
    {
        $postData = $this->app->request()->data;
        $PostRecord = new PostRecord($this->app->db());
        $PostRecord->find($id);
        $PostRecord->title = $postData->title;
        $PostRecord->content = $postData->content;
        $PostRecord->username = $postData->username;
        $PostRecord->updated_at = gmdate('Y-m-d H:i:s');
        $PostRecord->save();
        $this->app->redirect('/blog');
    }

    /**
     * Destroy
     *
     * @param int $id The ID of the post
     * @return void
     */
    public function destroy(int $id): void
    {
        $PostRecord = new PostRecord($this->app->db());
        $post = $PostRecord->find($id);
        $post->delete();
        $this->app->redirect('/blog');
    }
}
Let's kill some time and talk about a few things that are going on in the controller.
First off we are now using our new active record classes:
$PostRecord = new PostRecord($this->app->db());
$posts = $PostRecord->order('id DESC')->findAll();
We are injecting the database we setup in the services.php file above with $this->app->db();. Technically we could also just use Flight::db() as this points to the global $app variable.
Active Record classes are really helpful to simplify interactions with a database. We could rewrite the above in the following code:
$posts = $this->app->db()->fetchAll("SELECT * FROM posts ORDER BY id DESC");
This might not be the best example of how helpful an active record could be. But in part 2 I'll show you some hidden gems inside these classes that make it so much better than writing raw SQL.
Now let's talk HTML files. Here are the files we'll need for the post routes:
app/views/posts/index.latte
{extends '../layout.latte'}
{block content}
My Amazing Blog
Welcome to my blog!
{foreach $posts as $post}
{first}
Recent Posts
{/first}
{$post->title}
By: {$post->username} on {$post->created_at|date:'d.m.Y G:i a'}
Comments: {count($post->comments)}
{$post->content|truncate:100}
Update - Delete
{/foreach}
{/block}
app/views/posts/show.latte
{extends '../layout.latte'}

{block content}
< Back to blog
{$post->title}
Created by: {$post->username} on {$post->created_at|date:'d.m.Y G:i a'}.

    {$post->content|breakLines}

Last update: {$post->update_at|date:'d.m.Y G:i a'}.

Comments
{foreach $post->comments as $comment}

    {$comment->username} on {$comment->created_at|date:'d.m.Y G:i a'}.

        {$comment->content|breakLines}


    Delete

{else}
No comments yet.
{/foreach}

Add comment
{/block}
app/views/posts/create.latte
{extends '../layout.latte'}

{block content}
Create a Post
{/block}
app/views/posts/edit.latte
{extends '../layout.latte'}

{block content}
Update a Post
{/block}
Create a new post
Now that we've got all the pieces in place, you should be able to load up your blog page, create a new post, see a post, and delete a post. You may have noticed we've included a comment form but the form doesn't actually work. We can fix that real quick! Let's create a controller with runway:
php runway make:controller Comment
Now you can make the CommentController.php look like the following:
app = $app;
    }

    /**
     * Store
     *
     * @param int $id The post ID
     *
     * @return void
     */
    public function store(int $id): void
    {
        $postData = $this->app->request()->data;
        $CommentRecord = new CommentRecord($this->app->db());
        $CommentRecord->post_id = $id;
        $CommentRecord->username = $postData->username;
        $CommentRecord->content = $postData->content;
        $CommentRecord->created_at = gmdate('Y-m-d H:i:s');
        $CommentRecord->updated_at = null;
        $CommentRecord->save();
        $this->app->redirect('/blog/' . $id);
    }

    /**
     * Destroy
     *
     * @param int $id The post ID
     * @param int $comment_id The comment ID
     *
     * @return void
     */
    public function destroy(int $id, int $comment_id): void
    {
        $CommentRecord = new CommentRecord($this->app->db());
        $CommentRecord->find($comment_id);
        $CommentRecord->delete();
        $this->app->redirect('/blog/' . $id);
    }

}
Now let's add a couple other routes in the group chunk of code in routes.php
// Blog
$router->group('/blog', function(Router $router) {

    // Posts

    // post routes...

    // Comments
    $router->post('/@id/comment', \app\controllers\CommentController::class . '->store');
    $router->get('/@id/comment/@comment_id/delete', \app\controllers\CommentController::class . '->destroy');
});
Conclusion (sort of)
With these two additions to the code, you have a fully functioning blog built with Flight! This got the job done and you now have a blog, but the code is somewhat clunky and could be improved to have some pretty nifty features like middleware, permissions, and writing less code! Hop over to part 2
Go ahead and leave any questions in comments below or join us in the chatroom!
If you want to see the final product with all the improvements here's the code!
-
 如何使用PHP從XML文件中有效地檢索屬性值?從php $xml = simplexml_load_file($file); foreach ($xml->Var[0]->attributes() as $attributeName => $attributeValue) { echo $attributeName,...程式設計 發佈於2025-07-16
 -
如何使用Python的請求和假用戶代理繞過網站塊?如何使用Python的請求模擬瀏覽器行為,以及偽造的用戶代理提供了一個用戶 - 代理標頭一個有效方法是提供有效的用戶式header,以提供有效的用戶 - 設置,該標題可以通過browser和Acterner Systems the equestersystermery和操作系統。通過模仿像Chro...程式設計 發佈於2025-07-16
-
如何修復\“常規錯誤:2006 MySQL Server在插入數據時已經消失\”?How to Resolve "General error: 2006 MySQL server has gone away" While Inserting RecordsIntroduction:Inserting data into a MySQL database can...程式設計 發佈於2025-07-16
-
如何在其容器中為DIV創建平滑的左右CSS動畫?通用CSS動畫,用於左右運動 ,我們將探索創建一個通用的CSS動畫,以向左和右移動DIV,從而到達其容器的邊緣。該動畫可以應用於具有絕對定位的任何div,無論其未知長度如何。 問題:使用左直接導致瞬時消失 更加流暢的解決方案:混合轉換和左 [並實現平穩的,線性的運動,我們介紹了線性的轉換。...程式設計 發佈於2025-07-16
-
Java中Lambda表達式為何需要“final”或“有效final”變量?Lambda Expressions Require "Final" or "Effectively Final" VariablesThe error message "Variable used in lambda expression shou...程式設計 發佈於2025-07-16
-
Java字符串非空且非null的有效檢查方法檢查字符串是否不是null而不是空的 if(str!= null && str.isementy())二手: if(str!= null && str.length()== 0) option 3:trim()。 isement(Isement() trim whitespace whites...程式設計 發佈於2025-07-16
-
為什麼Microsoft Visual C ++無法正確實現兩台模板的實例?The Mystery of "Broken" Two-Phase Template Instantiation in Microsoft Visual C Problem Statement:Users commonly express concerns that Micro...程式設計 發佈於2025-07-16
-
如何使用不同數量列的聯合數據庫表?合併列數不同的表 當嘗試合併列數不同的數據庫表時,可能會遇到挑戰。一種直接的方法是在列數較少的表中,為缺失的列追加空值。 例如,考慮兩個表,表 A 和表 B,其中表 A 的列數多於表 B。為了合併這些表,同時處理表 B 中缺失的列,請按照以下步驟操作: 確定表 B 中缺失的列,並將它們添加到表的...程式設計 發佈於2025-07-16
-
PHP陣列鍵值異常:了解07和08的好奇情況PHP數組鍵值問題,使用07&08 在給定數月的數組中,鍵值07和08呈現令人困惑的行為時,就會出現一個不尋常的問題。運行print_r($月份)返回意外結果:鍵“ 07”丟失,而鍵“ 08”分配給了9月的值。 此問題源於PHP對領先零的解釋。當一個數字帶有0(例如07或08)的前綴時,PHP...程式設計 發佈於2025-07-16
-
Go語言垃圾回收如何處理切片內存?Garbage Collection in Go Slices: A Detailed AnalysisIn Go, a slice is a dynamic array that references an underlying array.使用切片時,了解垃圾收集行為至關重要,以避免潛在的內存洩...程式設計 發佈於2025-07-16
-
您可以使用CSS在Chrome和Firefox中染色控制台輸出嗎?在javascript console 中顯示顏色是可以使用chrome的控制台顯示彩色文本,例如紅色的redors,for for for for錯誤消息? 回答是的,可以使用CSS將顏色添加到Chrome和Firefox中的控制台顯示的消息(版本31或更高版本)中。要實現這一目標,請使用以下...程式設計 發佈於2025-07-16
-
如何將MySQL數據庫添加到Visual Studio 2012中的數據源對話框中?在Visual Studio 2012 儘管已安裝了MySQL Connector v.6.5.4,但無法將MySQL數據庫添加到實體框架的“ DataSource對話框”中。為了解決這一問題,至關重要的是要了解MySQL連接器v.6.5.5及以後的6.6.x版本將提供MySQL的官方Visual...程式設計 發佈於2025-07-16
-
Java中假喚醒真的會發生嗎?在Java中的浪費喚醒:真實性或神話? 在Java同步中偽裝喚醒的概念已經是討論的主題。儘管存在這種行為的潛力,但問題仍然存在:它們實際上是在實踐中發生的嗎? Linux的喚醒機制根據Wikipedia關於偽造喚醒的文章,linux實現了pthread_cond_wait()功能的Linux實現,...程式設計 發佈於2025-07-16
-
同實例無需轉儲複製MySQL數據庫方法在同一實例上複製一個MySQL數據庫而無需轉儲在同一mySQL實例上複製數據庫,而無需創建InterMediate sqql script。以下方法為傳統的轉儲和IMPORT過程提供了更簡單的替代方法。 直接管道數據 MySQL手動概述了一種允許將mysqldump直接輸出到MySQL cli...程式設計 發佈於2025-07-16
-
Spark DataFrame添加常量列的妙招在Spark Dataframe ,將常數列添加到Spark DataFrame,該列具有適用於所有行的任意值的Spark DataFrame,可以通過多種方式實現。使用文字值(SPARK 1.3)在嘗試提供直接值時,用於此問題時,旨在為此目的的column方法可能會導致錯誤。 df.withco...程式設計 發佈於2025-07-16


學習中文
- 1 走路用中文怎麼說? 走路中文發音,走路中文學習
- 2 坐飛機用中文怎麼說? 坐飞机中文發音,坐飞机中文學習
- 3 坐火車用中文怎麼說? 坐火车中文發音,坐火车中文學習
- 4 坐車用中文怎麼說? 坐车中文發音,坐车中文學習
- 5 開車用中文怎麼說? 开车中文發音,开车中文學習
- 6 游泳用中文怎麼說? 游泳中文發音,游泳中文學習
- 7 騎自行車用中文怎麼說? 骑自行车中文發音,骑自行车中文學習
- 8 你好用中文怎麼說? 你好中文發音,你好中文學習
- 9 謝謝用中文怎麼說? 谢谢中文發音,谢谢中文學習
- 10 How to say goodbye in Chinese? 再见Chinese pronunciation, 再见Chinese learning


