
使用 OpenAI GPT 和 DALL·E 模型,使用 AI/ML API、Next.js、React 和 Tailwind CSS 建立 AI 貼圖製作平台。
 瀏覽:573
I got bored. You too? ?
Hmm... ?
What about creating an AI Sticker Maker platform? To be honest, it's a really interesting idea. And hey, we might even generate some profit by simply integrating Stripe as a payment provider. ? Yeah, why not?
So, let's get started. Or at least give it a shot! ?
Quick Introduction ?
First things first, let's sketch out some pseudocode or make a plan (unless you're a true builder who codes from the hip). It should go something like this:
- User enters a prompt (a text description of how the sticker should look).
- Our AI Sticker Maker will generate a really cutesy sticker. Ta-da! ?
Easy-peasy, isn't it? ?
But wait, let me clarify. We're going to use two models: GPT-4o and DALL·E 3, both from OpenAI. They're hyped, for real! ?
We'll be using the AI/ML API, which provides access to 200 AI models with a single API. Let me briefly tell you about it.
Meet AI/ML API ??
AI/ML API is a game-changing platform for developers and SaaS entrepreneurs looking to integrate cutting-edge AI capabilities into their products. It offers a single point of access to over 200 state-of-the-art AI models, covering everything from NLP to computer vision.
Key Features for Developers:
- Extensive Model Library: 200 pre-trained models for rapid prototyping and deployment. ?
- Customization Options: Fine-tune models to fit your specific use case. ?
- Developer-Friendly Integration: RESTful APIs and SDKs for seamless incorporation into your stack. ?️
- Serverless Architecture: Focus on coding, not infrastructure management. ☁️
Get Started for FREE ($0 US dollars): aimlapi.com ?
Deep Dive into AI/ML API Documentation (very detailed, can't agree more): docs.aimlapi.com ?
Tech Stack Ingredients ?
We'll use TypeScript, Next.js, React, and Tailwind CSS to build and design our AI Sticker Maker platform.
- TypeScript is just a programming language—but a really great one! ?
- Next.js is the React Framework for the web. It enables us to create high-quality web applications with the power of React components. ?
- React is the library for web and native user interfaces. ?️
- Tailwind CSS is the best for styling—just build whatever you want, seriously. ?
That was just a quick overview of what we're going to use. Feel free to learn more about each of them here:
- TypeScript: typescriptlang.org ?
- Next.js: nextjs.org ⏭️
- React: react.dev ⚛️
- Tailwind CSS: tailwindcss.com ?️
Cooking Has Started ?
Let's get our hands dirty! First, create a folder. Open your terminal and enter this:
mkdir aiml-tutorial
cd aiml-tutorial
Now, let's create a new Next.js app:
npx create-next-app@latest
It will ask you a few questions:
✔ What is your project named? Here, you should enter your app name. For example: aistickermaker. For the rest of the questions, simply hit enter.
Here's what you'll see:
✔ Would you like to use TypeScript? … No / Yes
✔ Would you like to use ESLint? … No / Yes
✔ Would you like to use Tailwind CSS? … No / Yes
✔ Would you like your code inside a `src/` directory? … No / Yes
✔ Would you like to use App Router? (recommended) … No / Yes
✔ Would you like to use Turbopack for `next dev`? … No / Yes
✔ Would you like to customize the import alias (`@/*` by default)? … No / Yes
Pro Tip: Feel free to choose Yes or No based on your preferences. I won't judge! ?
Let's open the project with VSCode:
code .
Now, Visual Studio Code should launch directly with this app. Time to start coding! ?
Implementing APIs ?️
First things first, let's create APIs for enhancing the user prompt and generating the sticker. Go to the app folder, then create a new folder called api, and within it, create two new folders: enhancePrompt and generateSticker. For each, create a route.ts file.
The enhancePrompt Endpoint ?♂️
Now, let's start with the enhancePrompt endpoint. Open route.ts inside the enhancePrompt folder and enter the following code:
import { NextResponse } from 'next/server';

const systemPrompt = `
You are tasked with enhancing user prompts to generate clear, detailed, and creative descriptions for a sticker creation AI. The final prompt should be imaginative, visually rich, and aligned with the goal of producing a cute, stylized, and highly personalized sticker based on the user's input.

Instructions:

Visual Clarity: The enhanced prompt must provide clear visual details that can be directly interpreted by the image generation model. Break down and elaborate on specific elements of the scene, object, or character based on the user input.

Example: If the user says "A girl with pink hair," elaborate by adding features like "short wavy pink hair with soft, pastel hues."
Style & Theme:

Emphasize that the final output should reflect a cute, playful, and approachable style.
Add terms like "adorable," "cartoonish," "sticker-friendly," or "chibi-like" to guide the output to a lighter, cuter aesthetic.
Include styling prompts like “minimalistic lines,” “soft shading,” and “vibrant yet soothing colors.”
Personalization:

If a reference or context is given, enhance it to make the sticker feel personalized.
Add context-appropriate descriptors like “wearing a cozy blue hoodie,” “soft pink blush on cheeks,” or “a playful expression.”
Expression & Pose:

Where applicable, refine prompts with suggestions about facial expressions or body language. For example, “Smiling softly with big sparkling eyes” or “A cute wink and a slight tilt of the head.”
Background & Accessories:

Optionally suggest simple, complementary backgrounds or accessories, depending on user input. For instance, "A light pastel background with small, floating hearts" or "Holding a tiny, sparkling star."
Colors:

Emphasize the color scheme based on the user's description, making sure it's consistent with a cute, playful style.
Use descriptors like “soft pastels,” “bright and cheerful,” or “warm and friendly hues” to set the mood.
Avoid Overcomplication:

Keep the descriptions short enough to be concise and not overly complex, as the output should retain a sticker-friendly quality.
Avoid unnecessary details that could clutter the design.
Tone and Language:

The tone should be light, imaginative, and fun, matching the playful nature of stickers.

Example:
User Input:
"A girl with pink hair wearing a hoodie."

Enhanced Prompt:
"An adorable girl with short, wavy pink hair in soft pastel hues, wearing a cozy light blue hoodie. She has a sweet smile with big, sparkling eyes, and a playful expression. The sticker style is cartoonish with minimalistic lines and soft shading. The background is a simple light pastel color with small floating hearts, creating a cute and inviting look."
`;

export async function POST(request: Request) {
    try {
        const { userPrompt } = await request.json();
        console.log("/api/enhancePrompt/route.ts userPrompt: ", userPrompt);

        // Make the API call to the external service
          const response = await fetch('https://api.aimlapi.com/chat/completions', {
            method: 'POST',
            headers: {
              'Content-Type': 'application/json',
              'Authorization': `Bearer ${process.env.NEXT_PUBLIC_AIML_API_KEY}`
            },
            body: JSON.stringify({
              model: 'gpt-4o-mini',
              messages: [
                {
                  role: 'system',
                  content: systemPrompt
                },
                {
                  role: 'user',
                  content: userPrompt
                }
              ]
            })
          });

        console.log("response: ", response);

        if (!response.ok) {
            // If the API response isn't successful, return an error response
            return NextResponse.json({ error: "Failed to fetch completion data" }, { status: response.status });
        }

        const data = await response.json();
        console.log("data: ", data);

        const assistantResponse = data.choices[0]?.message?.content || "No response available";

        // Return the assistant's message content
        return NextResponse.json({ message: assistantResponse });
    } catch (error) {
        console.error("Error fetching the data:", error);
        return NextResponse.json({ error: "An error occurred while processing your request." }, { status: 500 });
    }
}
Here's separated prompt:
You are tasked with enhancing user prompts to generate clear, detailed, and creative descriptions for a sticker creation AI. The final prompt should be imaginative, visually rich, and aligned with the goal of producing a cute, stylized, and highly personalized sticker based on the user's input.

Instructions:

Visual Clarity: The enhanced prompt must provide clear visual details that can be directly interpreted by the image generation model. Break down and elaborate on specific elements of the scene, object, or character based on the user input.

Example: If the user says "A girl with pink hair," elaborate by adding features like "short wavy pink hair with soft, pastel hues."
Style & Theme:

Emphasize that the final output should reflect a cute, playful, and approachable style.
Add terms like "adorable," "cartoonish," "sticker-friendly," or "chibi-like" to guide the output to a lighter, cuter aesthetic.
Include styling prompts like “minimalistic lines,” “soft shading,” and “vibrant yet soothing colors.”
Personalization:

If a reference or context is given, enhance it to make the sticker feel personalized.
Add context-appropriate descriptors like “wearing a cozy blue hoodie,” “soft pink blush on cheeks,” or “a playful expression.”
Expression & Pose:

Where applicable, refine prompts with suggestions about facial expressions or body language. For example, “Smiling softly with big sparkling eyes” or “A cute wink and a slight tilt of the head.”
Background & Accessories:

Optionally suggest simple, complementary backgrounds or accessories, depending on user input. For instance, "A light pastel background with small, floating hearts" or "Holding a tiny, sparkling star."
Colors:

Emphasize the color scheme based on the user's description, making sure it's consistent with a cute, playful style.
Use descriptors like “soft pastels,” “bright and cheerful,” or “warm and friendly hues” to set the mood.
Avoid Overcomplication:

Keep the descriptions short enough to be concise and not overly complex, as the output should retain a sticker-friendly quality.
Avoid unnecessary details that could clutter the design.
Tone and Language:

The tone should be light, imaginative, and fun, matching the playful nature of stickers.

Example:
User Input:
"A girl with pink hair wearing a hoodie."

Enhanced Prompt:
"An adorable girl with short, wavy pink hair in soft pastel hues, wearing a cozy light blue hoodie. She has a sweet smile with big, sparkling eyes, and a playful expression. The sticker style is cartoonish with minimalistic lines and soft shading. The background is a simple light pastel color with small floating hearts, creating a cute and inviting look."
What's Happening Here? ?
- Importing NextResponse: To handle our HTTP responses smoothly.
- Defining the POST function: This is where the magic happens when someone hits this endpoint.
- Fetching the userPrompt: We're grabbing the prompt the user provided.
- Calling AI/ML API's API: We're making a request to enhance the user's prompt using GPT-4o.
- Handling Responses: We check if the response is okay, parse the data, and extract the assistant's response.
- Error Handling: Because nobody likes unhandled errors ruining the party.
Here's an actual example of how the AI enhances the user's prompt. ???
You just entered a prompt:
A cute panda eating ice cream under a rainbow
The AI will enhance it to make it more detailed and visually rich. As a result, you should ger a response like:
An adorable, chibi-like panda with big, sparkling eyes and a joyful expression, savoring a colorful scoop of ice cream. The panda is fluffy and round, with classic black-and-white markings, sitting contentedly. The ice cream cone features vibrant, swirling flavors in pastel pink, mint green, and sunny yellow. Above, a playful, cartoonish rainbow arcs across a soft blue sky, adding a cheerful splash of color. The design is sticker-friendly with minimalistic lines and soft shading, ensuring a cute and delightful aesthetic perfect for capturing the joyful scene.
Alright, let's dive back into the code cauldron and continue cooking up our AI Sticker Maker! ?
The generateSticker Endpoint ?️
So, we've got our enhancePrompt endpoint simmering nicely. Time to spice things up with the generateSticker endpoint. Head over to the api/generateSticker folder and open up route.ts. Replace whatever's in there (probably nothing) with this fresh code:
// api/generateSticker/route.ts
import { NextResponse } from 'next/server';

export async function POST(request: Request) {
    try {
        const { userPrompt } = await request.json();
        console.log("/api/generateSticker/route.ts userPrompt: ", userPrompt);

        // Make the API call to the external service
        const response = await fetch('https://api.aimlapi.com/images/generations', {
          method: 'POST',
          headers: {
            'Content-Type': 'application/json',
            'Authorization': `Bearer ${process.env.NEXT_PUBLIC_AIML_API_KEY}`
          },
          body: JSON.stringify({
            provider: 'openai',
            prompt: userPrompt,
            model: 'dall-e-3',
            n: 1,
            quality: 'hd',
            response_format: 'url',
            size: '1024x1024',
            style: 'vivid'
          })
        });

        console.log("response: ", response);

        if (!response.ok) {
            // If the API response isn't successful, return an error response
            return NextResponse.json({ error: "Failed to fetch completion data" }, { status: response.status });
        }

        const data = await response.json();
        console.log("data: ", data);

        const assistantResponse = data.data[0]?.url || "No response available";

        console.log("assistantResponse: ", assistantResponse);

        // Return the assistant's message content
        return NextResponse.json({ message: assistantResponse });
    } catch (error) {
        console.error("Error fetching the data:", error);
        return NextResponse.json({ error: "An error occurred while processing your request." }, { status: 500 });
    }
}
What's Happening Here? ?
- Importing NextResponse: To handle our HTTP responses smoothly.
- Defining the POST function: This is where the magic happens when someone hits this endpoint.
- Fetching the userPrompt: We're grabbing the prompt the user provided.
- Calling AI/ML API's API: We're making a request to generate an image based on the prompt using DALL·E 3.
- Handling Responses: We check if the response is okay, parse the data, and extract the image URL.
- Error Handling: Because nobody likes unhandled errors ruining the party.
Let's try above prompt with panda in action! ?
Here's our cutesy panda sticker! ???

Other examples ?
Prompt:
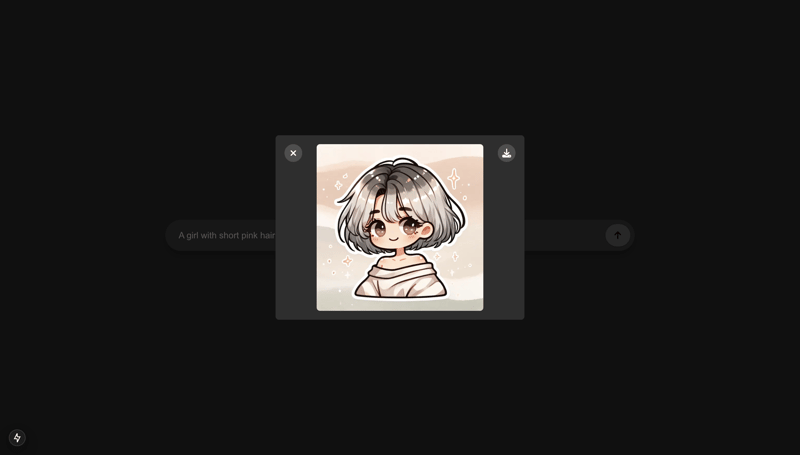
A girl with short white grey hair wearing a oversize shirt

Prompt:
A girl with short black pink hair wearing a oversize pink shirt

Seems, like really WOW! ?
We need a frontend, GUYS! ?
Building the Frontend ?
Time to put a face on our app! Let's create a user interface where users can input their prompt and get a shiny new sticker.
The page.tsx File ?
Navigate to app/page.tsx and update it with the following code:
// app/page.tsx
'use client';
import Image from "next/image";
import { useState } from 'react';
import { faArrowUp, faDownload, faTimes } from '@fortawesome/free-solid-svg-icons';
import { FontAwesomeIcon } from '@fortawesome/react-fontawesome';
import Notification from './utils/notify';
import { Analytics } from "@vercel/analytics/react"
export default function Home() {
const [notification, setNotification] = useState(null); // notification message
const [loading, setLoading] = useState(false);
const [prompt, setPrompt] = useState('');
const [stickerUrl, setStickerUrl] = useState("");
  const loader = () => (


  );
const enhanceUserPrompt = async (prompt: string) => {
setNotification({ message: 'Enhancing user prompt...', type: 'info' });
// Make the API call to the /api/enhancePrompt route and return the enhanced prompt
const response = await fetch('/api/enhancePrompt', {
method: 'POST',
headers: {
'Content-Type': 'application/json',
},
body: JSON.stringify({ userPrompt: prompt }),
});
if (!response.ok) {
throw new Error('Failed to fetch completion data');
}
const data = await response.json();
return data.message;
};
const generateCuteSticker = async (prompt: string) => {
setNotification({ message: 'Generating cute sticker...', type: 'info' });
// Make the API call to the /api/generateSticker route and return the generated sticker URL
const response = await fetch('/api/generateSticker', {
method: 'POST',
headers: {
'Content-Type': 'application/json',
},
body: JSON.stringify({ userPrompt: prompt }),
});
if (!response.ok) {
throw new Error('Failed to fetch completion data');
}
const data = await response.json();
return data.message;
};
const generateSticker = async () => {
if (!prompt) return;
setLoading(true);
setNotification({ message: 'Processing request...', type: 'info' });
try {
// Enhance user prompt
const enhancedPrompt = await enhanceUserPrompt(prompt);
if (!enhancedPrompt) {
setNotification({ message: 'Failed to enhance user prompt.', type: 'error' });
return;
}
// Generate cute sticker
const sticker = await generateCuteSticker(enhancedPrompt);
if (!sticker) {
setNotification({ message: 'Failed to generate cute sticker.', type: 'error' });
return;
}
setStickerUrl(sticker);
console.log('Sticker URL:', sticker);
setNotification({ message: 'Cute sticker generated successfully!', type: 'success' });
} catch (error) {
console.error('An unexpected error occurred:', error);
setNotification({ message: 'An unexpected error occurred.', type: 'error' });
} finally {
setLoading(false);
}
};
const handleDownload = () => {
if (!stickerUrl) return;
const link = document.createElement('a');
link.href = stickerUrl;
link.download = 'cute-sticker.png'; // You can set a default filename
document.body.appendChild(link);
link.click();
document.body.removeChild(link);
};
const handleClose = () => {
setStickerUrl("");
setPrompt("");
};
return (
setNotification(null)}
/>
)}
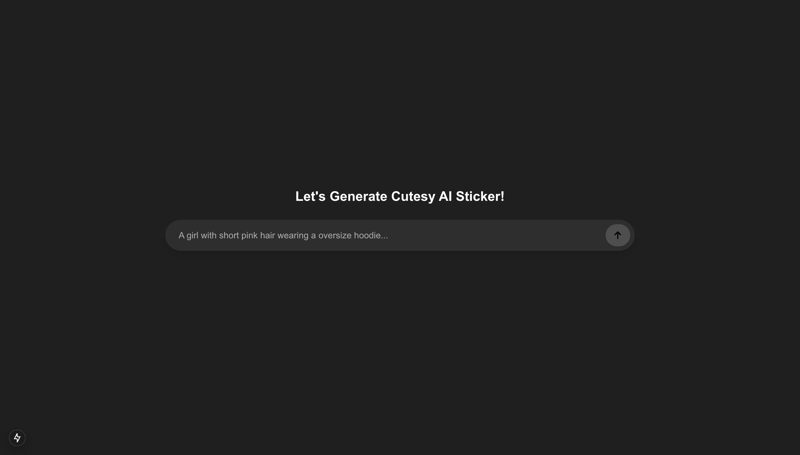
Let's Generate Cutesy AI Sticker!
setPrompt(e.target.value)}
placeholder="A girl with short pink hair wearing a oversize hoodie..."
className="placeholder:text-[#aeaeae] bg-transparent focus:outline-none text-white outline-none w-full px-4"
disabled={loading}
/>
{/* Modal */}
{stickerUrl && (
{/* Download Button */}
{/* Close Button */}
{/* Sticker Image */}
);
}
Breaking It Down ?
- Loader: We are using really simple, but nice loader; three horizontal dots with some nice animaton:
const loader = () => (
);
- State Management: Using useState to handle notifications, loading state, the user's prompt, and the sticker URL.
-
Functions:
- enhanceUserPrompt: Calls our /api/enhancePrompt endpoint to make the user's prompt more... well, prompting.
- generateCuteSticker: Hits the /api/generateSticker endpoint to get that adorable sticker.
- generateSticker: Orchestrates the whole process when the user clicks the magic button.
- handleDownload: Allows the user to download their new sticker.
- handleClose: Closes the sticker modal.
-
UI Components:
- Input Field: Where the user types their wildest sticker dreams.
- Generate Button: Triggers the sticker generation.
- Modal: Displays the sticker with options to download or close.
- Notifications: Pops up messages to inform the user what's going on.
A Sprinkle of FontAwesome ?
We're using FontAwesome for icons. Make sure to install it:
npm i --save @fortawesome/fontawesome-svg-core
npm i --save @fortawesome/free-solid-svg-icons
npm i --save @fortawesome/free-regular-svg-icons
npm i --save @fortawesome/free-brands-svg-icons
npm i --save @fortawesome/react-fontawesome@latest
You may also check the FontAwesome documentation for more details. Or search for other icons Search icons.
Handling Notifications ?
Remember that notification component we imported? Let's create it.
Creating the Notification Component ?
Create a new folder called utils inside your app directory. Inside utils, create a file called notify.tsx and paste:
// app/utils/notify.tsx
import React, { useEffect } from 'react';

type NotificationProps = {
  message: string;
  type: 'error' | 'success' | 'info';
  onClose: () => void;
};

const Notification: React.FC = ({ message, type, onClose }) => {
  useEffect(() => {
    const timer = setTimeout(() => {
      onClose();
    }, 3000); // Auto-close after 3 seconds
    return () => clearTimeout(timer);
  }, [onClose]);

  const bgColor = type === 'error' ? 'bg-red-500' : type === 'success' ? 'bg-green-500' : 'bg-blue-500';

  return (

      {message}

  );
};

export default Notification;
What's This For? ?
- Purpose: To display temporary messages to the user, like "Generating cute sticker..." or "An error occurred."
- Auto-Close Feature: It disappears after 3 seconds, just like my motivation on Monday mornings.
- Styling: Changes color based on the type of notification.
Configuring Image Domains ?️
Since we're fetching images from OpenAI's servers, Next.js needs to know it's okay to load them. Open up next.config.ts and add:
// next.config.ts
import type { NextConfig } from "next";

const nextConfig: NextConfig = {
  /* config options here */
  images: {
    remotePatterns: [
      {
        protocol: 'https',
        hostname: 'oaidalleapiprodscus.blob.core.windows.net',
        port: '',
      },
    ],
  },
};

export default nextConfig;
Why Do This? ?♂️
Because Next.js is a bit overprotective (like a helicopter parent) and won't load images from external domains unless you specifically allow it. This setting tells Next.js, "It's cool, these images are with me."
Environment Variables ?
Now, before you excitedly run your app and wonder why it's not working, let's set up our environment variables.
Setting Up Your AI/ML API Key ?️
Create a file called .env.local in the root of your project and add:
NEXT_PUBLIC_AIML_API_KEY=your_api_key_here
Replace your_api_key_here with your actual AI/ML API key. If you don't have one, you might need to sign up at AI/ML API and grab it. It's absolutely FREE to get started!
Here's a Quick Tutorial on how to get your API key: How to get API Key from AI/ML API. Quick step-by-step tutorial with screenshots for better understanding.
Warning: Keep this key secret! Don't share it publicly or commit it to Git. Treat it like your Netflix password.
Fire It Up! ?
Time to see this baby in action.
Running the Development Server ?♀️
In your terminal, run:
npm run dev
This starts the development server. Open your browser and navigate to http://localhost:3000.
You should see your AI Sticker Maker platform. ?
Testing It Out ?
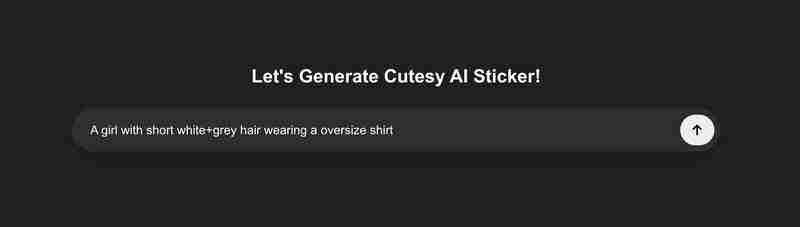
- Enter a Prompt: Something like "A girl with short white grey hair wearing a oversize shirt". Go wild!
- Click the Button: Hit that generate button and watch the magic unfold.
- Wait for It...: You'll see notifications keeping you posted.
- Voilà!: Your AI-generated sticker should appear. Bask in its glory.
Troubleshooting ?️
- "Failed to fetch completion data": Double-check your API key and make sure it's set correctly.
- Images Not Loading: Ensure your next.config.ts file is set up as shown above.
- App Crashes: Open your console and see what errors pop up. Google is your friend!
Wrapping Up ?
Congratulations! You've just built an AI Sticker Maker that's both fun and functional. Not only did you delve into the world of AI and Next.js, but you also made something that can bring a smile to people's faces.
What's Next? ?
- Styling: Customize the look and feel. Make it as fabulous or minimalist as you like.
- Features: Add user accounts, sticker galleries, or even a feature to create sticker packs.
- Monetization: Integrate Stripe and start charging for premium stickers. Time to make some moolah!
Final Thoughts ?
Building this app was like making a sandwich with layers of tech goodness. We've got AI models as the filling, Next.js as the bread, and a sprinkle of humor as the secret sauce.
Remember, the world is your oyster (or sticker). Keep experimenting, keep building, and most importantly, have fun!
Happy coding! ?
Full implementation available on Github AI Sticker Maker.
It’s Absolutely FREE to get started! Try It Now click
Also check out this tutorial, it's very interesting! Building a Chrome Extension from Scratch with AI/ML API, Deepgram Aura, and IndexedDB Integration
Should you have any questions or need further assistance, don’t hesitate to reach out via email at [email protected].
-
 可以在純CS中將多個粘性元素彼此堆疊在一起嗎?[2这里: https://webthemez.com/demo/sticky-multi-header-scroll/index.html </main> <section> { display:grid; grid-template-...程式設計 發佈於2025-07-02
 -
JavaScript計算兩個日期之間天數的方法How to Calculate the Difference Between Dates in JavascriptAs you attempt to determine the difference between two dates in Javascript, consider this s...程式設計 發佈於2025-07-02
-
eval()vs. ast.literal_eval():對於用戶輸入,哪個Python函數更安全?稱量()和ast.literal_eval()中的Python Security 在使用用戶輸入時,必須優先確保安全性。強大的Python功能Eval()通常是作為潛在解決方案而出現的,但擔心其潛在風險。 This article delves into the differences betwee...程式設計 發佈於2025-07-02
-
Spark DataFrame添加常量列的妙招在Spark Dataframe ,將常數列添加到Spark DataFrame,該列具有適用於所有行的任意值的Spark DataFrame,可以通過多種方式實現。使用文字值(SPARK 1.3)在嘗試提供直接值時,用於此問題時,旨在為此目的的column方法可能會導致錯誤。 df.withCo...程式設計 發佈於2025-07-02
-
PHP與C++函數重載處理的區別作為經驗豐富的C開發人員脫離謎題,您可能會遇到功能超載的概念。這個概念雖然在C中普遍,但在PHP中構成了獨特的挑戰。讓我們深入研究PHP功能過載的複雜性,並探索其提供的可能性。 在PHP中理解php的方法在PHP中,函數超載的概念(如C等語言)不存在。函數簽名僅由其名稱定義,而與他們的參數列表無關...程式設計 發佈於2025-07-02
-
如何從Google API中檢索最新的jQuery庫?從Google APIS 問題中提供的jQuery URL是版本1.2.6。對於檢索最新版本,以前有一種使用特定版本編號的替代方法,它是使用以下語法:獲取最新版本:未壓縮)While these legacy URLs still remain in use, it is recommended ...程式設計 發佈於2025-07-02
-
MySQL中如何高效地根據兩個條件INSERT或UPDATE行?在兩個條件下插入或更新或更新 solution:的答案在於mysql的插入中...在重複鍵更新語法上。如果不存在匹配行或更新現有行,則此功能強大的功能可以通過插入新行來進行有效的數據操作。如果違反了唯一的密鑰約束。 實現所需的行為,該表必須具有唯一的鍵定義(在這種情況下為'名稱'...程式設計 發佈於2025-07-02
-
如何使用PHP將斑點(圖像)正確插入MySQL?essue VALUES('$this->image_id','file_get_contents($tmp_image)')";This code builds a string in PHP, but the function call fil...程式設計 發佈於2025-07-02
-
Java中如何使用觀察者模式實現自定義事件?在Java 中創建自定義事件的自定義事件在許多編程場景中都是無關緊要的,使組件能夠基於特定的觸發器相互通信。本文旨在解決以下內容:問題語句我們如何在Java中實現自定義事件以促進基於特定事件的對象之間的交互,定義了管理訂閱者的類界面。 以下代碼片段演示瞭如何使用觀察者模式創建自定義事件: args...程式設計 發佈於2025-07-02
-
在GO中構造SQL查詢時,如何安全地加入文本和值?在go中構造文本sql查詢時,在go sql queries 中,在使用conting and contement和contement consem per時,尤其是在使用integer per當per當per時,per per per當per. [&&&&&&&&&&&&&&&&默元組方...程式設計 發佈於2025-07-02
-
如何使用Python理解有效地創建字典?在python中,詞典綜合提供了一種生成新詞典的簡潔方法。儘管它們與列表綜合相似,但存在一些顯著差異。 與問題所暗示的不同,您無法為鑰匙創建字典理解。您必須明確指定鍵和值。 For example:d = {n: n**2 for n in range(5)}This creates a dict...程式設計 發佈於2025-07-02
-
如何實時捕獲和流媒體以進行聊天機器人命令執行?在開發能夠執行命令的chatbots的領域中,實時從命令執行實時捕獲Stdout,一個常見的需求是能夠檢索和顯示標準輸出(stdout)在cath cath cant cant cant cant cant cant cant cant interfaces in Chate cant inter...程式設計 發佈於2025-07-02
-
如何從Python中的字符串中刪除表情符號:固定常見錯誤的初學者指南?從python import codecs import codecs import codecs 導入 text = codecs.decode('這狗\ u0001f602'.encode('utf-8'),'utf-8') 印刷(文字)#帶有...程式設計 發佈於2025-07-02
-
為什麼PHP的DateTime :: Modify('+1個月')會產生意外的結果?使用php dateTime修改月份:發現預期的行為在使用PHP的DateTime類時,添加或減去幾個月可能並不總是會產生預期的結果。正如文檔所警告的那樣,“當心”這些操作的“不像看起來那樣直觀。 考慮文檔中給出的示例:這是內部發生的事情: 現在在3月3日添加另一個月,因為2月在2001年只有2...程式設計 發佈於2025-07-02
-
Java中假喚醒真的會發生嗎?在Java中的浪費喚醒:真實性或神話? 在Java同步中偽裝喚醒的概念已經是討論的主題。儘管存在這種行為的潛力,但問題仍然存在:它們實際上是在實踐中發生的嗎? Linux的喚醒機制根據Wikipedia關於偽造喚醒的文章,linux實現了pthread_cond_wait()功能的Linux實現,...程式設計 發佈於2025-07-02


學習中文
- 1 走路用中文怎麼說? 走路中文發音,走路中文學習
- 2 坐飛機用中文怎麼說? 坐飞机中文發音,坐飞机中文學習
- 3 坐火車用中文怎麼說? 坐火车中文發音,坐火车中文學習
- 4 坐車用中文怎麼說? 坐车中文發音,坐车中文學習
- 5 開車用中文怎麼說? 开车中文發音,开车中文學習
- 6 游泳用中文怎麼說? 游泳中文發音,游泳中文學習
- 7 騎自行車用中文怎麼說? 骑自行车中文發音,骑自行车中文學習
- 8 你好用中文怎麼說? 你好中文發音,你好中文學習
- 9 謝謝用中文怎麼說? 谢谢中文發音,谢谢中文學習
- 10 How to say goodbye in Chinese? 再见Chinese pronunciation, 再见Chinese learning


