
使用 Oats~i 建立 Web 應用程式 – 啟動 Oats~i 應用程式
 瀏覽:757
Welcome to the second part of the Build a Web App with Oats~i tutorial series. In the first part, we went through installing Oats~i in your development environment. In case you missed that one, check it out here.
In this part of the series, we’ll go through how to start an Oats~i app. This will cover all instances where you want to start an Oats~i app and have the framework run on the front end.
Instead of building a whole project from scratch, we’ll use the inbuilt starter project that comes with Oats~i when you set it up using the Oats~i cli. We’ll open the important bits of the code necessary for this tutorial and use that to explain how Oats~i loads up when it gets to the client/browser and starts running your web app.
Let’s dive in.
Install the Starter Project Using Oats~i CLI
Create a new folder where you want to install the Oats~i starter project and open the terminal. Then run:
npx oats-i-cli
Follow the prompts.
This will install Oats~i and the starter project bundled with it to your current working directory.
Finally, to run the starter project, run
npm run dev
Navigate to the address provided in the terminal (often localhost:8080) and see the starter project in action. Navigate back and forth between the available pages to see Oats~i handle routing and build views through fragments.
Now let’s get to the code that brings Oats~i to life in the client/browser.
Index.js
Open the index.js file found in src -> app -> index -> scripts.
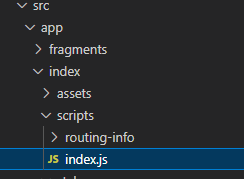
This file contains the code that starts Oats~i for the starter project bundled in the cli. This is more or less the same code you’d write to start Oats~i in your own project.
Let’s break it down.
The App Root
Oats~i is typically initialized from the appRoot module through the appRoot.initApp() method.
appRoot is a singleton instance of the AppRoot class that manages the initialization of an Oats~i web app, main navigation, and loading the root view if its template is provided.
The initApp() method takes several arguments, including an instance of the AppStateManager, MainRouter, AppRootView object, a default route, and optional extra options that currently allow you to define the app’s external link interception behavior.
Let’s break these down.
AppStateManager
The app state manager is a module responsible for managing the route states of an Oats~i app. Primarily, it helps Oats~i understand whether a history pop event is a click on the forward or back button on the browser by the user.
This information is not obvious using the history API as is.
Having this information is crucial because Oats~i saves fragment states as the web app is navigated by the user. Therefore, if they are to go back or forward to a page they were in before, the fragment(s) responsible for rendering and running those pages will “remember” their state and show the right information and automatically be scrolled to the right position the user was at.
Knowing whether the pop event is a forward or back movement makes retrieving state information accurate.
You simply create an instance of the AppStateManager by invoking new, passing in the web app’s routing info.
In our index.js file, we do this in the line:
const appStateManager = new AppStateManager(AppRoutingInfo);
We have already defined our AppRoutingInfo in a separate file (more on this later).
Main Router
The main router handles routing in an Oats~i web app. You create a router instance by invoking “new”, passing in the app’s routing info, app state manager instance, an error callback, a root path, and a route consent callback.
We’ve already talked about the app routing info and app state manager instance, so let’s talk about the other arguments that you pass to the main router.
Error Callback
In case of a problem routing, the main router can fire the error callback and inform you of the reasons why routing has failed. As long as you’ve defined your routes well, you shouldn’t worry about implementing this method, other than merely providing it.
Root Path
The main router allows you to directly call for routing from your JavaScript code using the routeTO() method. It also determines the valid route to follow based on your app’s main routing info.
Now, if you have Oats~i running in your website with a special address such as /admin, it can be repetitive having to start every routing call or routing info with the /admin root. Instead, you can supply this to the main router as the root path, and just append the rest of your route to your routing calls or routing info.
So, instead of /admin/create, with the root path set to /admin, you can just have the route as /create. However, href attributes in links MUST be fully qualified.
Route Consent Callback
Before the main router can trigger routing for a given path, it attempts to see whether routing for that route has been permitted. The route consent callback allows you to specify this, giving you the ability to control which sections of your web app can be accessed by a given user or based on any other business or app logic.
Note: This is different from fragment consenting, which we’ll cover later.
AppRootView Object
The app root view object consists of the root view template and array of main navigation infos.
Every Oats~i app has a root view. This is the permanent section of the view which the user will always see regardless of the path they’re navigating to. The root view is wrapped within an tag and will typically contain elements such as your navbar and footer.
Here’s an example, sourced from home.sv.hbs in the Oats~i starter project
Home
            About
Note: As you can infer from the Oats~i starter project, you can skip passing in a template for the app root view in the initApp() method as long as you’ve provided it in the html markup sourced for your page from the server.
Your root view object should also have a single tag specified within, where the app’s fragments will be loaded.
The AppRootView object also takes a main navigation info array, which contains a list of selectors and their active routes, which Oats~i will use to show you which navigation selector is active.
In the Oats~i starter project, specifying the main nav info makes it possible to update the styling and looks of the navigation links when you click on it and navigate to its url.
Oats~i handles the click and update boiler plate for the navigation links or buttons. All you have to do is style the links or buttons based on which one is marked as active using the attribute ‘navigation-state=”active”’
Default Route
The default route is the route Oats~i will default to incase the page loads from a url that is not specified in your app’s routing info. You can use this to curate the default web app behavior especially if it results from a log in or authentication action.
For instance, if the user has come in from a login page and is redirected to their admin page, but the initial page load is at “/admin”, you can specify the default route to be “/admin/dashboard”.
Oats~i will reroute the web app to /admin/dashboard on load and the user will always access their dashboard every time they come from logging into the app.
If you want to change this behavior to say, profile, you can simply change the default route in your web app to /admin/profile and all users logging in will have their profile page as the default page.
Extra Options
Oats~i also takes in optional extra options, with the current implementation allowing you to intercept external links within your web app. This allows you to warn users of their navigation away from your site and the url they’re about to access, in case you want to build a content protection system.
Complete Code
The complete code for starting an Oats~i app will look something like this:
//sourced from index.js in the starter app
const appStateManager = new AppStateManager(AppRoutingInfo);
    appRoot.initApp(appStateManager, new MainRouter(AppRoutingInfo, appStateManager, (args) => {}, "", async (url) => {

        return {

            canAccess: true,
            fallbackRoute: "/"
        }
    }), { template: null, mainNavInfos: AppMainNavInfo }, "");
You can wrap this code within a function that is automatically invoked when your index.js file downloads in the browser to have the web app automatically started on page load. In the starter project’s case, this is the initApp() function.
Now, there are two more things left to explain.
App Routing Info
From the startup code, you can point out that providing routing information is mandatory for an Oats~i web app to initialize. From the example’s I’ve given, we define this info elsewhere then import it in our startup script. Defining your routing info in a separate file is not mandatory, but I find it to be good practice especially when you want to add more routes or main navigation in your web app.
Here’s how routing information is defined for an Oats~i web app, using the example from the starter project.
const AppRoutingInfo = RoutingInfoUtils.buildMainRoutingInfo([

    {
        route: "/",
        target: homeMainFragmentBuilder,
        nestedChildFragments: null
    },
    {
        route: "/about",
        target: aboutMainFragmentBuilder,
        nestedChildFragments: null
    }
], AppMainNavInfo);
You can call the routing info any name you want, as long as you use the method RoutingInfoUtils.buildMainRoutingInfo() to build it.
The method will return an array of routing information, with each info holding:
- route: this is the route that info is valid for. You cannot repeat a route across your routing infos.
- target: this is the main fragment the route should start building from. Oats~i builds its fragments from the main fragment to the child fragments
- Nested child fragments: these are the child fragments that should also be built for the route, in order. This order typically represents the DOM structure, with the fragment that should be created first in DOM coming before it’s nested child or a child fragment in the same level with it.
You can notice that we also pass AppMainNavInfo to the buildMainRoutingInfo() method as well. This is the same info we passed in to the app state manager and initApp method in the starter script. Let’s look at it.
App Main Nav Info
A good web app needs good navigation. And often, setting up navigation can involve a lot of boiler plate code to not only set up the click listeners for the navigation links or buttons, but also change their styling based on which one is active.
Oats~i takes care of the boiler plate for you by requiring you only provide the navigation information needed by your web app. This takes the following format (example sourced from the starter project).
const AppMainNavInfo = MainNavigationInfoBuilder.buildMainNavigationInfo([

    {
        selector: "home-link",
        defaultRoute: "/",
        baseActiveRoute: "/",
    },
    {
        selector: "about-link",
        defaultRoute: "/about",
        baseActiveRoute: "/about",
    }
]);
You create a main navigation info in Oats~i using the method MainNavigationInfoBuilder.buildMainNavigationInfo(). It returns an array of navigation infos, with each containing:
- selector: This is a dot selector that Oats~i will use to query the navigation link or button, set up listeners (for buttons only – links/A tags are automatically intercepted), and update its “navigation-state” attribute based on whether its active or not. In your markup, this is simply a class name.
- defaultRoute: this is the default route Oats~i should route to if the navigation button is clicked. For links, since Oats~i automatically intercepts clicks on links/A tags, ensure this matches the value of your href attribute.
- baseActiveRoute: This is the base route for which the navigation button or link should be treated as active. For instance, if you have a navigation button with defaultRoute “/profile” and baseActiveRoute “/profile” and the user navigates to /profile/update-pic, Oats~i will set this button as active since this route starts with the baseActiveRoute value.
Putting Everything Together
Let’s put everything together and have the final picture of what you need to get an Oats~i app up and running. Typically, you must have defined:
- The app routing info
- The app main nav info (for main navigation links in your root view)
Then, simply get a new instance of the app state manager, and call appRoot.initApp passing this instance, the app routing info, app main nav info, and main router instance. Again, here’s the example code from the Oats~i starter project that comes bundled with the cli, now wrapped in a function that we call immediately the index.js file loads in the browser.
function initApp(){

    const appStateManager = new AppStateManager(AppRoutingInfo);
    appRoot.initApp(appStateManager, new MainRouter(AppRoutingInfo, appStateManager, (args) => {}, "", async (url) => {

        return {

            canAccess: true,
            fallbackRoute: "/"
        }
    }), { template: null, mainNavInfos: AppMainNavInfo }, "");
}

initApp();
As your web app grows and changes, the only bits of this code you’ll ever need to change are the app routing infos and main navigation infos (AppRoutingInfo and AppMainNavInfo). This will be typically because you’re adding new routes to your web app (thus updating the routing information) or adding new main navigation buttons or links (thus updating the main navigation infos).
The rest of the code will be fine untouched.
Sign Up and Follow for the Next Tutorial
A lot of this will make sense when we build our very own small project in Oats~i. That’s what we’ll be doing in the next part of this series, to learn the next fundamental concepts around building an Oats~i web app.
See you then.
Support Oats~i
You can support the development of Oats~i through Patreon or buy me a coffee.
-
 在JavaScript中如何並發運行異步操作並正確處理錯誤?同意操作execution 在執行asynchronous操作時,相關的代碼段落會遇到一個問題,當執行asynchronous操作:此實現在啟動下一個操作之前依次等待每個操作的完成。要啟用並發執行,需要進行修改的方法。 第一個解決方案試圖通過獲得每個操作的承諾來解決此問題,然後單獨等待它們: c...程式設計 發佈於2025-07-16
 -
為什麼在我的Linux服務器上安裝Archive_Zip後,我找不到“ class \” class \'ziparchive \'錯誤?Class 'ZipArchive' Not Found Error While Installing Archive_Zip on Linux ServerSymptom:When attempting to run a script that utilizes the ZipAr...程式設計 發佈於2025-07-16
-
Java的Map.Entry和SimpleEntry如何簡化鍵值對管理?A Comprehensive Collection for Value Pairs: Introducing Java's Map.Entry and SimpleEntryIn Java, when defining a collection where each element com...程式設計 發佈於2025-07-16
-
如何使用組在MySQL中旋轉數據?在關係數據庫中使用mySQL組使用mySQL組進行查詢結果,在關係數據庫中使用MySQL組,轉移數據的數據是指重新排列的行和列的重排以增強數據可視化。在這裡,我們面對一個共同的挑戰:使用組的組將數據從基於行的基於列的轉換為基於列。 Let's consider the following ...程式設計 發佈於2025-07-16
-
PHP未來:適應與創新PHP的未來將通過適應新技術趨勢和引入創新特性來實現:1)適應云計算、容器化和微服務架構,支持Docker和Kubernetes;2)引入JIT編譯器和枚舉類型,提升性能和數據處理效率;3)持續優化性能和推廣最佳實踐。 引言在編程世界中,PHP一直是網頁開發的中流砥柱。作為一個從1994年就開始發展...程式設計 發佈於2025-07-16
-
CSS強類型語言解析您可以通过其强度或弱输入的方式对编程语言进行分类的方式之一。在这里,“键入”意味着是否在编译时已知变量。一个例子是一个场景,将整数(1)添加到包含整数(“ 1”)的字符串: result = 1 "1";包含整数的字符串可能是由带有许多运动部件的复杂逻辑套件无意间生成的。它也可以是故意从单个真理...程式設計 發佈於2025-07-16
-
如何正確使用與PDO參數的查詢一樣?在pdo 中使用類似QUERIES在PDO中的Queries時,您可能會遇到類似疑問中描述的問題:此查詢也可能不會返回結果,即使$ var1和$ var2包含有效的搜索詞。錯誤在於不正確包含%符號。 通過將變量包含在$ params數組中的%符號中,您確保將%字符正確替換到查詢中。沒有此修改,PD...程式設計 發佈於2025-07-16
-
如何在Java字符串中有效替換多個子字符串?在java 中有效地替換多個substring,需要在需要替換一個字符串中的多個substring的情況下,很容易求助於重複應用字符串的刺激力量。 However, this can be inefficient for large strings or when working with nu...程式設計 發佈於2025-07-16
-
使用jQuery如何有效修改":after"偽元素的CSS屬性?在jquery中了解偽元素的限制:訪問“ selector 嘗試修改“:”選擇器的CSS屬性時,您可能會遇到困難。 This is because pseudo-elements are not part of the DOM (Document Object Model) and are th...程式設計 發佈於2025-07-16
-
將圖片浮動到底部右側並環繞文字的技巧在Web設計中圍繞在Web設計中,有時可以將圖像浮動到頁面右下角,從而使文本圍繞它纏繞。這可以在有效地展示圖像的同時創建一個吸引人的視覺效果。 css位置在右下角,使用css float and clear properties: img { 浮點:對; ...程式設計 發佈於2025-07-16
-
如何高效地在一個事務中插入數據到多個MySQL表?mySQL插入到多個表中,該數據可能會產生意外的結果。雖然似乎有多個查詢可以解決問題,但將從用戶表的自動信息ID與配置文件表的手動用戶ID相關聯提出了挑戰。 使用Transactions和last_insert_id() 插入用戶(用戶名,密碼)值('test','tes...程式設計 發佈於2025-07-16
-
為什麼使用Firefox後退按鈕時JavaScript執行停止?導航歷史記錄問題:JavaScript使用Firefox Back Back 此行為是由瀏覽器緩存JavaScript資源引起的。要解決此問題並確保在後續頁面訪問中執行腳本,Firefox用戶應設置一個空功能。 警報'); }; alert('inline Alert')...程式設計 發佈於2025-07-16
-
如何使用PHP從XML文件中有效地檢索屬性值?從php $xml = simplexml_load_file($file); foreach ($xml->Var[0]->attributes() as $attributeName => $attributeValue) { echo $attributeName,...程式設計 發佈於2025-07-16
-
為什麼我的CSS背景圖像出現?故障排除:CSS背景圖像未出現 ,您的背景圖像儘管遵循教程說明,但您的背景圖像仍未加載。圖像和样式表位於相同的目錄中,但背景仍然是空白的白色帆布。 而不是不棄用的,您已經使用了CSS樣式: bockent {背景:封閉圖像文件名:背景圖:url(nickcage.jpg); 如果您的html,cs...程式設計 發佈於2025-07-16
-
如何使用FormData()處理多個文件上傳?)處理多個文件輸入時,通常需要處理多個文件上傳時,通常是必要的。 The fd.append("fileToUpload[]", files[x]); method can be used for this purpose, allowing you to send multi...程式設計 發佈於2025-07-16


學習中文
- 1 走路用中文怎麼說? 走路中文發音,走路中文學習
- 2 坐飛機用中文怎麼說? 坐飞机中文發音,坐飞机中文學習
- 3 坐火車用中文怎麼說? 坐火车中文發音,坐火车中文學習
- 4 坐車用中文怎麼說? 坐车中文發音,坐车中文學習
- 5 開車用中文怎麼說? 开车中文發音,开车中文學習
- 6 游泳用中文怎麼說? 游泳中文發音,游泳中文學習
- 7 騎自行車用中文怎麼說? 骑自行车中文發音,骑自行车中文學習
- 8 你好用中文怎麼說? 你好中文發音,你好中文學習
- 9 謝謝用中文怎麼說? 谢谢中文發音,谢谢中文學習
- 10 How to say goodbye in Chinese? 再见Chinese pronunciation, 再见Chinese learning


