使用 ReactJS 建立免費的 AI 圖像生成器
發佈於2024-11-08
开发者们大家好,
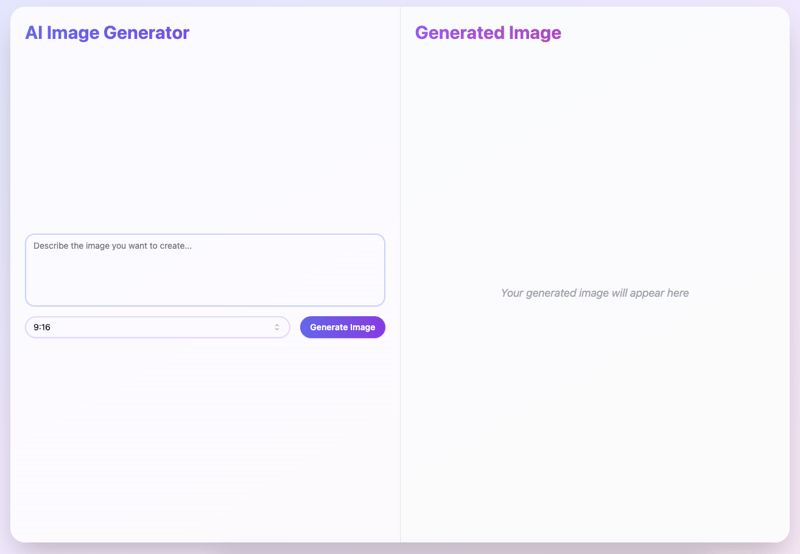
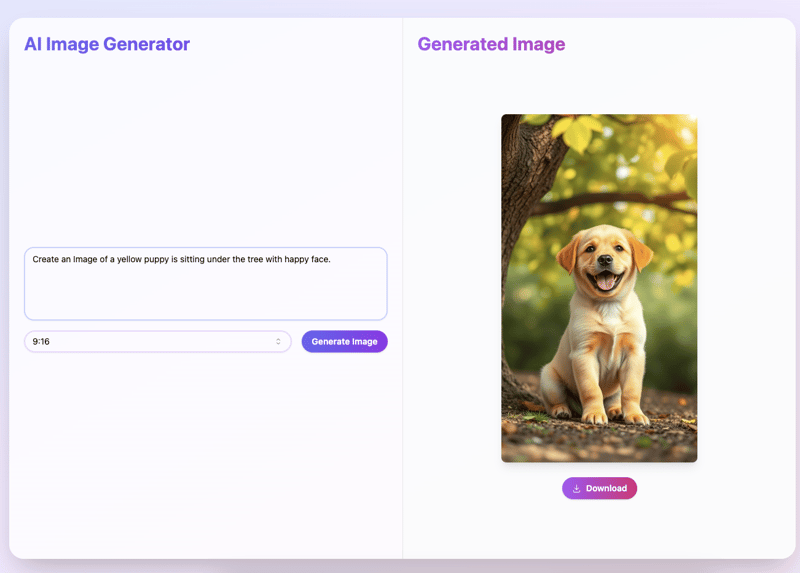
今天,我将向您展示如何使用 ReactJS 创建图像生成器,并且完全可以免费使用,这要感谢黑森林实验室和 Together AI。
第 1 步:设置项目
在本教程中,我们将使用 Vite 来初始化应用程序并使用 Shadcn 来初始化 UI。我假设您已经设置了项目并安装了 Shadcn。
第 2 步:安装 Together AI 软件包
我们需要安装Together AI包来访问免费的Flux模型来生成图像。
在终端中运行以下命令
npm i together-ai
第 3 步:构建用户界面
现在,让我们为我们的应用程序创建 UI。以下是图像生成器组件的完整代码。它包括提示的文本输入。用于选择宽高比的下拉菜单。
请记住,我们需要使用“black-forest-labs/FLUX.1-schnell-Free”,因为它是免费的。
import { useRef, useState } from "react";
import Together from "together-ai";
import { ImagesResponse } from "together-ai";
import { Button } from "@/components/ui/button";
import {
Select,
SelectContent,
SelectItem,
SelectTrigger,
SelectValue,
} from "@/components/ui/select";
import { Textarea } from "@/components/ui/textarea";
import { motion } from "framer-motion";
import { Separator } from "@/components/ui/separator";
import { DownloadIcon } from "@radix-ui/react-icons";
import { save } from "@tauri-apps/plugin-dialog";
import { writeFile } from "@tauri-apps/plugin-fs";
function App() {
const [input, setInput] = useState("");
const [imageUrl, setImageUrl] = useState("");
const [ratio, setRatio] = useState("9:16");
const [isLoading, setIsLoading] = useState(false);
const [downloading, setDownloading] = useState(false);
const imageRef = useRef(null);
const hRatio = ratio.split(":").map(Number)[0];
const vRatio = ratio.split(":").map(Number)[1];
const width = hRatio === 1 ? 512 : hRatio * 64;
const height = vRatio === 1 ? 512 : vRatio * 64;
const together = new Together({
apiKey: import.meta.env.VITE_TOGETHER_API_KEY,
});
const handleGenerateImage = async () => {
setIsLoading(true);
try {
console.log(width, height);
const response: ImagesResponse = await together.images.create({
model: "black-forest-labs/FLUX.1-schnell-Free",
prompt: input,
width: width,
height: height,
// @ts-expect-error response_format is not defined in the type
response_format: "b64_json",
});
const base64Image = response.data[0].b64_json;
const dataUrl = `data:image/png;base64,${base64Image}`;
setImageUrl(dataUrl);
} catch (error) {
console.error("Error generating image:", error);
// You might want to add some error handling UI here
} finally {
setIsLoading(false);
}
};
const handleDownloadImage = async () => {
if (imageUrl) {
setDownloading(true);
try {
// Remove the data URL prefix
const base64Data = imageUrl.replace(/^data:image\/\w ;base64,/, "");
// Convert base64 to binary
const imageBuffer = Uint8Array.from(atob(base64Data), (c) =>
c.charCodeAt(0)
);
// Open a save dialog
const filePath = await save({
filters: [
{
name: "Image",
extensions: ["png"],
},
],
});
if (filePath) {
// Write the file
await writeFile(filePath, imageBuffer);
console.log("File saved successfully");
}
} catch (error) {
console.error("Error saving image:", error);
} finally {
setDownloading(false);
}
}
};
return (
AI Image Generator for "Thảo"
Generated Image
{imageUrl ? (

) : (
Your generated image will appear here
)}
);
}
export default App;


最后的想法
通过此设置,您现在拥有一个简单的 ReactJS 应用程序,可以生成和下载 AI 生成的图像。
感谢您的阅读!如果您觉得这篇文章有趣,请不要犹豫,点个赞。快乐编码!
版本聲明
本文轉載於:https://dev.to/nhd2106/image-generator-app-for-free-2p0d?1如有侵犯,請聯絡[email protected]刪除
最新教學
更多>
-
 如何使用FormData()處理多個文件上傳?)處理多個文件輸入時,通常需要處理多個文件上傳時,通常是必要的。 The fd.append("fileToUpload[]", files[x]); method can be used for this purpose, allowing you to send multi...程式設計 發佈於2025-04-05
 -
 在程序退出之前,我需要在C ++中明確刪除堆的堆分配嗎?在C中的顯式刪除 在C中的動態內存分配時,開發人員通常會想知道是否有必要在heap-procal extrable exit exit上進行手動調用“ delete”操作員,但開發人員通常會想知道是否需要手動調用“ delete”操作員。本文深入研究了這個主題。 在C主函數中,使用了動態分配變量(...程式設計 發佈於2025-04-05
 -
 對象擬合:IE和Edge中的封面失敗,如何修復?To resolve this issue, we employ a clever CSS solution that solves the problem:position: absolute;top: 50%;left: 50%;transform: translate(-50%, -50%)...程式設計 發佈於2025-04-05
 -
 Python讀取CSV文件UnicodeDecodeError終極解決方法在試圖使用已內置的CSV模塊讀取Python中時,CSV文件中的Unicode Decode Decode Decode Decode decode Error讀取,您可能會遇到錯誤的錯誤:無法解碼字節 在位置2-3中:截斷\ uxxxxxxxx逃脫當CSV文件包含特殊字符或Unicode的路徑逃...程式設計 發佈於2025-04-05
 -
 如何使用Python理解有效地創建字典?在python中,詞典綜合提供了一種生成新詞典的簡潔方法。儘管它們與列表綜合相似,但存在一些顯著差異。 與問題所暗示的不同,您無法為鑰匙創建字典理解。您必須明確指定鍵和值。 For example:d = {n: n**2 for n in range(5)}This creates a dict...程式設計 發佈於2025-04-05
 -
 在GO中構造SQL查詢時,如何安全地加入文本和值?在go中構造文本sql查詢時,在go sql queries 中,在使用conting and contement和contement consem per時,尤其是在使用integer per當per當per時,per per per當per. [&&&&&&&&&&&&&&&&默元組方法在...程式設計 發佈於2025-04-05
 -
 如何克服PHP的功能重新定義限制?克服PHP的函數重新定義限制在PHP中,多次定義一個相同名稱的函數是一個no-no。嘗試這樣做,如提供的代碼段所示,將導致可怕的“不能重新列出”錯誤。 但是,PHP工具腰帶中有一個隱藏的寶石:runkit擴展。它使您能夠靈活地重新定義函數。 runkit_function_renction_...程式設計 發佈於2025-04-05
 -
 如何使用PHP將斑點(圖像)正確插入MySQL?essue VALUES('$this->image_id','file_get_contents($tmp_image)')";This code builds a string in PHP, but the function call fil...程式設計 發佈於2025-04-05
 -
 如何在GO編譯器中自定義編譯優化?在GO編譯器中自定義編譯優化 GO中的默認編譯過程遵循特定的優化策略。 However, users may need to adjust these optimizations for specific requirements.Optimization Control in Go Compi...程式設計 發佈於2025-04-05
 -
 為什麼不使用CSS`content'屬性顯示圖像?在Firefox extemers屬性為某些圖像很大,&& && && &&華倍華倍[華氏華倍華氏度]很少見,卻是某些瀏覽屬性很少,尤其是特定於Firefox的某些瀏覽器未能顯示圖像時未能顯示圖像時遇到了一個問題。這可以在提供的CSS類中看到:。 googlepic { 內容:url(&...程式設計 發佈於2025-04-05
 -
 \“(1)vs.(;;):編譯器優化是否消除了性能差異?\”答案: 在大多數現代編譯器中,while(1)和(1)和(;;)之間沒有性能差異。編譯器: perl: 1 輸入 - > 2 2 NextState(Main 2 -E:1)V-> 3 9 Leaveloop VK/2-> A 3 toterloop(next-> 8 last-> 9 ...程式設計 發佈於2025-04-05
 -
 如何使用替換指令在GO MOD中解析模塊路徑差異?在使用GO MOD時,在GO MOD 中克服模塊路徑差異時,可能會遇到衝突,其中可能會遇到一個衝突,其中3派對軟件包將另一個帶有導入套件的path package the Imptioned package the Imptioned package the Imported tocted pac...程式設計 發佈於2025-04-05
 -
 如何在其容器中為DIV創建平滑的左右CSS動畫?通用CSS動畫,用於左右運動 ,我們將探索創建一個通用的CSS動畫,以向左和右移動DIV,從而到達其容器的邊緣。該動畫可以應用於具有絕對定位的任何div,無論其未知長度如何。 問題:使用左直接導致瞬時消失 更加流暢的解決方案:混合轉換和左 [並實現平穩的,線性的運動,我們介紹了線性的轉換。...程式設計 發佈於2025-04-05
 -
 哪種在JavaScript中聲明多個變量的方法更可維護?在JavaScript中聲明多個變量:探索兩個方法在JavaScript中,開發人員經常遇到需要聲明多個變量的需要。對此的兩種常見方法是:在單獨的行上聲明每個變量: 當涉及性能時,這兩種方法本質上都是等效的。但是,可維護性可能會有所不同。 第一個方法被認為更易於維護。每個聲明都是其自己的語句,使...程式設計 發佈於2025-04-05
學習中文
- 1 走路用中文怎麼說? 走路中文發音,走路中文學習
- 2 坐飛機用中文怎麼說? 坐飞机中文發音,坐飞机中文學習
- 3 坐火車用中文怎麼說? 坐火车中文發音,坐火车中文學習
- 4 坐車用中文怎麼說? 坐车中文發音,坐车中文學習
- 5 開車用中文怎麼說? 开车中文發音,开车中文學習
- 6 游泳用中文怎麼說? 游泳中文發音,游泳中文學習
- 7 騎自行車用中文怎麼說? 骑自行车中文發音,骑自行车中文學習
- 8 你好用中文怎麼說? 你好中文發音,你好中文學習
- 9 謝謝用中文怎麼說? 谢谢中文發音,谢谢中文學習
- 10 How to say goodbye in Chinese? 再见Chinese pronunciation, 再见Chinese learning


