Vite と Axios を使用して React で MUI ファイル アップロードを実装する方法: 包括的なガイド
Introduction
In modern web applications, file uploads play a vital role, enabling users to upload documents, images, and more, directly to a server. Implementing efficient file upload functionality can significantly enhance the user experience. In this blog, we'll explore how to create a sleek mui file upload feature using React and Material UI (MUI). React is a powerful JavaScript library for building user interfaces, while MUI is a collection of customizable React components based on Google's Material Design. We'll leverage Vite, a modern build tool, for faster development compared to traditional bundlers like Webpack. This step-by-step guide will walk you through creating a reliable file upload feature, focusing on performance and user experience.
Setting Up the React Project with Vite
To get started with the mui file upload project, we'll set up a React environment using Vite. If you need a more in-depth guide, check out our detailed Beginners Guide to Using Vite with React. Below are the essential steps to get you up and running:
- First, create a new React project using Vite by running the following command:
npm create vite@latest mui-file-upload
- Navigate to the project directory:
cd mui-file-upload
- Install project dependencies:
npm install
- Next, add MUI and Axios to your project:
npm install @mui/material axios
Vite offers blazing-fast build times, hot module replacement, and a simpler configuration than Webpack. These benefits make it an excellent choice when building performance-sensitive features like a mui file upload. Now, let's dive into creating the file upload functionality!
Creating the File Upload Button with MUI
To start building our mui file upload feature, we'll create a simple and user-friendly upload button using Material UI (MUI). The Button component from MUI is versatile and easy to style, making it perfect for creating an intuitive file upload button.
First, let's import the Button component and set up a basic button for file uploads:
import React from 'react';
import Button from '@mui/material/Button';
export default function UploadButton() {
return (
);
}
Here, the Button component uses the variant="contained" prop for a filled style, and the color="primary" prop to match your theme's primary color. The component="label" prop makes the button a label for the hidden element, triggering file selection when clicked.
To make your button stand out, you can customize it using MUI’s powerful theming capabilities. MUI allows you to adjust the button’s color, size, and even add icons. Here's an example of a more customized button:
}
  sx={{ margin: 2, padding: '10px 20px' }}
>
  Upload
This example uses startIcon to add an icon at the beginning of the button, and the sx prop for inline styling. The ability to quickly change button styles makes MUI an ideal choice for creating visually appealing mui file upload components.
Building the File Upload Form
Now, let's create a form component for our mui file upload feature using MUI’s TextField. The TextField component can be customized to handle various input types, but in this case, we’ll focus on file uploads.
Here’s a basic form setup with a file input field:
import React from 'react';
import Button from '@mui/material/Button';
import TextField from '@mui/material/TextField';

export default function UploadForm() {
  return (
);
}
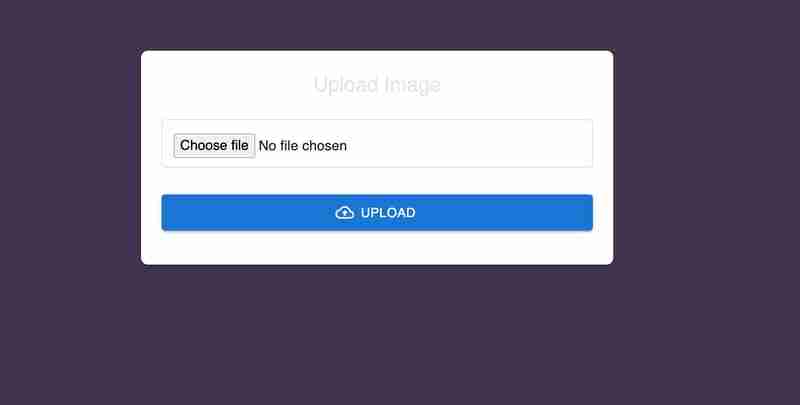
and after some styles it will look like this

Using the type="file" attribute is crucial for file uploads, ensuring that the user can select files from their local system. You can add validation through attributes like accept, which limits file types (e.g., accept="image/*" allows only image files). This attention to detail improves the user experience by preventing invalid file types from being selected. The full-width TextField with proper margin also makes the form more accessible and visually appealing for the mui file upload functionality.
Handling File Upload with Axios
Uploading files efficiently is a crucial task in modern web applications, and using Axios makes this process both straightforward and manageable. In our mui file upload example, Axios takes center stage, handling the file transfer seamlessly while keeping our React app responsive.
The heart of our upload process lies in a function that triggers when the user submits the form. We use a FormData object, a native JavaScript tool, that’s perfect for handling multipart data like files. The setup is simple: the selected file is wrapped in FormData and passed to Axios, which then takes care of sending it to the server.
const handleFileUpload = async (event) => {
  event.preventDefault();
  setUploadProgress(0);
  setUploadComplete(false);

  const formData = new FormData();
  const file = event.target.elements.fileInput.files[0];
  formData.append('file', file);

  try {
    await axios.post('https://api.escuelajs.co/api/v1/files/upload', formData, {
      onUploadProgress: (progressEvent) => {
        const percentCompleted = Math.round((progressEvent.loaded * 100) / progressEvent.total);
        setUploadProgress(percentCompleted);
      },
    });
    setUploadComplete(true);
  } catch (error) {
    console.error('Error uploading file:', error);
  }
};
The logic here is clean and straightforward. We handle the file selection through an element, pass it to FormData, and let Axios do the heavy lifting. By leveraging onUploadProgress, we can keep users updated on the progress—an essential feature that makes the upload experience engaging rather than frustrating.
Beyond the mechanics, it’s wise to validate files on the client side before sending them off, ensuring that our server isn't burdened with invalid requests. Additionally, keeping the upload secure over HTTPS adds a layer of protection for sensitive data, making the mui file upload process both reliable and safe.
Implementing Progress Feedback Using MUI
Feedback during a file upload can be the difference between a confident user and a confused one. That's where MUI’s flexibility shines, allowing us to seamlessly integrate progress indicators that keep users in the loop.
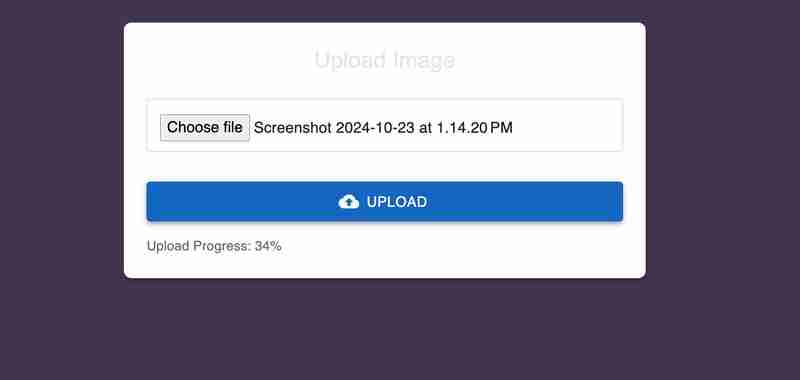
Using Axios’s onUploadProgress feature, we can dynamically update the state with the current progress percentage. MUI’s Typography component provides a straightforward yet elegant way to display this feedback, without cluttering the UI.
{uploadProgress > 0 && (

    Upload Progress: {uploadProgress}%

)}

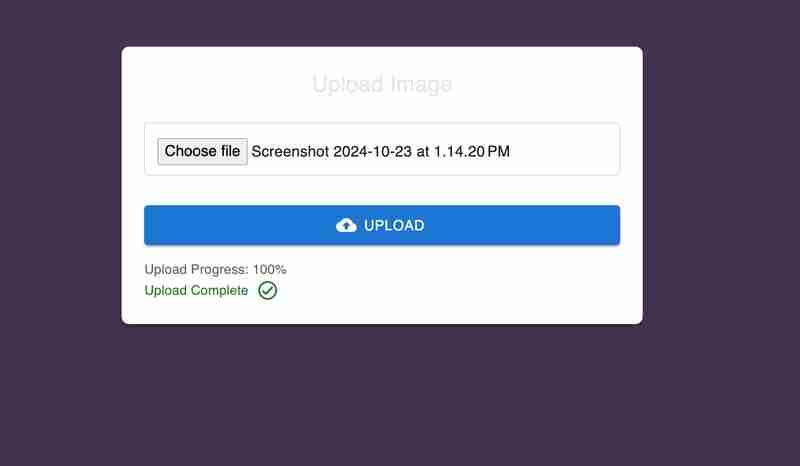
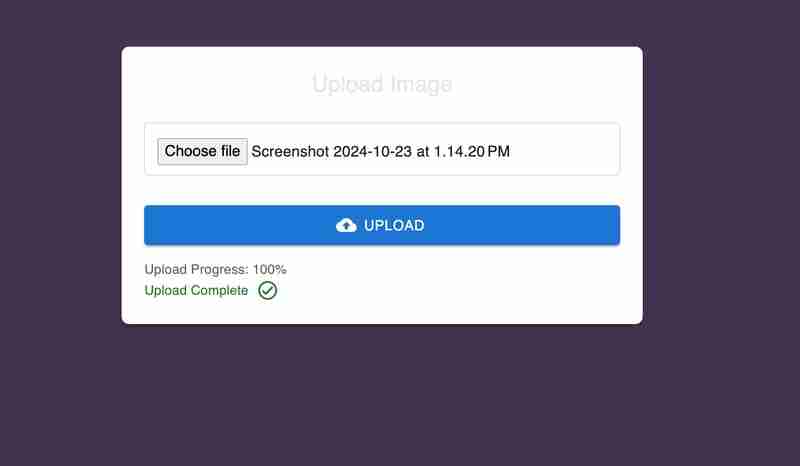
This component elegantly fades in once the upload starts, clearly displaying the percentage completed. It’s a small touch but adds a professional feel to the user experience. Similarly, when the upload completes, a confirmation message appears—celebrating a job well done:
{uploadComplete && (

    Upload Complete

)}

This combination of progress feedback and visual confirmation ensures that users are never left guessing. The dynamic update of the upload progress keeps the interaction engaging, while the success message provides closure. It’s about creating a seamless journey—from file selection to completion—where users feel in control at every step. That's the beauty of building a robust mui file upload feature with modern tools like Axios and MUI.
Error Handling and User Feedback
Handling errors during a file upload is crucial for a smooth user experience. Common issues include network disruptions, server errors, and uploading unsupported file types. React’s state management combined with Axios’s error handling makes it straightforward to manage these problems gracefully.
In our mui file upload example, error feedback is handled using MUI's Typography component. If an upload fails, we display a user-friendly error message.
const handleFileUpload = async (event) => {
  event.preventDefault();
  setUploadProgress(0);
  setUploadComplete(false);
  setUploadError(null);

  const formData = new FormData();
  const file = event.target.elements.fileInput.files[0];
  formData.append('file', file);

  try {
    await axios.post('https://api.escuelajs.co/api/v1/files/upload', formData, {
      onUploadProgress: (progressEvent) => {
        const percentCompleted = Math.round((progressEvent.loaded * 100) / progressEvent.total);
        setUploadProgress(percentCompleted);
      },
    });
    setUploadComplete(true);
  } catch (error) {
    console.error('Error uploading file:', error);
    setUploadError('Failed to upload file. Please try again.');
  }
};
Errors are displayed dynamically using:
{uploadError && (

    {uploadError}

)}

This ensures users are kept informed of any issues, enhancing the mui file upload experience with clear, actionable feedback.
Enhancing Reusability with Custom Hooks
Custom hooks in React are a fantastic way to streamline your code and manage reusable logic. In the context of our mui file upload functionality, we can create a custom hook to encapsulate the file upload process, including error handling, progress updates, and completion status.
Here’s a custom hook that manages the core upload logic:
import { useState } from 'react';
import axios from 'axios';

const useFileUpload = () => {
  const [uploadProgress, setUploadProgress] = useState(0);
  const [uploadComplete, setUploadComplete] = useState(false);
  const [uploadError, setUploadError] = useState(null);

  const uploadFile = async (file) => {
    setUploadProgress(0);
    setUploadComplete(false);
    setUploadError(null);

    const formData = new FormData();
    formData.append('file', file);

    try {
      await axios.post('https://api.escuelajs.co/api/v1/files/upload', formData, {
        onUploadProgress: (progressEvent) => {
          const percentCompleted = Math.round((progressEvent.loaded * 100) / progressEvent.total);
          setUploadProgress(percentCompleted);
        },
      });
      setUploadComplete(true);
    } catch (error) {
      console.error('Error uploading file:', error);
      setUploadError('Failed to upload file. Please try again.');
    }
  };

  return { uploadProgress, uploadComplete, uploadError, uploadFile };
};
By using useFileUpload, you can simplify any component that handles file uploads, ensuring consistent behavior across your application. This makes the mui file upload logic more readable, maintainable, and reusable.
Creating a Higher-Order Component (HOC) for File Upload
In React, a Higher-Order Component (HOC) is a pattern that allows you to reuse component logic. An HOC is essentially a function that takes a component as an argument and returns a new component with additional features. For our mui file upload, creating an HOC allows us to abstract the file upload logic and apply it across different components effortlessly.
Here's how we can create an HOC to handle file uploads:
import React from 'react';
import useFileUpload from './useFileUpload'; // Custom hook for file upload
// Higher-Order Component for file upload
const withFileUpload = (WrappedComponent) => {
return function (props) {
const { uploadProgress, uploadComplete, uploadError, uploadFile } = useFileUpload();
const handleFileChange = (event) => {
const file = event.target.files[0];
if (file) uploadFile(file);
};
return (
This HOC wraps any component, adding upload logic to it. For example:
import React from 'react';
import withFileUpload from './withFileUpload';
function UploadInput({ onFileChange, uploadProgress, uploadComplete, uploadError }) {
return (
{uploadProgress > 0 && Progress: {uploadProgress}%
}
{uploadComplete && Upload Complete!
}
{uploadError && Error: {uploadError}
}
);
}
export default withFileUpload(UploadInput);
By using this pattern, our file upload logic is modular, reusable, and easy to maintain. It enables consistent behavior across components, minimizing duplication and making the codebase cleaner.
Conclusion
Throughout this blog, we've explored how to implement a powerful mui file upload feature using React, MUI, Vite, and Axios. We started by setting up the project, creating customizable file upload components, and adding robust error handling and progress feedback. Custom hooks and HOCs have demonstrated how to make the code modular, reusable, and easier to manage.
Using Vite, we benefited from faster builds and simplified configuration. MUI’s components provided a polished UI, while Axios’s simplicity made file handling straightforward. For the complete code, you can explore the GitHub repository where all examples are available, allowing you to experiment and extend the functionality further. Dive in, and feel free to adapt the concepts for your own projects!
-
 PHPを使用してXMLファイルから属性値を効率的に取得するにはどうすればよいですか?XMLファイルから属性値をPHP の取得します。提供されている例のような属性を含むXMLファイルを使用する場合: $xml = simplexml_load_file($file); foreach ($xml->Var[0]->attributes() as $att...プログラミング 2025-03-09に投稿
 -
 McRyptからOpenSSLに暗号化を移行し、OpenSSLを使用してMcRyptで暗号化されたデータを復号化できますか?暗号化ライブラリをMcRyptからOpenSSL にアップグレードして、暗号化ライブラリをMcRyptからOpenSLにアップグレードできますか? OpenSSLでは、McRyptで暗号化されたデータを復号化することは可能ですか? 2つの異なる投稿は矛盾する情報を提供します。もしそうなら...プログラミング 2025-03-09に投稿
 -
 PHPの配列からランダムな要素をどのように抽出しますか?配列からのランダム選択 は、配列からランダムなアイテムを取得することができます。次の配列を検討してください: $items = [523, 3452, 334, 31, 5346]; この配列からランダムなアイテムを取得するために、array_rand()関数を利用することは効果的なソリューシ...プログラミング 2025-03-09に投稿
 -
 さまざまな数の列を持つデータベーステーブルを結合するにはどうすればよいですか?異なる列とのテーブルを組み合わせた ] は、データベーステーブルを異なる列とマージしようとする場合に課題に遭遇する可能性があります。簡単な方法は、列が少ないテーブルに欠落している列にnull値を追加することです。 たとえば、表Aの2つの表Aと表Bを検討してください。表Aには、表Bよりも多く...プログラミング 2025-03-09に投稿
 -
 Microsoft Visual C ++が2フェーズテンプレートのインスタンス化を正しく実装できないのはなぜですか?Microsoft Visual Cの「壊れた」2フェーズテンプレートのインスタンス化の謎 問題声明: ユーザーは、Microsoft Visual C(MSVC)の懸念を表現する一般的な懸念を表明します。メカニズムの特定の側面は、予想どおりに動作できませんか?ただし、このチェックがテンプ...プログラミング 2025-03-09に投稿
 -
 オブジェクトフィット:IEとEdgeでカバーが失敗します、修正方法は?object-fit:カバーがIEとEDGEで失敗します。 CSSでは、一貫した画像の高さを維持するために、ブラウザ全体でシームレスに動作します。ただし、IEとEdgeでは、独特の問題が発生します。ブラウザをスケーリングすると、画像は高さをズームするのではなく幅でサイズを変更し、外観を歪め...プログラミング 2025-03-09に投稿
 -
 Firefoxバックボタンを使用すると、JavaScriptの実行が停止するのはなぜですか?navigational Historyの問題:JavaScriptは、Firefoxバックボタンを使用した後に実行を停止します firefoxユーザーは、JavaScriptスクリプトが以前の訪問ページを介して回復したときに実行されない問題に遭遇する可能性があります。この問題は、Ch...プログラミング 2025-03-09に投稿
 -
 Pythonの文字列から絵文字を削除する方法:一般的なエラーを修正するための初心者のガイド?emojisをpython emojisの除去する絵文字を削除するための提供されたPythonコードは、構文誤差が含まれているため失敗します。 Unicode文字列は、Python 2のU ''プレフィックスを使用して指定する必要があります。さらに、Re.Unicod...プログラミング 2025-03-09に投稿
 -
 \ "while(1)vs。for(;;):コンパイラの最適化はパフォーマンスの違いを排除しますか?\"while(1)vs。for(;;):速度の違いはありますか? loops? 回答: では、ほとんどの最新のコンパイラでは、(1)と(;;)。コンパイラー: perl: の両方が(1)と(;;)が同じオプコードをもたらします。 1 入力 - > 2を入力します 2 NextSt...プログラミング 2025-03-09に投稿
 -
 Java文字列に複数のサブストリングを効率的に交換するにはどうすればよいですか?java で複数のサブストリングを弦の複数のサブストリングを置き換えると、文字列内の複数のサブストリングを置き換える必要性に直面すると、弦楽列の方法を繰り返し担当するブルートのアプローチに頼ることに魅力的です。ただし、これは大きな文字列や多数の文字列を使用する場合は非効率的です。正規表...プログラミング 2025-03-09に投稿
 -
 PostgreSQLの各一意の識別子の最後の行を効率的に取得するにはどうすればよいですか?postgresql:各一意の識別子の最後の行 を抽出します。次のデータを検討してください: select distinct on (id) id, date, another_info from the_table order by id, date desc; データセット内の一...プログラミング 2025-03-09に投稿
 -
 純粋なCSSでは、複数の粘着性要素を互いに積み重ねることができますか?純粋なCSSで複数の粘着性要素を互いに積み重ねることは可能ですか?ここ: https://webthemez.com/demo/sticky-multi-header-scroll/index.html JavaScriptの実装ではなく、純粋なCSSを使用することのみです。複数の粘...プログラミング 2025-03-09に投稿
 -
 なぜ私のCSSの背景画像が現れるのですか?トラブルシューティング:css背景画像が表示されない チュートリアルの指示にもかかわらず、背景画像が読み込まれない問題に遭遇しました。画像とスタイルのシートは同じディレクトリに存在していますが、背景は空白の白いキャンバスのままです。画像ファイル名を囲む引用: background-ima...プログラミング 2025-03-09に投稿
 -
 データ挿入時の「一般エラー: 2006 MySQL サーバーが消えました」を修正するにはどうすればよいですか?レコードの挿入中に「一般エラー: 2006 MySQL サーバーが消えました」を解決する方法はじめに:MySQL データベースにデータを挿入すると、「一般エラー: 2006 MySQL サーバーが消えました。」というエラーが発生することがあります。このエラーは、通常、MySQL 構成内の 2 つの変...プログラミング 2025-03-09に投稿
中国語を勉強する
- 1 「歩く」は中国語で何と言いますか? 走路 中国語の発音、走路 中国語学習
- 2 「飛行機に乗る」は中国語で何と言いますか? 坐飞机 中国語の発音、坐飞机 中国語学習
- 3 「電車に乗る」は中国語で何と言いますか? 坐火车 中国語の発音、坐火车 中国語学習
- 4 「バスに乗る」は中国語で何と言いますか? 坐车 中国語の発音、坐车 中国語学習
- 5 中国語でドライブは何と言うでしょう? 开车 中国語の発音、开车 中国語学習
- 6 水泳は中国語で何と言うでしょう? 游泳 中国語の発音、游泳 中国語学習
- 7 中国語で自転車に乗るってなんて言うの? 骑自行车 中国語の発音、骑自行车 中国語学習
- 8 中国語で挨拶はなんて言うの? 你好中国語の発音、你好中国語学習
- 9 中国語でありがとうってなんて言うの? 谢谢中国語の発音、谢谢中国語学習
- 10 How to say goodbye in Chinese? 再见Chinese pronunciation, 再见Chinese learning


