 Page de garde > La programmation > Créez une application Web avec Oats~i – Fragments de leçon, routage et itinéraires par défaut
Créez une application Web avec Oats~i – Fragments de leçon, routage et itinéraires par défaut
Today, we’re not talking theory or starter projects. We’re building our very own, first ever, Oats~i web app in a tutorial.
If you’re reading this for the first time, briefly check out the start of the “Build a Web with Oats~i” series to learn what Oats~i is, a bit of how it works and how to set it up in your frontend development environment.
In this tutorial, we’re going to build our very own Oats~i web app that will have two pages, one where we’ll show random cat pictures and another where we’ll search and show movies based on titles, all using publicly available APIs.
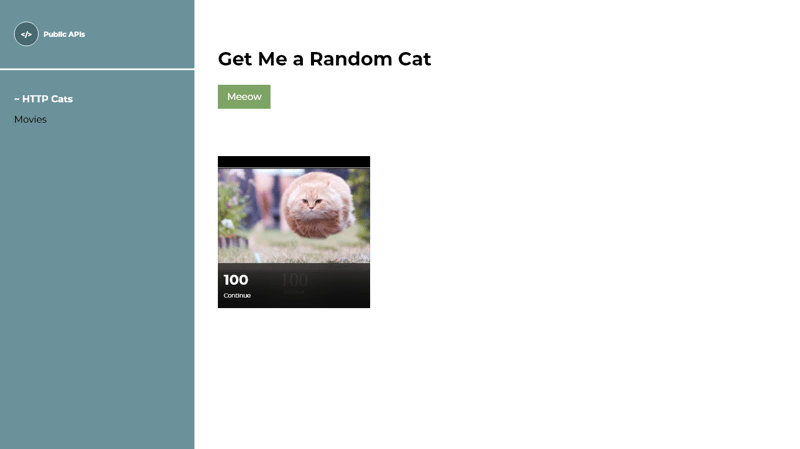
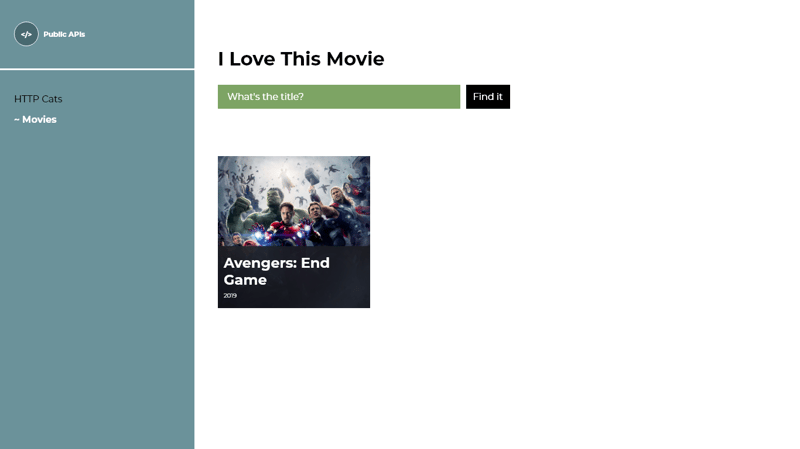
However, with so much to learn, we’ll be taking things one step at a time. So, in lesson 1, our objective is to set up our routing and fragments and showcase how to set up a default route.
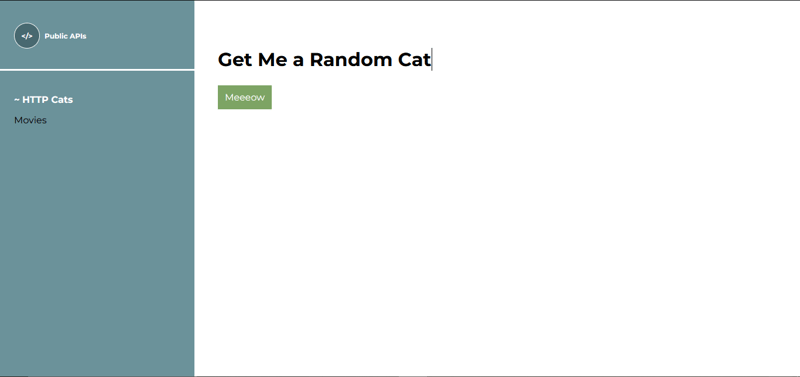
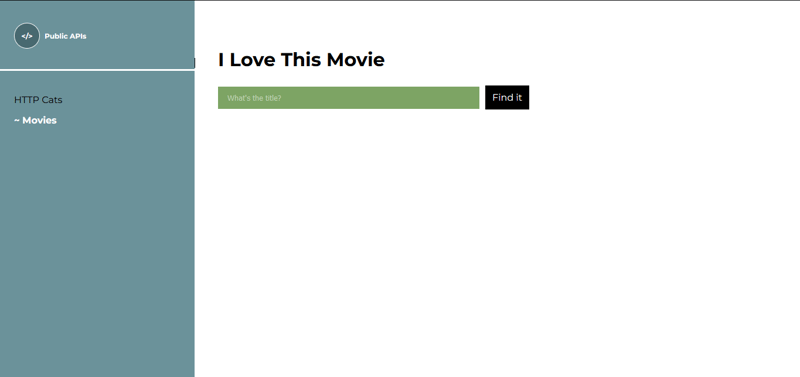
Our final project for today’s lesson will look something like this.
Note:
If you want to run the final code before we get started, or want to follow along directly, find the source code here: https://github.com/Ian-Cornelius/Oats-i-Lesson-1---Fragments-Routes-and-Default-Route
Clone the repo, navigate to the project’s root folder, open the terminal, then run
npm install
Wait for the installation to complete, then run
npm run dev
Open the url given in the terminal in your browser, navigate around, then follow along.
Also, in this whole series, I’ll assume you’re familiar with html and css in general, to ensure we only stick to the bits of code that matter when creating an Oats~i web app. There are no advanced HTML or CSS knowledge needed to get started with Oats~i. Just the basics.
Also, I assume you have node and npm installed already.
Now, let’s dive in!
Setting Up
We’ll quickly set up our project using the Oats~i cli. Create a new folder where you want to run Oats~i, navigate to it, open the terminal, then run
npx oats-i-cli
Follow the prompts and wait for the installation to complete.
You’ve just set up a complete Oats~i development environment. Now let’s get to deleting and editing the files in the starter project that we don’t need.
Deleting Files
First, navigate to src -> app -> index -> assets and delete all files under that folder.
Then, navigate to src -> app -> fragments and delete the about and home folders.
Create the Cats and Movies Fragments
Oats~i renders views or pages primarily through a fragment system. A fragment is basically a view unit, comprising of components or elements necessary to show visual detail or data.
Let’s take the case of our tutorial project.
We’ll have a page where a user can click on a button and have random cat images shown to them based on randomly selected http codes, using the http-cat API. This will be the home page or “/” route.
On the other page, the user will have a search bar and button where they can input a movie title and search for it using the movies API. This is the movies page or “/movies” route.
We want the user to be able to navigate between these two pages, with the right view being shown when in the home page or “/” route and movies page or “/movies” route respectively.
These views are our fragments. Here’s a visualization to help make this concept clearer.
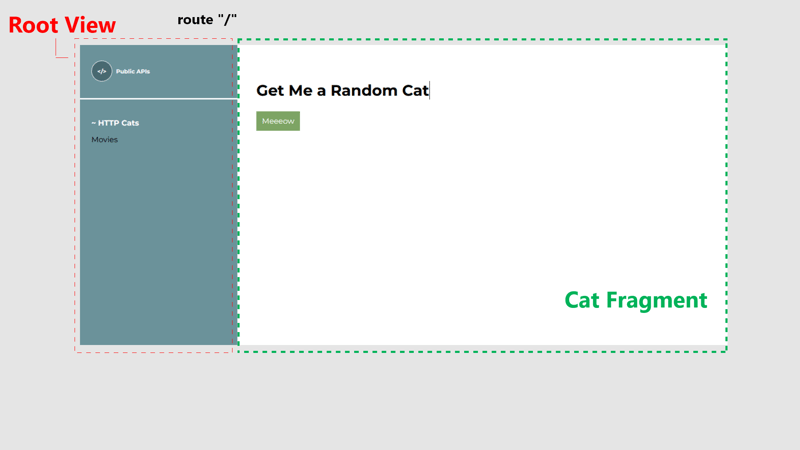
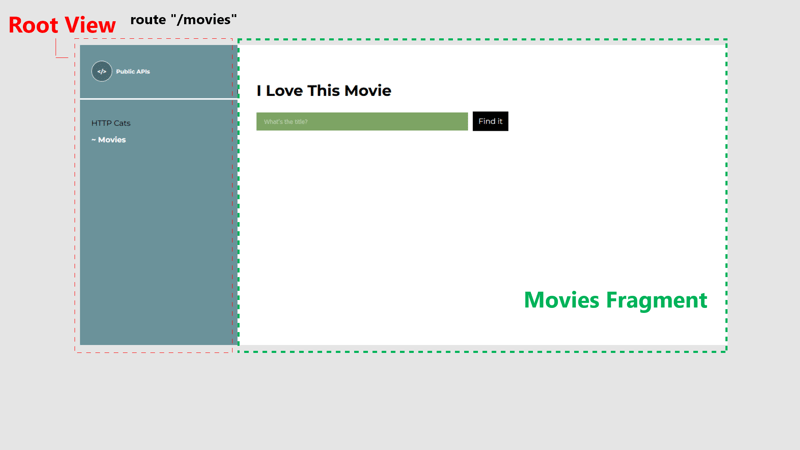
By this logic, our Oats~i web app for this project will have two fragments. Let’s create these two, each having its own folder where its complete code is contained.
The Cats Fragment Folder
Navigate to src -> app -> fragments then create a new folder named “http-cats”. This folder will hold the source code for the http-cats fragment in our Oats~i app, shown when the user navigates to the
“/” route.
Inside the “http-cats” folder, create new folders named views, styles, assets, and scripts.
The views folder will hold the view templates for our http-cats fragment. The styles folder will hold the css files, the assets folder will hold the asset files (images, etc), and the scripts folder will hold our javascript files.
Note: These folder structures are not a strict enforcement by Oats~i but rather a logical project structure that I find to work best for most cases.
Now, let’s write the JavaScript source file that will actually render our http-cats fragment.
Write the Http-Cats Fragment Source File
Inside the scripts folder, create a new file named http_cats_main_fragment.js. Paste the following code inside it:
//@ts-check
//import styles
import "../styles/http_cats.css";

import AppFragmentBuilder from "oats-i/fragments/builder/AppFragmentBuilder";
import AppMainFragment from "oats-i/fragments/AppMainFragment"

class HTTPCatsMainFragment extends AppMainFragment{

    async initializeView(cb){

        //@ts-expect-error cannot find module (for view)
        const uiTemplate = require("../views/http_cats_fragment.hbs")();
        this.onViewInitSuccess(uiTemplate, cb);
    }
}

const httpCatsMainFragmentBuilder = new AppFragmentBuilder(HTTPCatsMainFragment, {

    localRoutingInfos: null,
    viewID: "http-cats-main-fragment",
});
export default httpCatsMainFragmentBuilder;
Now, let’s break it down.
Importing CSS Files (Styling)
The first line imports our css file, used to style our http-cats fragment view. Webpack handles loading this file into our final HTML file using the css loader, style loader, and html webpack plugin we’d configured before.
AppMainFragment, AppFragmentBuilder (and AppChildFragment Classes - Fragment Classes)
The next lines import the AppMainFragment class and the AppFragmentBuilder class.
When building Oats~i fragments, you’ll be extending from either of two fragment classes. These are the main fragment or child fragment class.
The main fragment is the parent fragment view of your page or route. Its content is encapsulated within a div element, given the id passed in as the viewID when instantiating the AppFragmentBuilder class. This content is then placed inside the tag which you put inside the tag.
There can only be one main fragment per route or page. Any other view that will be rendered by a fragment afterwards must be from a child fragment. You can picture it this way using a HTML markup tree.
HTTP Cats
                Movies
-
 Comment optimiser efficacement les opérations CRUD à l'aide de la méthode firstOrNew() de Laravel Eloquent ?Optimisation des opérations CRUD avec Laravel EloquentLorsque vous travaillez avec une base de données dans Laravel, il est courant d'insérer ou d...La programmation Publié le 2024-11-06
 -
 Pourquoi le remplacement des paramètres de méthode dans PHP viole-t-il des normes strictes ?Remplacement des paramètres de méthode en PHP : une violation de normes strictesDans la programmation orientée objet, le principe de substitution de L...La programmation Publié le 2024-11-06
 -
 Quelle bibliothèque PHP offre une prévention supérieure des injections SQL : PDO ou mysql_real_escape_string ?PDO vs mysql_real_escape_string : un guide completL'échappement des requêtes est crucial pour empêcher les injections SQL. Alors que mysql_real_es...La programmation Publié le 2024-11-06
 -
 Premiers pas avec React : feuille de route pour débutantHé tout le monde ! ? Je viens de commencer mon parcours dans l'apprentissage de React.js. Cela a été une aventure passionnante (et parfois stimula...La programmation Publié le 2024-11-06
 -
 Comment puis-je référencer des valeurs internes dans un objet JavaScript ?Comment référencer des valeurs internes dans un objet JavaScriptEn JavaScript, accéder aux valeurs d'un objet qui font référence à d'autres va...La programmation Publié le 2024-11-06
 -
 Un guide rapide des méthodes de liste Python avec des exemplesIntroduction Les listes Python sont polyvalentes et sont livrées avec une variété de méthodes intégrées qui aident à manipuler et à traiter e...La programmation Publié le 2024-11-06
 -
 Quand un constructeur de copie défini par l’utilisateur est-il essentiel en C++ ?Quand un constructeur de copie défini par l'utilisateur est-il requis ?Les constructeurs de copie font partie intégrante de la programmation orien...La programmation Publié le 2024-11-06
 -
 Essayez...Catch V/s Safe Assignment (?=) : une aubaine ou une malédiction pour le développement moderne ?Récemment, j'ai découvert le nouvel opérateur d'affectation sécurisée (?.=) introduit dans JavaScript, et je suis vraiment fasciné par sa simp...La programmation Publié le 2024-11-06
 -
 Comment optimiser l'analyse de fichiers à largeur fixe en Python ?Optimisation de l'analyse des fichiers à largeur fixePour analyser efficacement les fichiers à largeur fixe, on peut envisager d'exploiter le ...La programmation Publié le 2024-11-06
 -
 Poids moucheL'un des modèles structurels vise à réduire l'utilisation de la mémoire en partageant autant de données que possible avec des objets similaire...La programmation Publié le 2024-11-06
 -
 Débloquez votre maîtrise de MySQL : le cours MySQL Practice LabsÉlevez vos compétences MySQL et devenez un expert en bases de données avec le cours complet MySQL Practice Labs. Cette expérience d'apprentissage ...La programmation Publié le 2024-11-06
 -
 Portefeuille? ? Salut tout le monde, je m'appelle Nick ?? Élevez vos projets avec des solutions d'ingénierie expertes Explorez mon portfolio pour découvr...La programmation Publié le 2024-11-06
 -
 Comment corriger l'erreur « Échec de la connexion SMTP() » lors de l'envoi d'e-mails via Gmail ?Échec de la connexion SMTP : résolution de l'erreur « Échec de la connexion SMTP() »En essayant d'envoyer des e-mails à l'aide de Gmail, v...La programmation Publié le 2024-11-06
 -
 Comment concaténer plusieurs images horizontalement en Python à l'aide de Pillow ?Concaténation d'images horizontalement avec PythonLa combinaison de plusieurs images horizontalement est une tâche courante dans le traitement d&#...La programmation Publié le 2024-11-06
Étudier le chinois
- 1 Comment dit-on « marcher » en chinois ? 走路 Prononciation chinoise, 走路 Apprentissage du chinois
- 2 Comment dit-on « prendre l’avion » en chinois ? 坐飞机 Prononciation chinoise, 坐飞机 Apprentissage du chinois
- 3 Comment dit-on « prendre un train » en chinois ? 坐火车 Prononciation chinoise, 坐火车 Apprentissage du chinois
- 4 Comment dit-on « prendre un bus » en chinois ? 坐车 Prononciation chinoise, 坐车 Apprentissage du chinois
- 5 Comment dire conduire en chinois? 开车 Prononciation chinoise, 开车 Apprentissage du chinois
- 6 Comment dit-on nager en chinois ? 游泳 Prononciation chinoise, 游泳 Apprentissage du chinois
- 7 Comment dit-on faire du vélo en chinois ? 骑自行车 Prononciation chinoise, 骑自行车 Apprentissage du chinois
- 8 Comment dit-on bonjour en chinois ? 你好Prononciation chinoise, 你好Apprentissage du chinois
- 9 Comment dit-on merci en chinois ? 谢谢Prononciation chinoise, 谢谢Apprentissage du chinois
- 10 How to say goodbye in Chinese? 再见Chinese pronunciation, 再见Chinese learning


