
How to View Multiple Worksheets Side-by-Side in Excel
 Browse:921
How to View Two Excel Worksheets Side-by-Side
View Two Worksheets in the Same Excel Workbook Side-by-Side
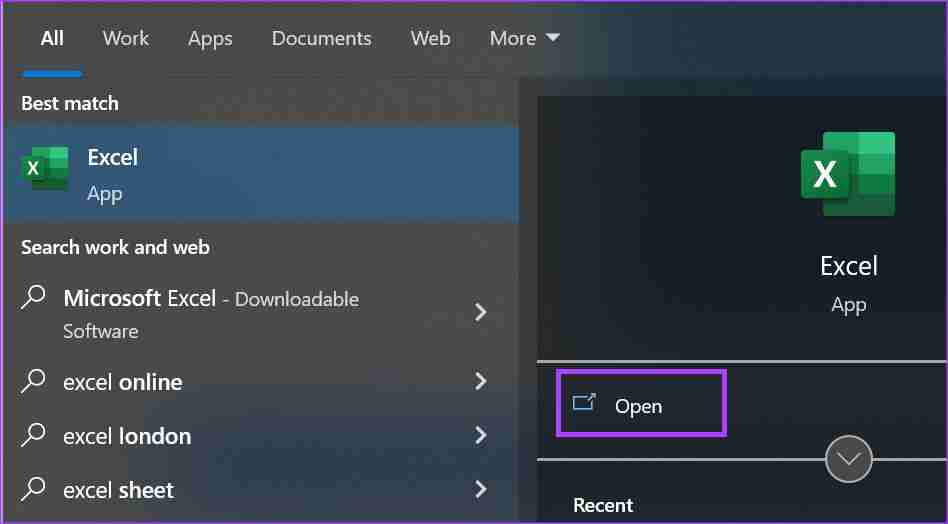
Step 1: From your PC’s Start menu or Taskbar, click the Microsoft Excel app or workbook to open it.
Step 2: On the Excel Ribbon, click the View tab.
Step 3: In the Window group of the View tab, click New Window. This will create a duplicate of your open workbook.
Step 4: Click the View tab again and View Side by Side within the Window group. This will place both workbooks side by side.

Step 5: Click the sheet you want to compare in each workbook window.
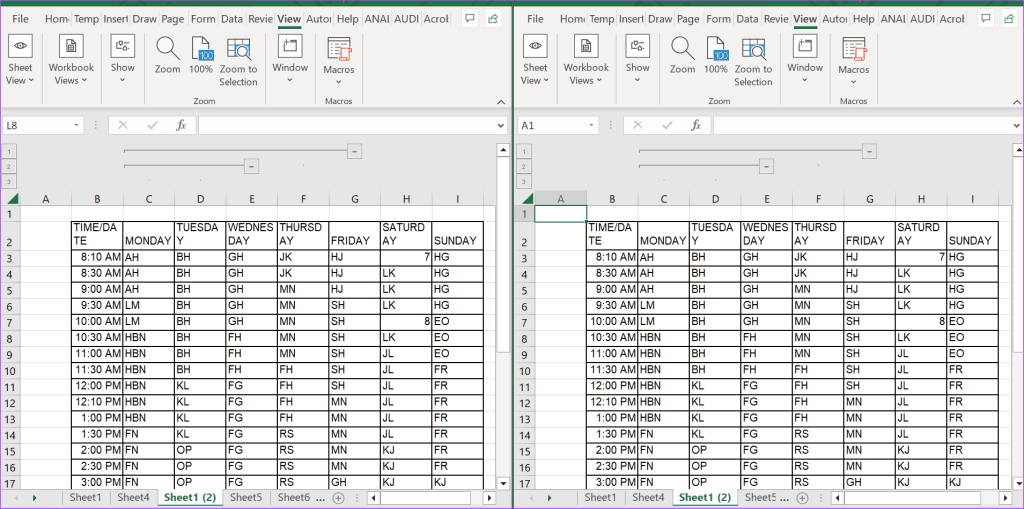
You must ensure the worksheet tabs are showing so you can view them side by side.
View Two Worksheets in Different Excel Workbooks Side-by-Side
Step 1: Open the workbooks with the worksheets that you want to place side-by-side.
Step 2: On the Excel Ribbon, click the View tab.

Step 3: Click the View Side by Side option within the Window group.
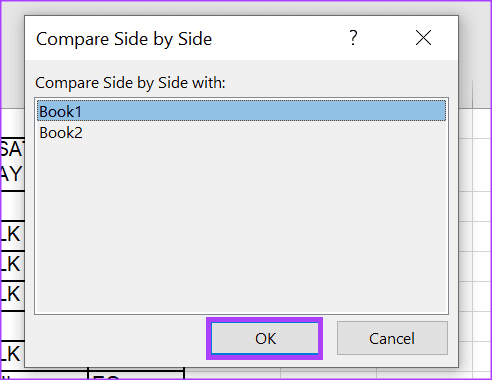
Step 4: If you have more than two workbooks open, Excel will launch the Compare Side by Side dialog box. Select the workbook you want to compare and click OK. This will place both workbooks side by side.
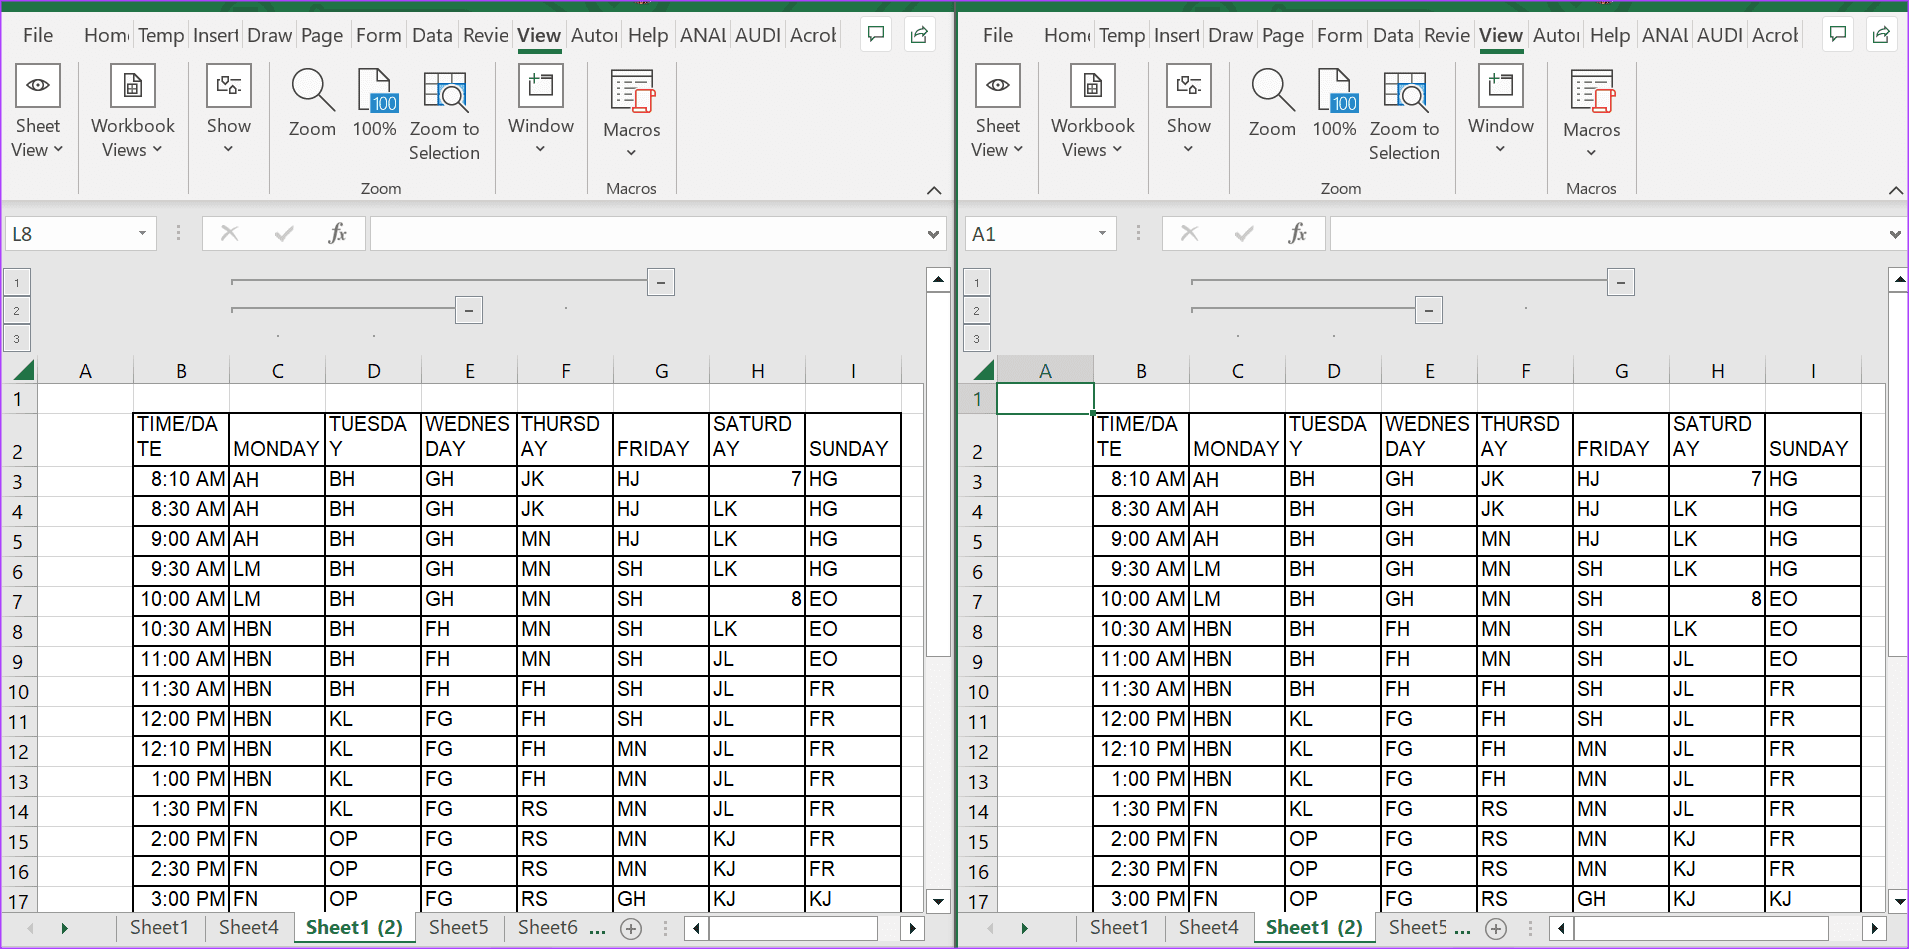
Step 5: Once done, click the sheet you want to compare in each workbook window.
Edit the View of Side-by-Side Excel Workbooks
When you enable the View Side by Side option, Excel, by default, will place both worksheets in a Tiled view. However, you can change the view of your worksheets using the steps below:
Step 1: On the Excel Ribbon, click the View tab.
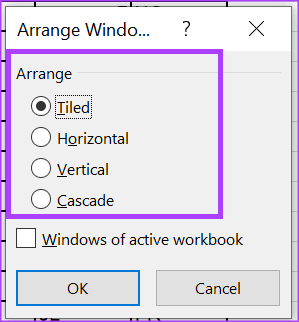
Step 2: Click the View tab, and within the Window group, click Arrange All. This will launch the Arrange Window dialog box.

Step 3: From the following options, select how you want your Excel workbooks stacked:
- Tiled: The windows are arranged as squares of equal size in the order you open them.
- Horizontal: the windows are stacked one below another.
- Vertical: the windows are placed next to each other.
- Cascade: the windows overlap one another.
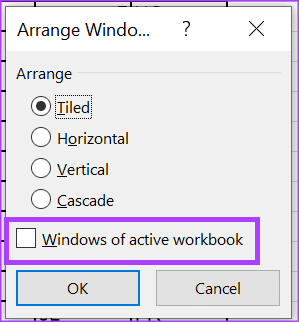
Step 4: If you want to work with multiple worksheets in a workbook, tick the box for Windows of active workbook.
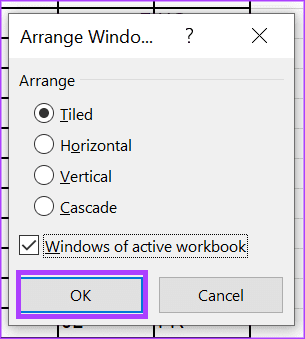
Step 5: Click OK to save your changes.
-
 How to delete your data from a person search siteThis article was last updated on February 24, 2025. Many people are unaware that a significant amount of their personal data is readily accessible on...Software tutorial Posted on 2025-04-21
 -
How to disguise an iPad as a laptopThis updated article (originally published October 31, 2019) explores how to transform your iPad into a laptop alternative using iPadOS 16 beta featur...Software tutorial Posted on 2025-04-21
-
How to clean Mac mailbox cache? How to delete it on Mac?This guide explains how to clear the Mail cache on your Mac, addressing common issues like slow performance and email loading problems. The macOS Mai...Software tutorial Posted on 2025-04-21
-
How to prioritize the allocation of WiFi to the most needed devicesModern homes usually have multiple devices connected to Wi-Fi access networks simultaneously, which often leads to bandwidth tightness, especially w...Software tutorial Posted on 2025-04-19
-
McAfee antivirus software review: Is it enough? 【Function, Price】McAfee: A Veteran Antivirus, But Is It the Best for Macs? McAfee, a long-standing and reputable name in cybersecurity, offers a robust antivirus suite...Software tutorial Posted on 2025-04-19
-
OnePlus Watch 3 is postponed to April due to funny issuesAfter the long-awaited OnePlus Watch 3 smartwatch is released, the purchase plan may require a slight adjustment. A ridiculous production problem has...Software tutorial Posted on 2025-04-19
-
Tips to make the most of the tap function on the back of your iPhoneOver the years, Apple has developed a large number of tools to make using iPhones more convenient. Although the "Tap Back" feature is dull,...Software tutorial Posted on 2025-04-18
-
Quickly get Windows 11 24H2 updates, skip the waiting queueIn the comprehensive guide, MiniTool will walk you through how to bypass Windows 11 24H2 waiting line using Group Policy and Registry. Take action if ...Software tutorial Posted on 2025-04-18
-
Tips for using mobile phone hotspots: How to avoid the surge in data trafficUsing your phone as a hotspot for your laptop on the go is convenient, but laptops are data hogs. Unlike phones, which prioritize Wi-Fi for tasks like...Software tutorial Posted on 2025-04-18
-
Which one is better compared to iPhone and Android?Choosing between iOS and Android: A Detailed Comparison The mobile phone market is dominated by two major players: iOS and Android. Both boast millio...Software tutorial Posted on 2025-04-17
-
Safari slows down on Mac? The secret to speeding up safari!Safari browser runs slowly? A must-see guide to acceleration for Mac users! Safari is one of the fastest browsers on Mac, but it is also not complete...Software tutorial Posted on 2025-04-17
-
I thought I would never need a wallet until this happenedYou’re in a nice restaurant with your beloved; perhaps both of you are enjoying a lovely steak. After a while, you raise your hand and ask the waiter ...Software tutorial Posted on 2025-04-17
-
Comparison between McAfee and MacKeeper: Which one is better? How to choose antivirus software?Choosing the right cybersecurity solution for your Mac can be tricky. This comparison of McAfee and MacKeeper helps you decide between a well-establi...Software tutorial Posted on 2025-04-17
-
7 security communication apps you should useChoosing a messaging app often boils down to what your contacts use, overlooking a crucial factor: security. We share incredibly sensitive informatio...Software tutorial Posted on 2025-04-17
-
The ultimate guide to how to label any websiteBeyond Static: Annotating Web Pages with Ease The web shouldn't be a static experience. With the right tools, you can actively engage with websit...Software tutorial Posted on 2025-04-17


Study Chinese
- 1 How do you say "walk" in Chinese? 走路 Chinese pronunciation, 走路 Chinese learning
- 2 How do you say "take a plane" in Chinese? 坐飞机 Chinese pronunciation, 坐飞机 Chinese learning
- 3 How do you say "take a train" in Chinese? 坐火车 Chinese pronunciation, 坐火车 Chinese learning
- 4 How do you say "take a bus" in Chinese? 坐车 Chinese pronunciation, 坐车 Chinese learning
- 5 How to say drive in Chinese? 开车 Chinese pronunciation, 开车 Chinese learning
- 6 How do you say swimming in Chinese? 游泳 Chinese pronunciation, 游泳 Chinese learning
- 7 How do you say ride a bicycle in Chinese? 骑自行车 Chinese pronunciation, 骑自行车 Chinese learning
- 8 How do you say hello in Chinese? 你好Chinese pronunciation, 你好Chinese learning
- 9 How do you say thank you in Chinese? 谢谢Chinese pronunciation, 谢谢Chinese learning
- 10 How to say goodbye in Chinese? 再见Chinese pronunciation, 再见Chinese learning


