
3 Ways to Adjust Resolution for Second Display on Mac
 Browse:306
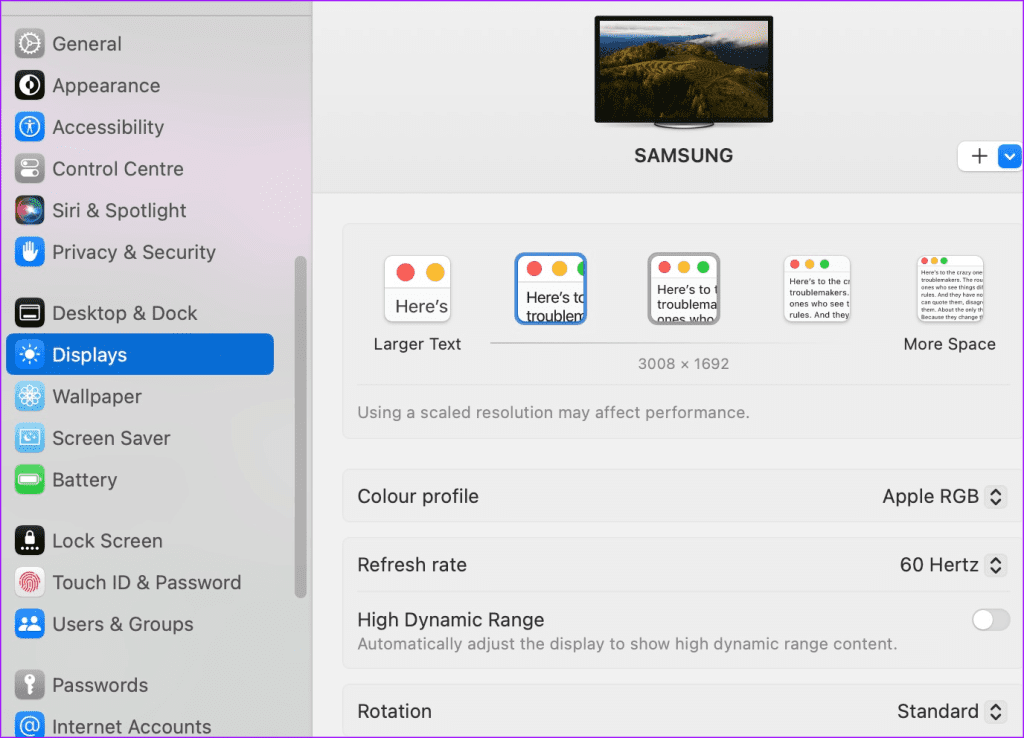
Here are the resolution options on our 4K Samsung M7 monitor (when connected to a 14-inch MacBook M1 Pro).
- 1920 x 1080
- 2560 x 1440
- 3008 x 1692
- 3360 x 1890
- 3840 x 2160
As you may already know, the system text turns smaller as the resolution increases. Even if you choose QHD or a Full-HD, the macOS system is smart enough to scale it to match your monitor resolution. For example, we connected a 4K monitor to our MacBook and selected 2,560 x 1,440 from the macOS system settings. The system scaled it to 4K resolution without skipping a beat.
Note: Using a scaled resolution may affect your Mac performance. While performance drop isn’t visible on high-end Mac models, you may notice longer loading times for older devices.
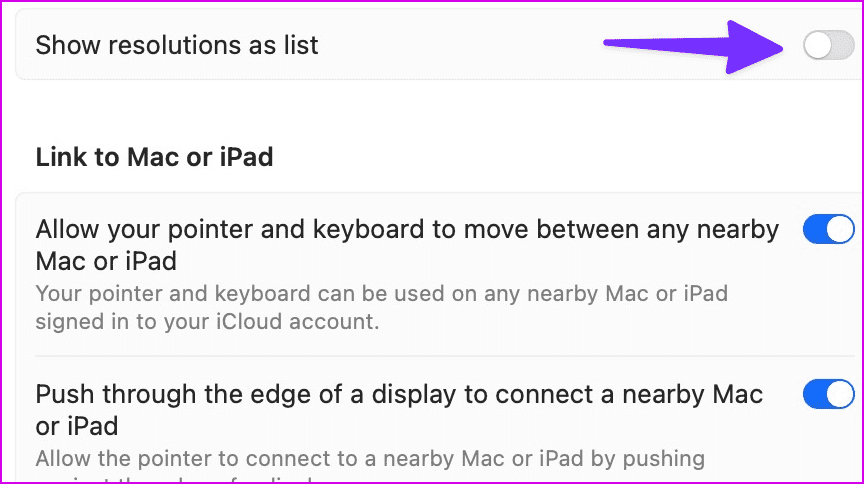
At the same time, if you want to check all the resolution options, scroll down and click Advanced within the same menu. Toggle ‘Show resolutions as list’ button and check the available options.
You can tweak the following parameter from the Displays menu besides display resolution:
- Color Profile: The system lets you select another color profile, such as Adobe RGB, Display P3, image P3, and more. Pro users can also customize a color profile on Mac.
- Refresh Rate: If you work with a high-refresh-rate monitor, make sure to tweak the refresh rate from the same menu.
- High Dynamic Range
- Rotation
Method 2: Tweak Display With BetterDisplay
The Display menu in Mac Settings is basic at best. So, if you want more advanced options, you can also use third-party apps like BetterDisplay.
Step 1: Once you’ve downloaded BetterDisplay and given it the relevant Accessibility permissions, open Accessibility Settings and enable the toggle beside BetterDisplay.
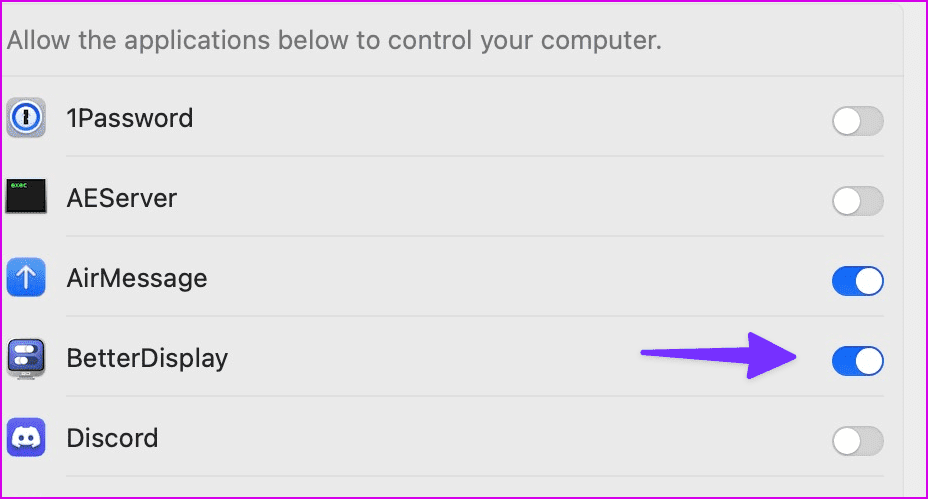
Step 2: At this stage, you’ll be required to enter your Mac password for authentication.
Step 3: You can now check the BetterDisplay menu icon at the top. Click on it. You can use the slider to tweak the second display resolution. You can also change the refresh rate, screen rotation, color profile, enable HDR mode, and more.
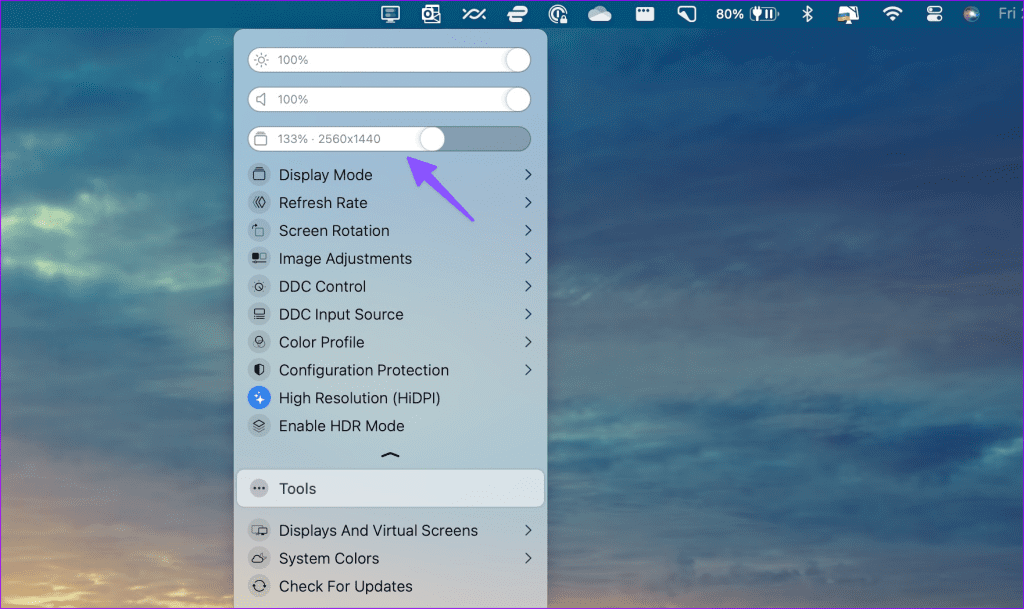
BetterDisplay offers a 2-week trial, and after which you must purchase the pro version, which costs $21.
Read Also: Best Ways to Control External Monitor Brightness From Mac
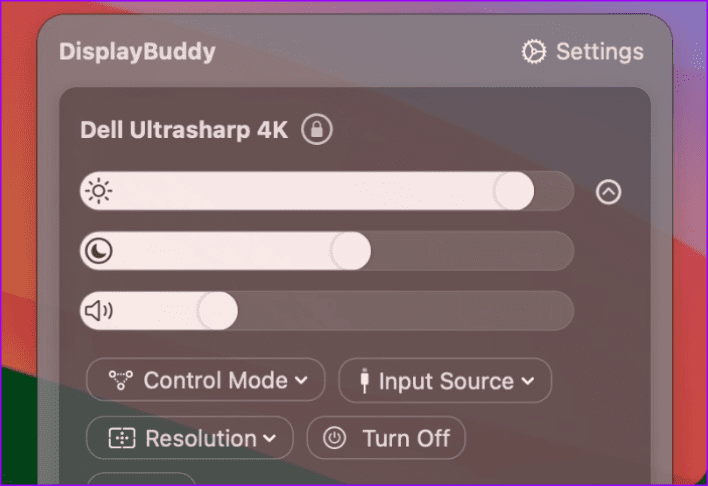
Method 3: Tweak Display With DisplayBuddy
Another capable alternative to BetterDisplay is DisplayBuddy. It one-ups BetterDisplay by offering Siri support, Mac shortcuts, a better UI, and better support for a multi-monitor setup. Additionally, you can sync controls across multiple displays, create presets to save settings on all displays, and more.
Once you set up DisplayBuddy, click the app icon in the menu bar and tweak the resolution.
At the time of writing this post, DisplayBuddy costs $18 for a one-time purchase.
-
 7 security communication apps you should useChoosing a messaging app often boils down to what your contacts use, overlooking a crucial factor: security. We share incredibly sensitive informatio...Software tutorial Posted on 2025-04-17
 -
The ultimate guide to how to label any websiteBeyond Static: Annotating Web Pages with Ease The web shouldn't be a static experience. With the right tools, you can actively engage with websit...Software tutorial Posted on 2025-04-17
-
Can't enter the BIOS after the CPU is upgraded? Practical SolutionWant to figure out the issue - Can't access BIOS after CPU upgrade? Don’t panic, this guide from MiniTool is written to tell you why this error wo...Software tutorial Posted on 2025-04-17
-
How to stop ex from appearing in your photo memoriesEveryone likes a good throwback, so both Google Photos and Apple Photos use their algorithms to resurface memories from years past. But there are some...Software tutorial Posted on 2025-04-16
-
Excel's three clever formatting techniques are quickSpreadsheets shouldn’t be dull and dry — if you want people to read them, that is. Learn a few tricks to make formatting your data easy and create Exc...Software tutorial Posted on 2025-04-16
-
Windows 11 DNS address cannot be found? 10 practical solutionsRead our disclosure page to find out how can you help MSPoweruser sustain the editorial team Read more ...Software tutorial Posted on 2025-04-16
-
Take the initiative in data protection: opt out and control your dataYou are more than just a data point. The Opt Out empowers you to regain control of your personal information. The term "surveillance" ofte...Software tutorial Posted on 2025-04-16
-
Buy power banks and be wary of this marketing lieThe truth about mobile power capacity: the huge gap between advertising capacity and actual capacity The capacity advertised by mobile power manufact...Software tutorial Posted on 2025-04-15
-
Solve the problem of startup stuck after Windows 11 KB5043145 updateThis guide offers solutions for resolving the Windows 11 startup freeze issue following the KB5043145 update. This frustrating problem, where Windows...Software tutorial Posted on 2025-04-15
-
Essential artifacts for organizing home furnishings: the best applications and gadgets清洁是一项永无止境的苦差事——新的灰尘和污垢潜伏在角落里,随时准备破坏您辛勤的成果。但是,即使您无法彻底摆脱家务,您也可以使用合适的应用程序和设备更快地整理房间。以下九款产品可以帮助您减少清洁时间,让您有更多时间去做其他事情。 Sortly 在开始擦洗之前,您需要整理散落在您家里的物品。一旦杂物不...Software tutorial Posted on 2025-04-15
-
PCI简单通讯控制器驱动下载指南Troubleshooting the PCI Simple Communications Controller Driver: A Comprehensive Guide The PCI Simple Communications Controller driver is crucial for ...Software tutorial Posted on 2025-04-15
-
All strategies for restoring unsaved OpenOffice documentsAre your OpenOffice files not saved due to unexpected circumstances such as a computer power outage? Is it possible to recover unsaved OpenOffice docu...Software tutorial Posted on 2025-04-15
-
10 Amazon features you should use我几乎所有东西都在亚马逊上购买。虽然我尽量不去想这样做会加剧我们《机器人瓦力》式的未来,但这实在太方便了,按下按钮后两天就能收到货。如果你也有同感,那就来看看这10个你真的应该使用的亚马逊功能吧。 使用亚马逊当日送达安排送货 亚马逊的魅力之一就是能够在你想到需要某样东西的时候立即购买。这样,你就能...Software tutorial Posted on 2025-04-14
-
Monster Hunter Wilderness PC communication error, quick solutionEncountering the Monster Hunter Wilds communication error S9052-TAD-W79J? This frustrating issue affects many players, but several solutions have pro...Software tutorial Posted on 2025-04-14
-
Easily transfer WhatsApp emojis to Signal and TelegramYou thought convincing your friends to swap WhatsApp for Telegram or Signal would be the hardest thing about switching messaging apps. But the...Software tutorial Posted on 2025-04-14


Study Chinese
- 1 How do you say "walk" in Chinese? 走路 Chinese pronunciation, 走路 Chinese learning
- 2 How do you say "take a plane" in Chinese? 坐飞机 Chinese pronunciation, 坐飞机 Chinese learning
- 3 How do you say "take a train" in Chinese? 坐火车 Chinese pronunciation, 坐火车 Chinese learning
- 4 How do you say "take a bus" in Chinese? 坐车 Chinese pronunciation, 坐车 Chinese learning
- 5 How to say drive in Chinese? 开车 Chinese pronunciation, 开车 Chinese learning
- 6 How do you say swimming in Chinese? 游泳 Chinese pronunciation, 游泳 Chinese learning
- 7 How do you say ride a bicycle in Chinese? 骑自行车 Chinese pronunciation, 骑自行车 Chinese learning
- 8 How do you say hello in Chinese? 你好Chinese pronunciation, 你好Chinese learning
- 9 How do you say thank you in Chinese? 谢谢Chinese pronunciation, 谢谢Chinese learning
- 10 How to say goodbye in Chinese? 再见Chinese pronunciation, 再见Chinese learning


