2 Ways to Create a Bootable Windows 11 USB With a Mac
Creating a bootable Windows 11 USB on a Mac is definitely more challenging than on a Windows PC, but it's not impossible. Let's explore a couple of different methods you can use to get the job done on your Mac.
What You Need Before Starting
You'll need the following items to create a bootable Windows 11 installer:
- A flash drive or any other form of removable media that's 8GB or larger.
- An active internet connection.
- You'll also need the latest Windows 11 ISO file. To get it, visit Microsoft's downloads page and select Windows 11 from the Download Windows 11 Disk Image (ISO) for x64 devices section. Choose your preferred language from Select the product language, then click Confirm and download the installer on your Mac by selecting 64-bit Download.
Both the methods below will completely erase your USB drive, so make sure to back up any important files first.
Use a Third-Party App to Create a Windows Bootable Disk
The simplest way to create a bootable Windows 11 USB is by using a third-party app. I recommend WinDiskWriter since it's open-source, lightweight, and has an easy-to-use interface.
Just connect your flash drive to your Mac and follow these steps to create a bootable Windows 11 disk with WinDiskWriter.
- Head over to WinDiskWriter's GitHub page and download the latest available build.
- After downloading the zip file, extract it and open the app by double-clicking it.
- Under the Target Device section, ensure the correct drive is selected. If a different drive is displayed, click the drop-down menu option and choose your USB drive.
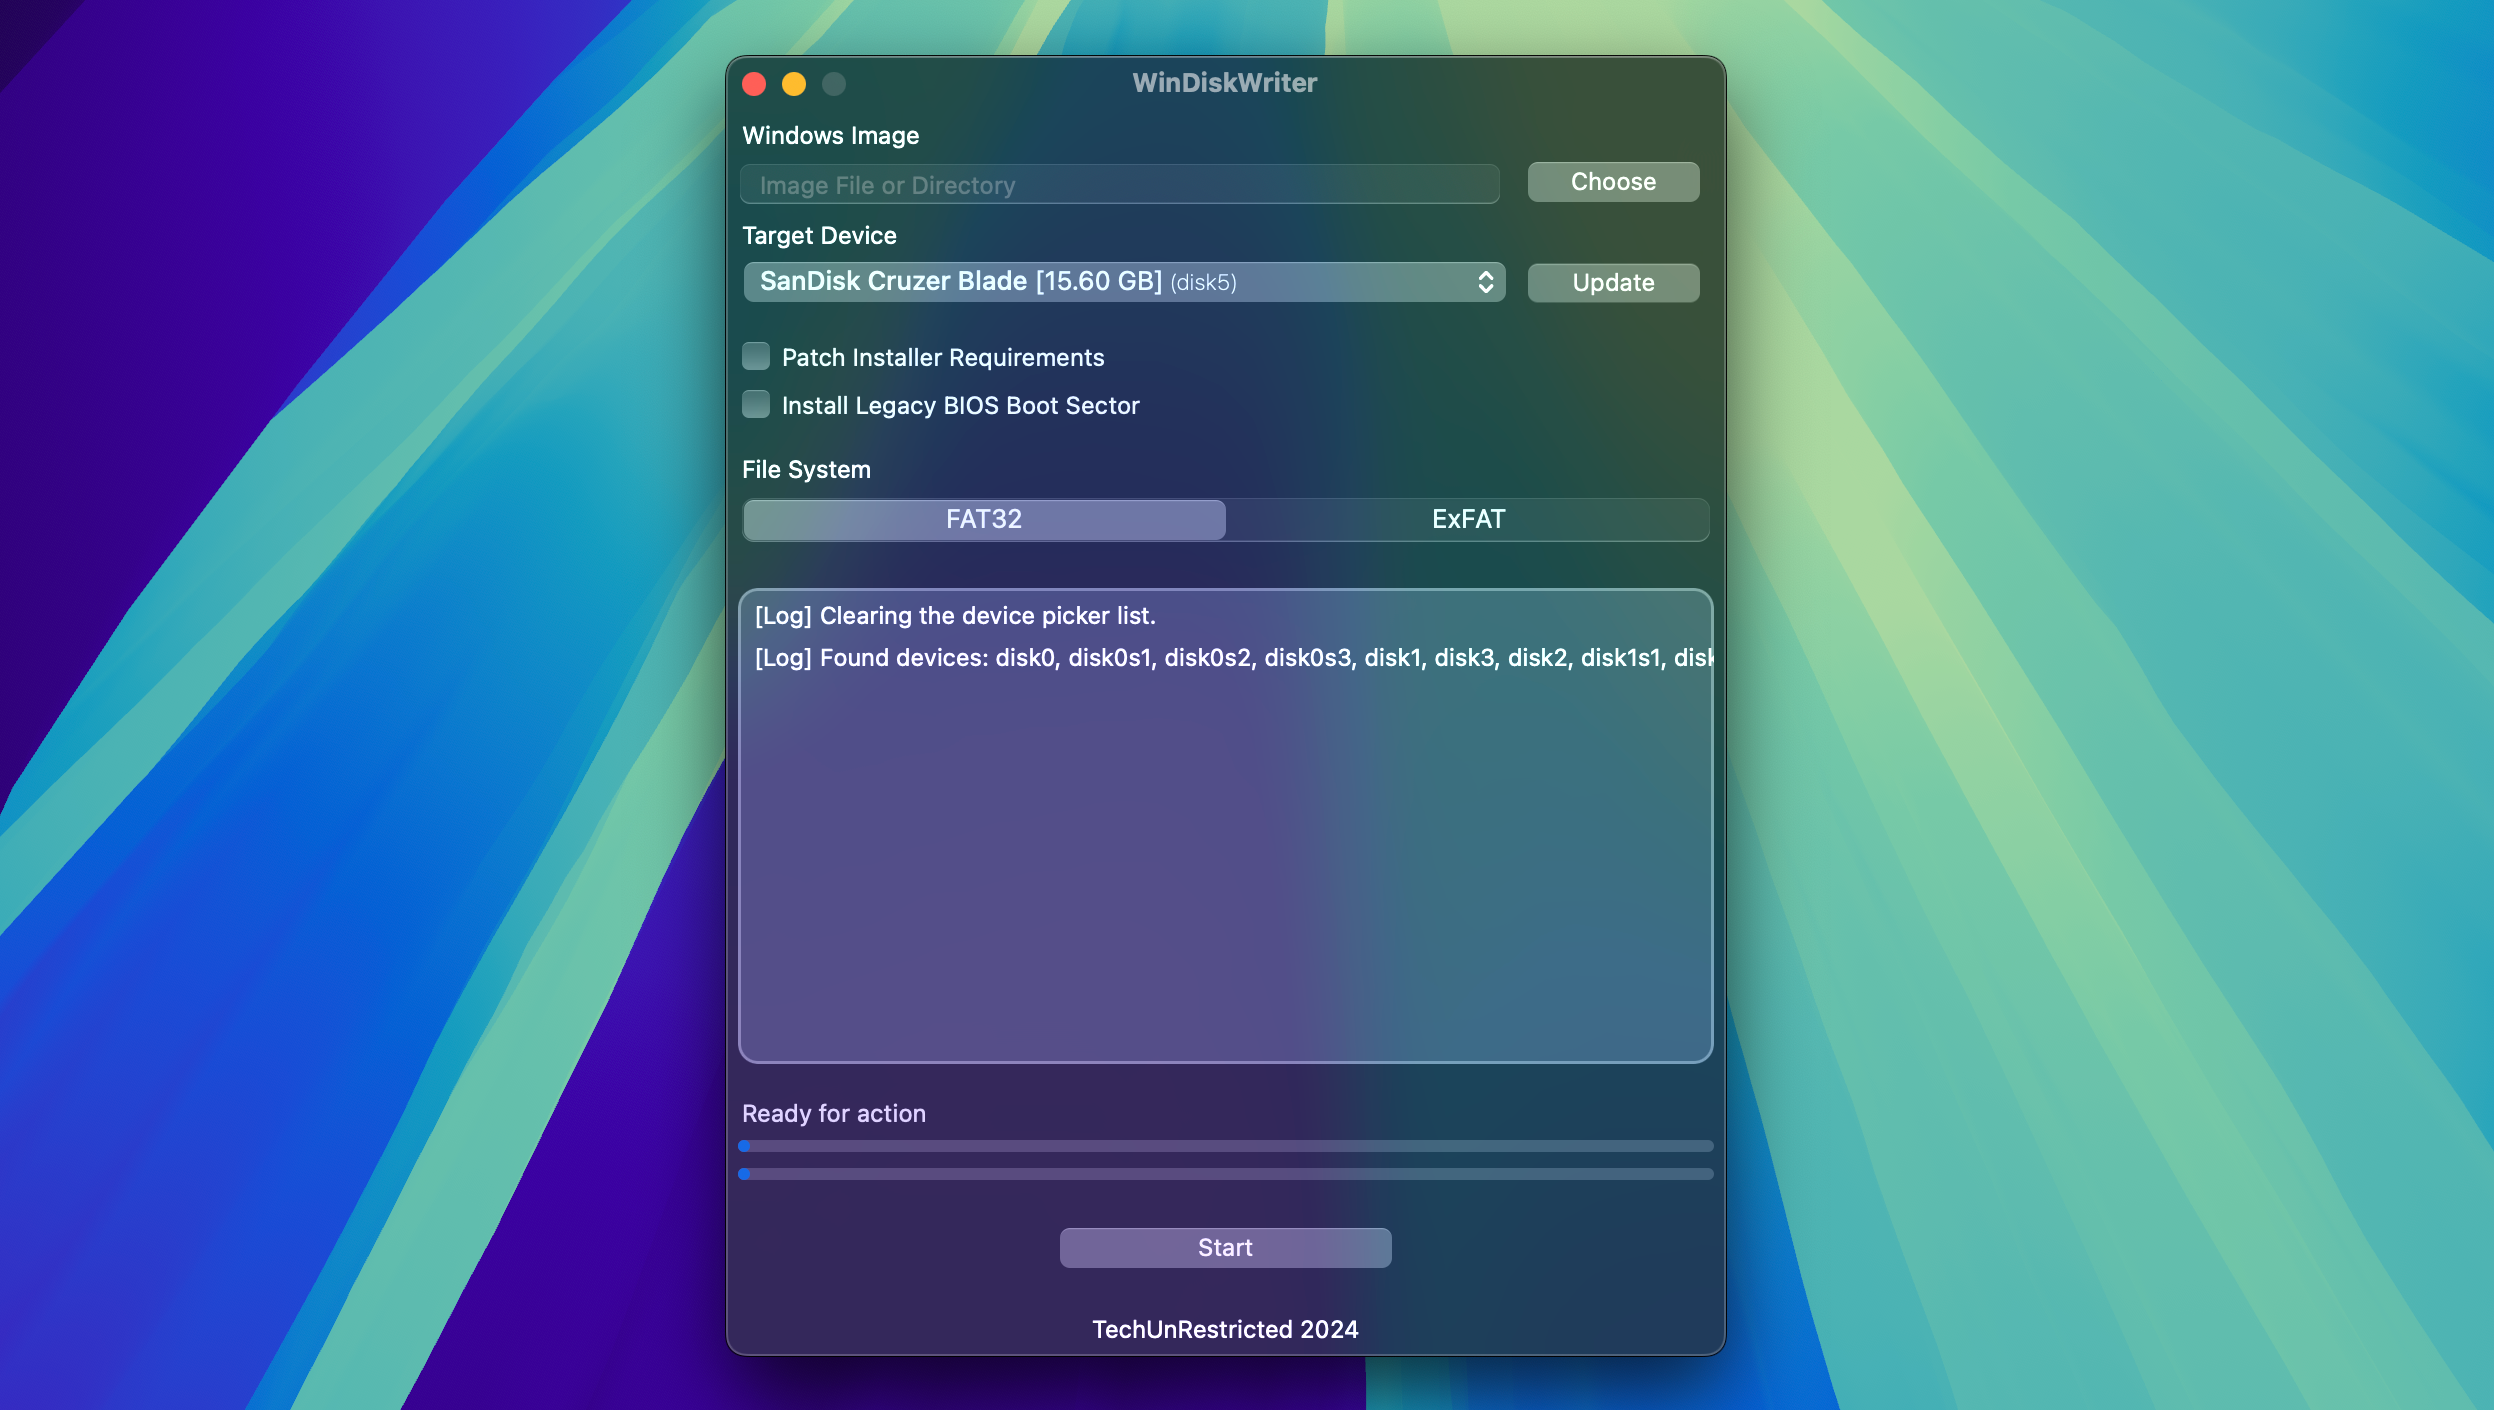
- Click Choose under the Windows Image section to open a Finder window and locate the Windows ISO file you previously downloaded. Then, click Open.
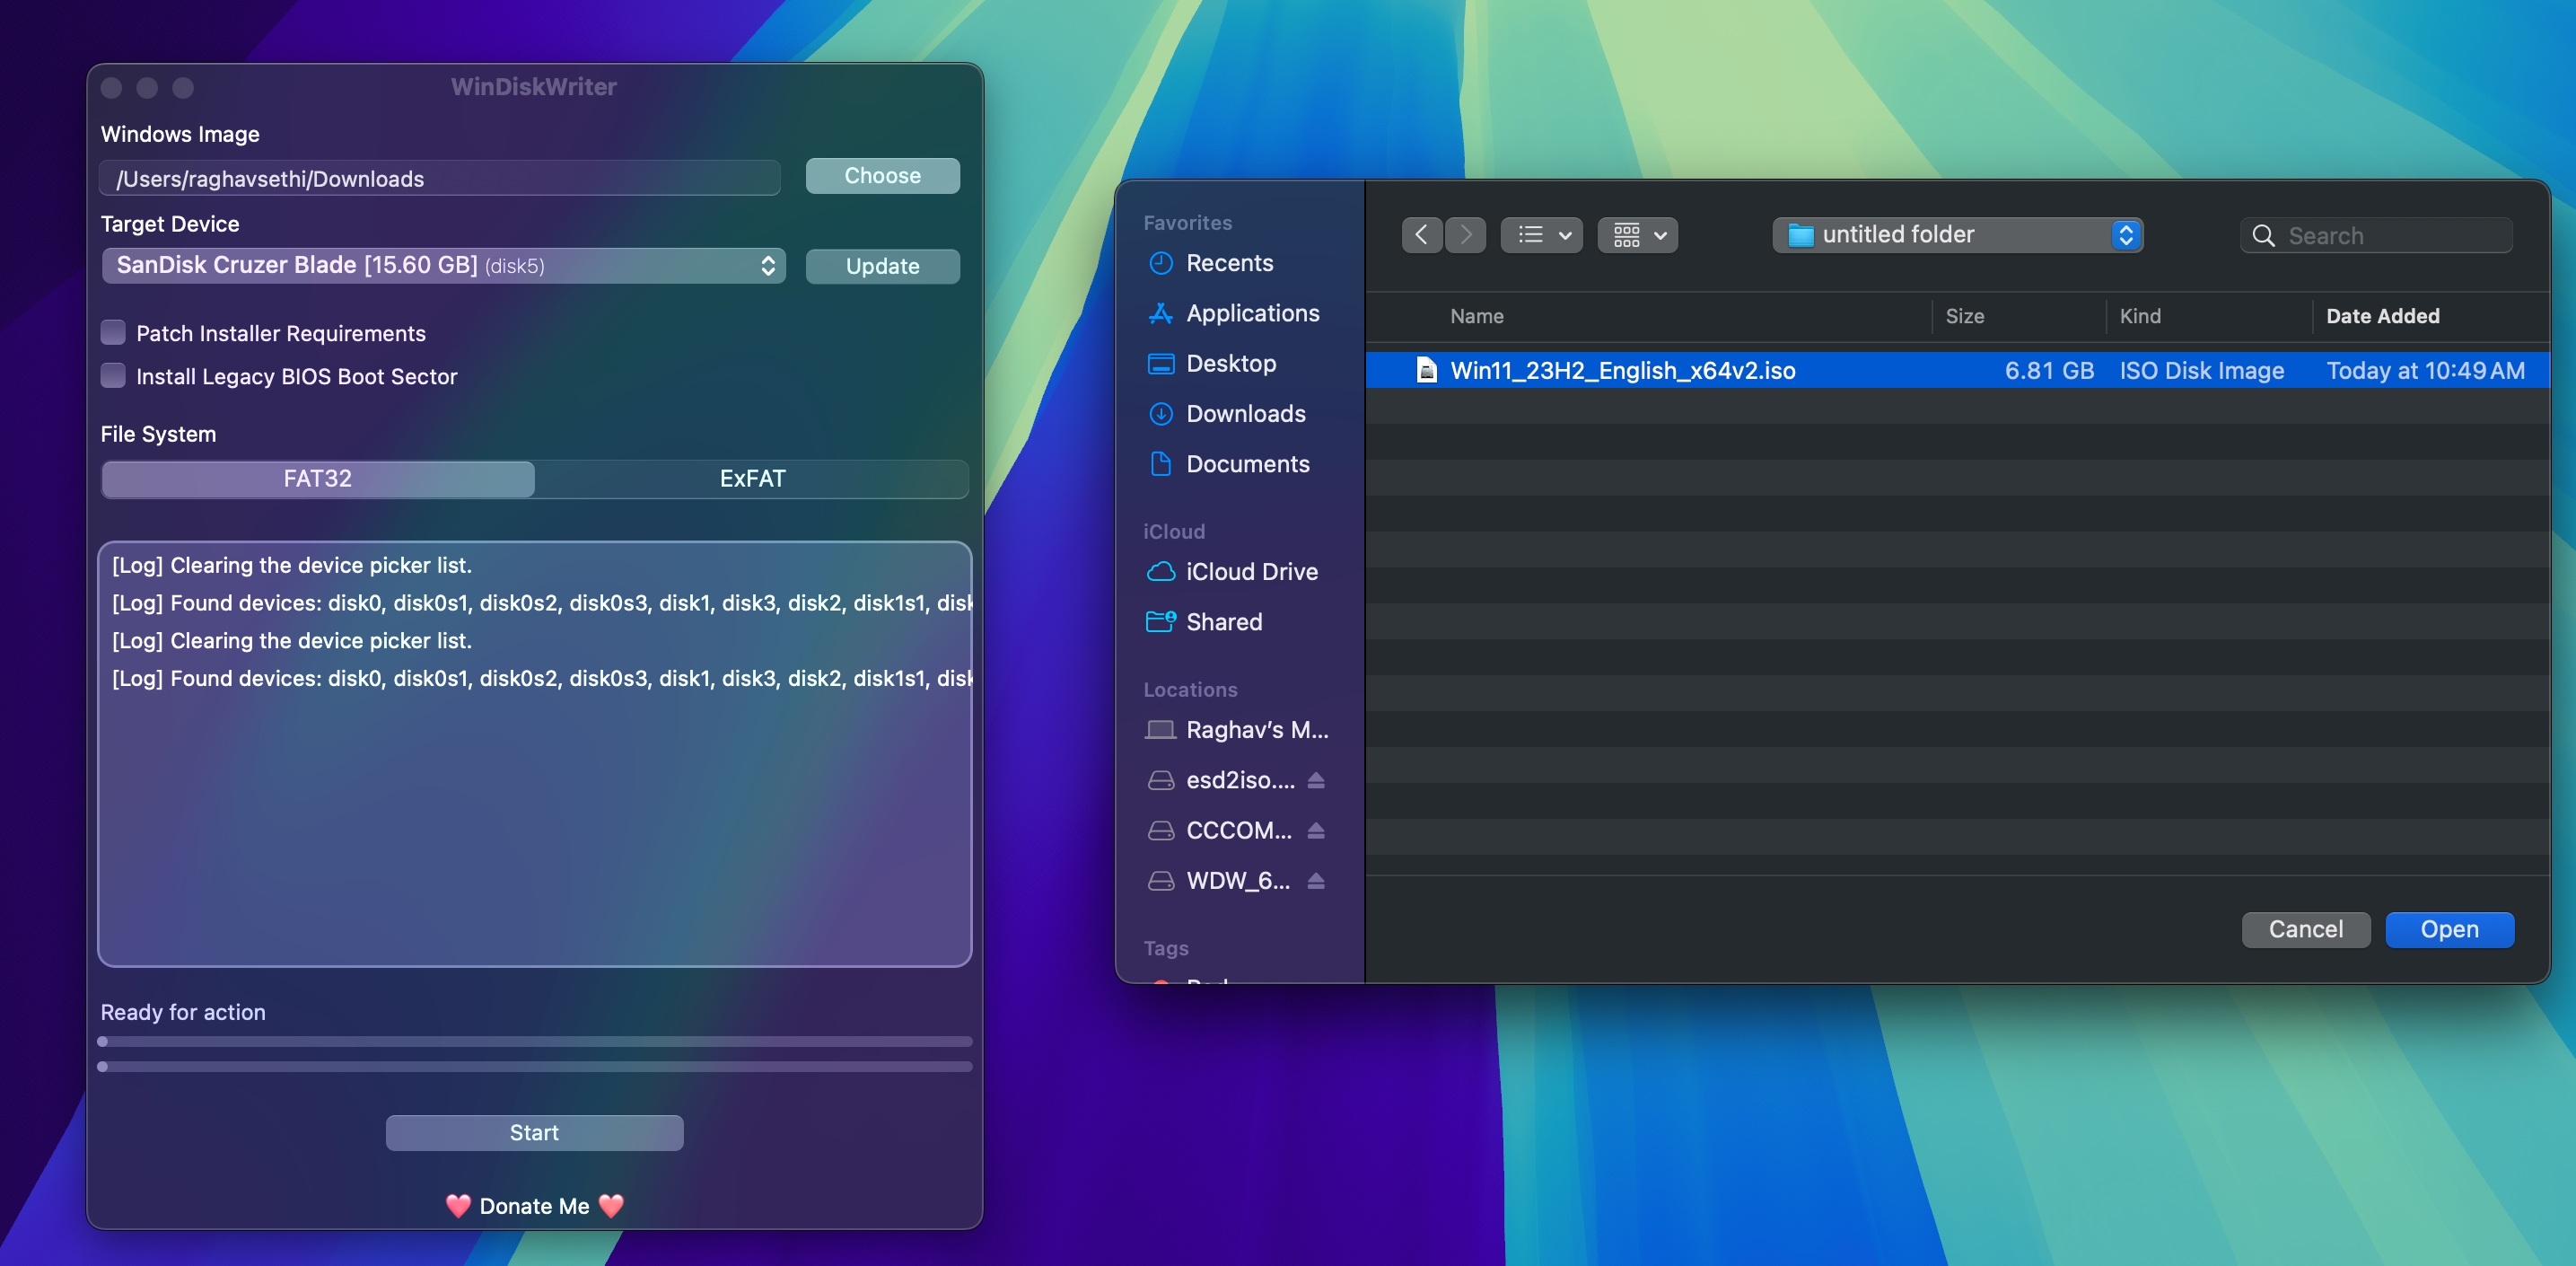
- Finally, click Start at the bottom to begin the process. Keep in mind that this might take some time, so be patient.
Once the process is complete, you can safely eject your USB drive and use it as a bootable drive on any PC.
Create a Windows 11 Bootable Disk Using Terminal
If you don't want to use a third-party app, you can manually create an installer using the Terminal app on your Mac. Before starting, make sure you install Homebrew on your Mac, as you'll need it later on.
- Open Disk Utility on your Mac using Spotlight Search, or find it in the Applications > Utilities folder.
- In the sidebar, select your USB drive, then click Erase in the top-right corner.
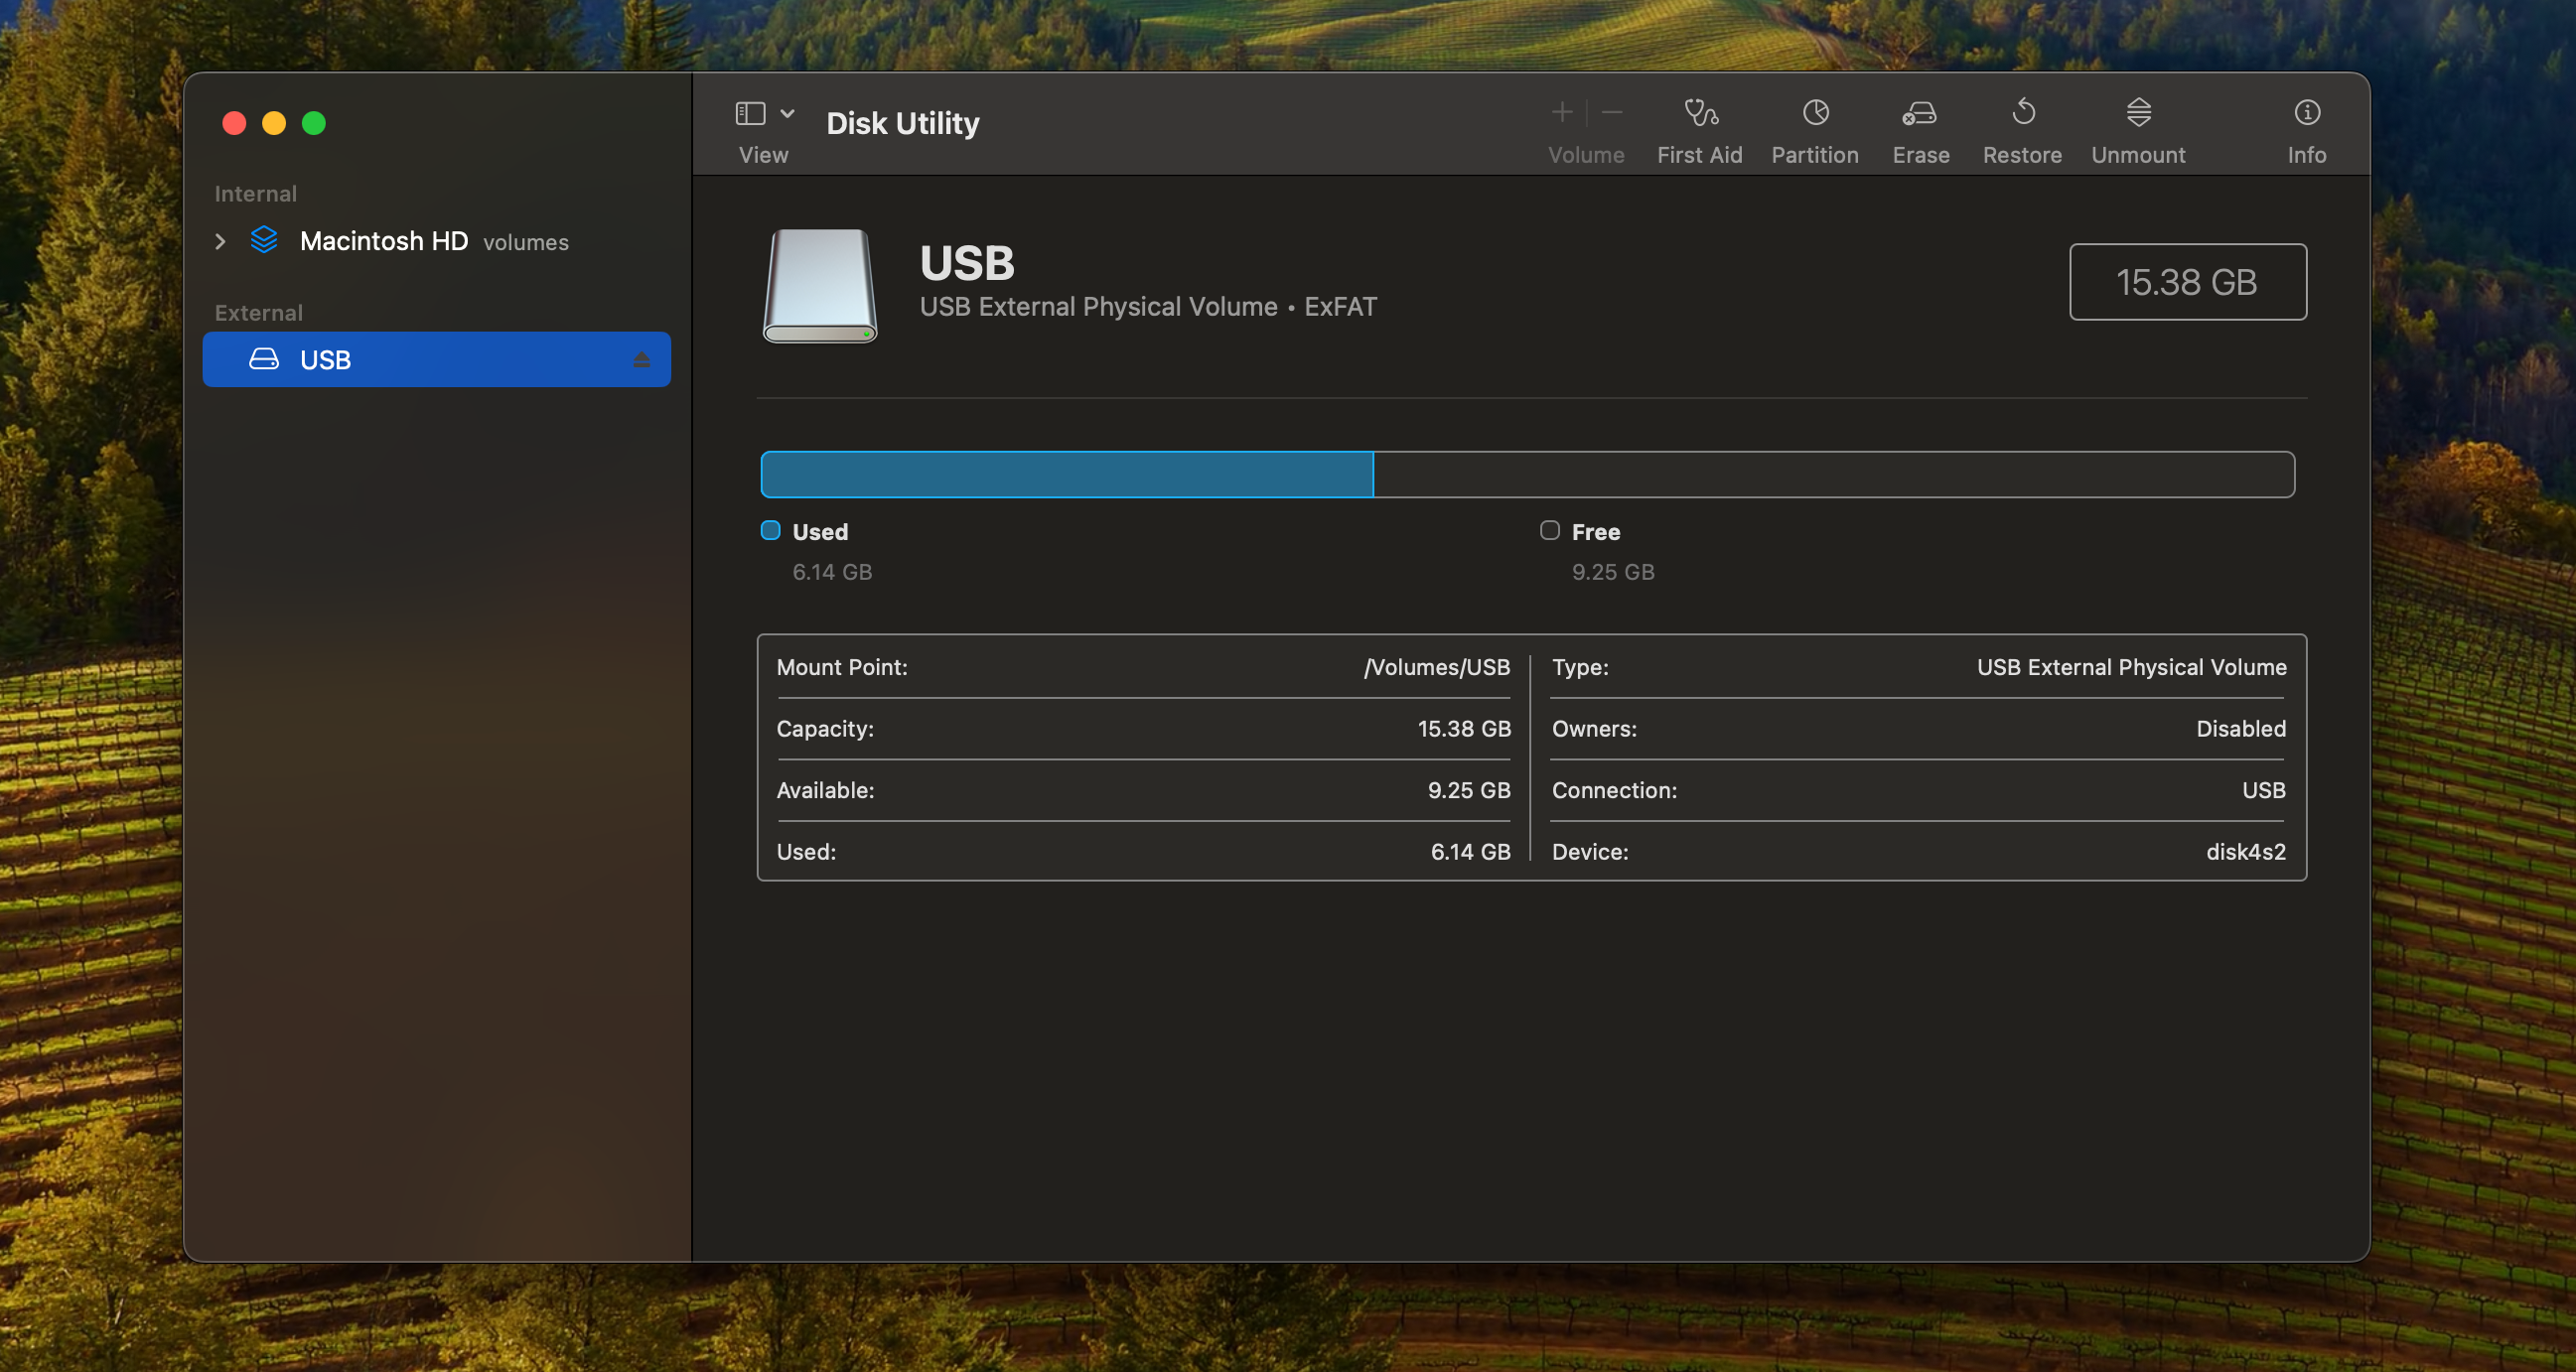
- Name the drive as per your liking, choose ExFAT as the format, and then click Erase.
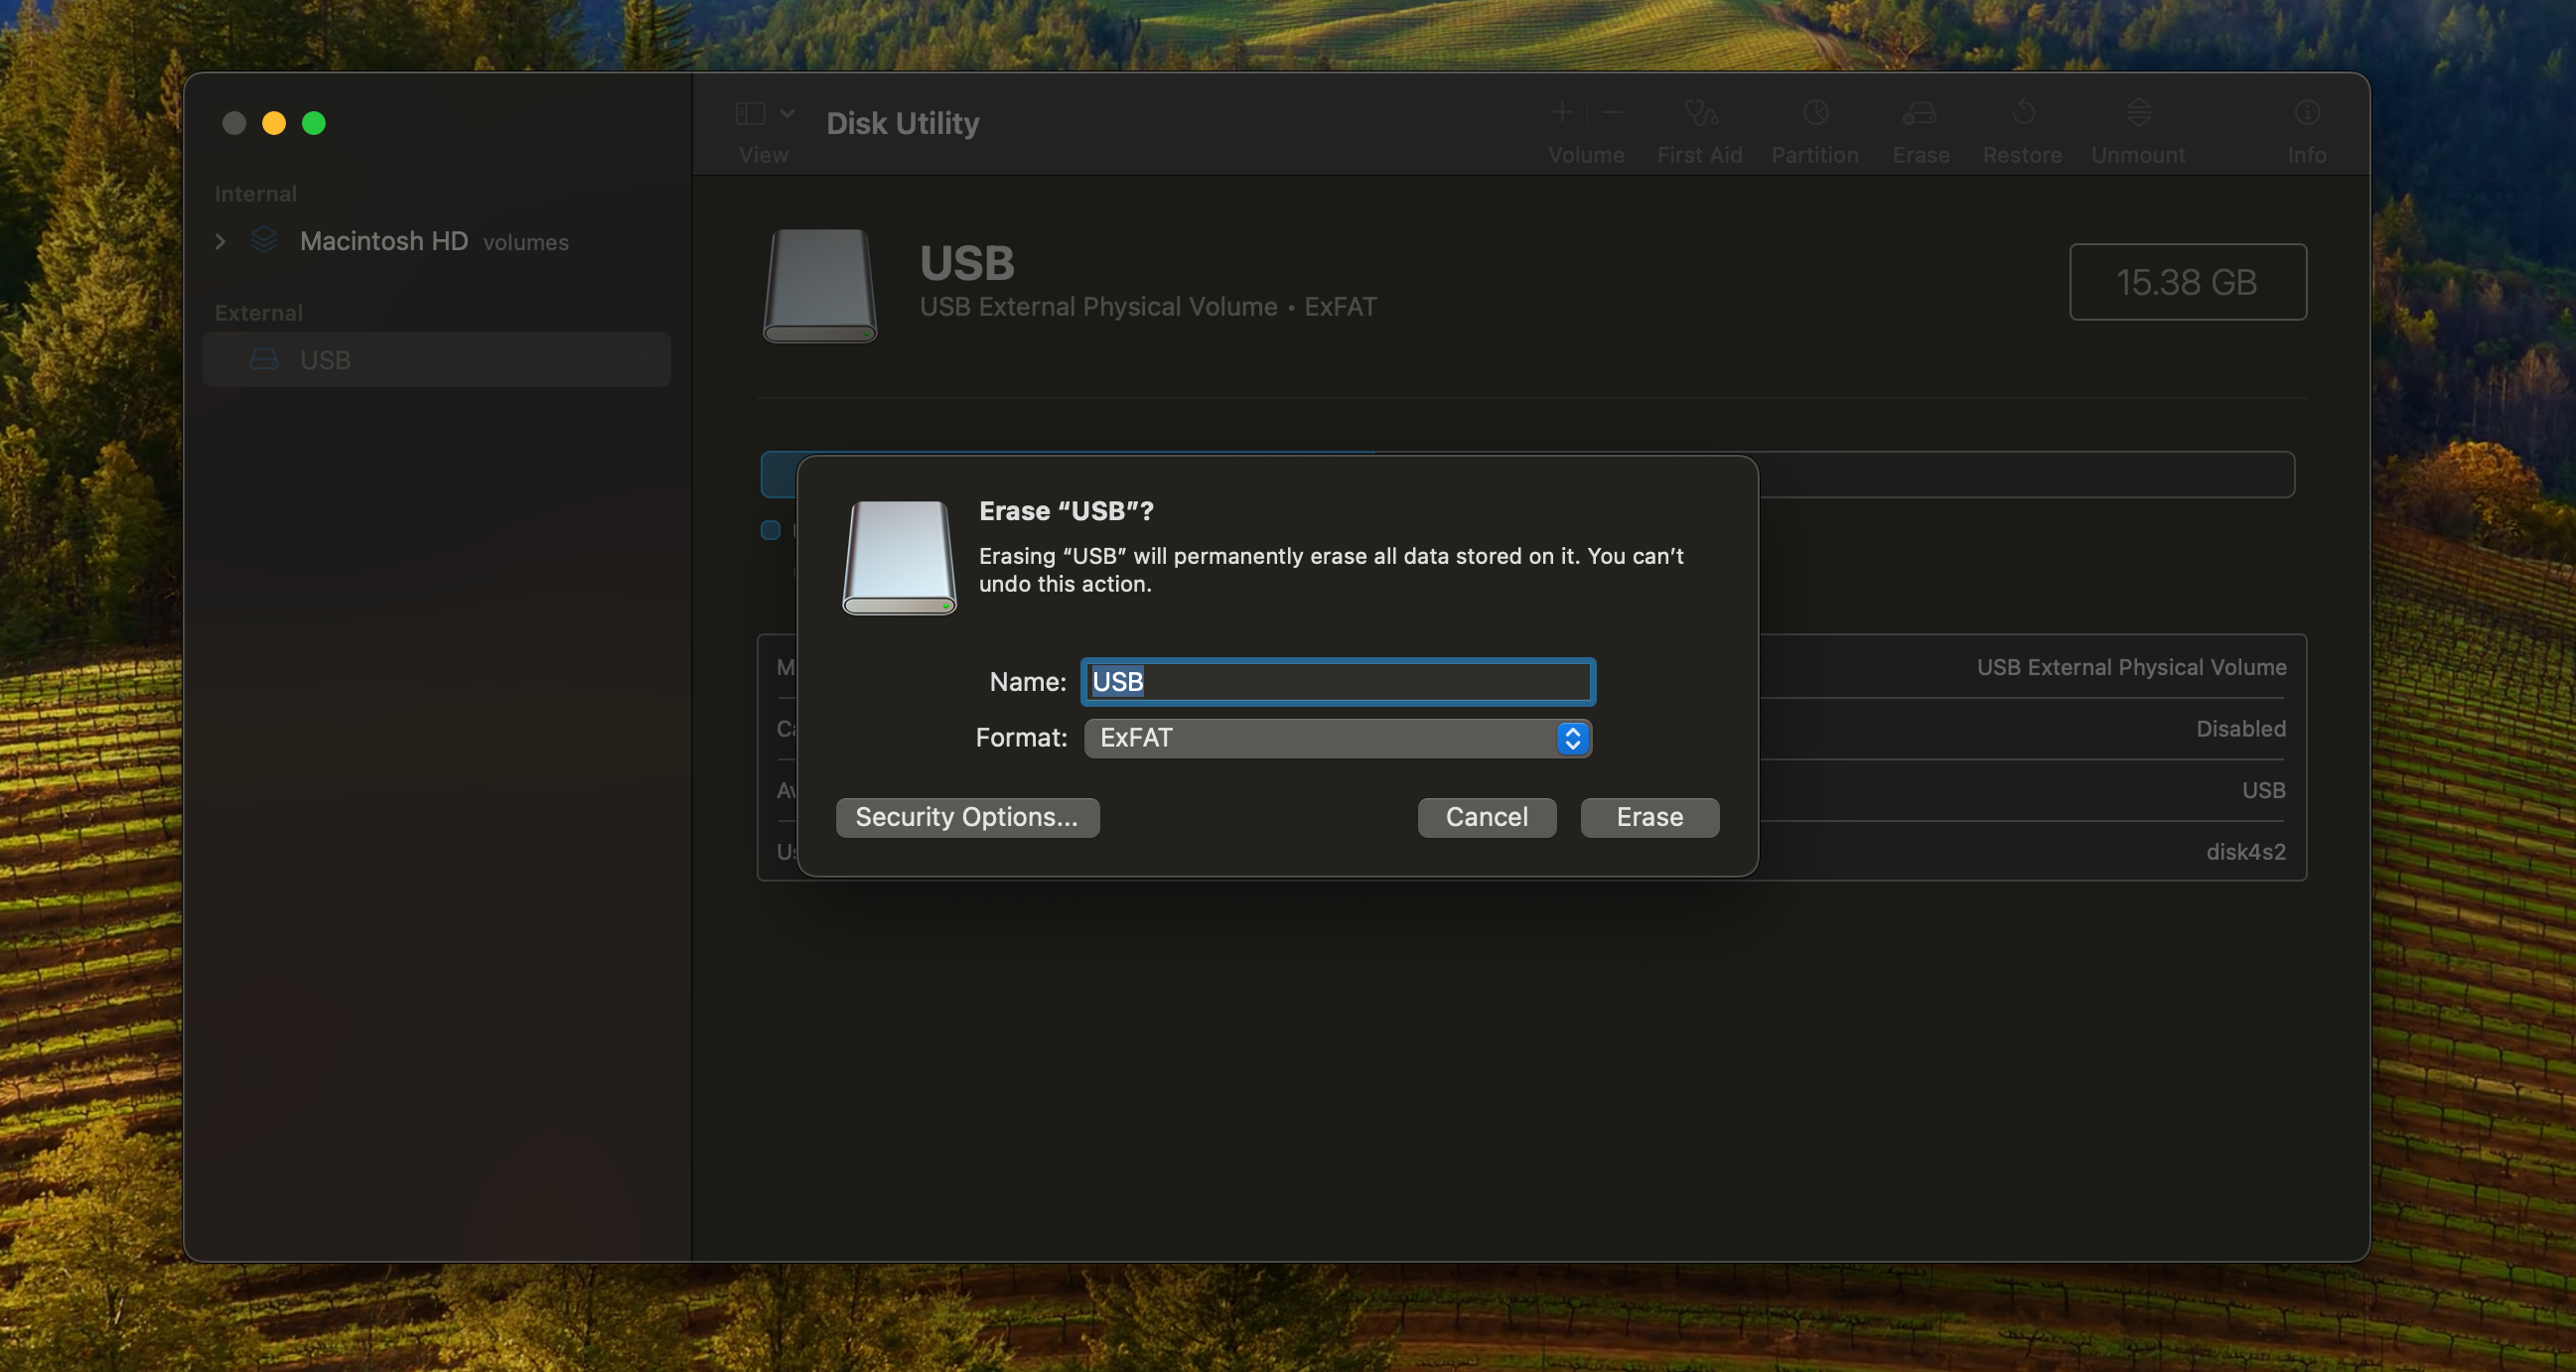
- Open Terminal on your Mac and enter the following command to mount the ISO file. Make sure to replace the path of the ISO file to where you stored it. In most cases, it will be in your Downloads folder.
hdiutil mount ~/Downloads/Win11_23H2_English_x64v1.iso - You'll now need to install wimlib via Homebrew. You can do so by entering this command:
brew install wimlib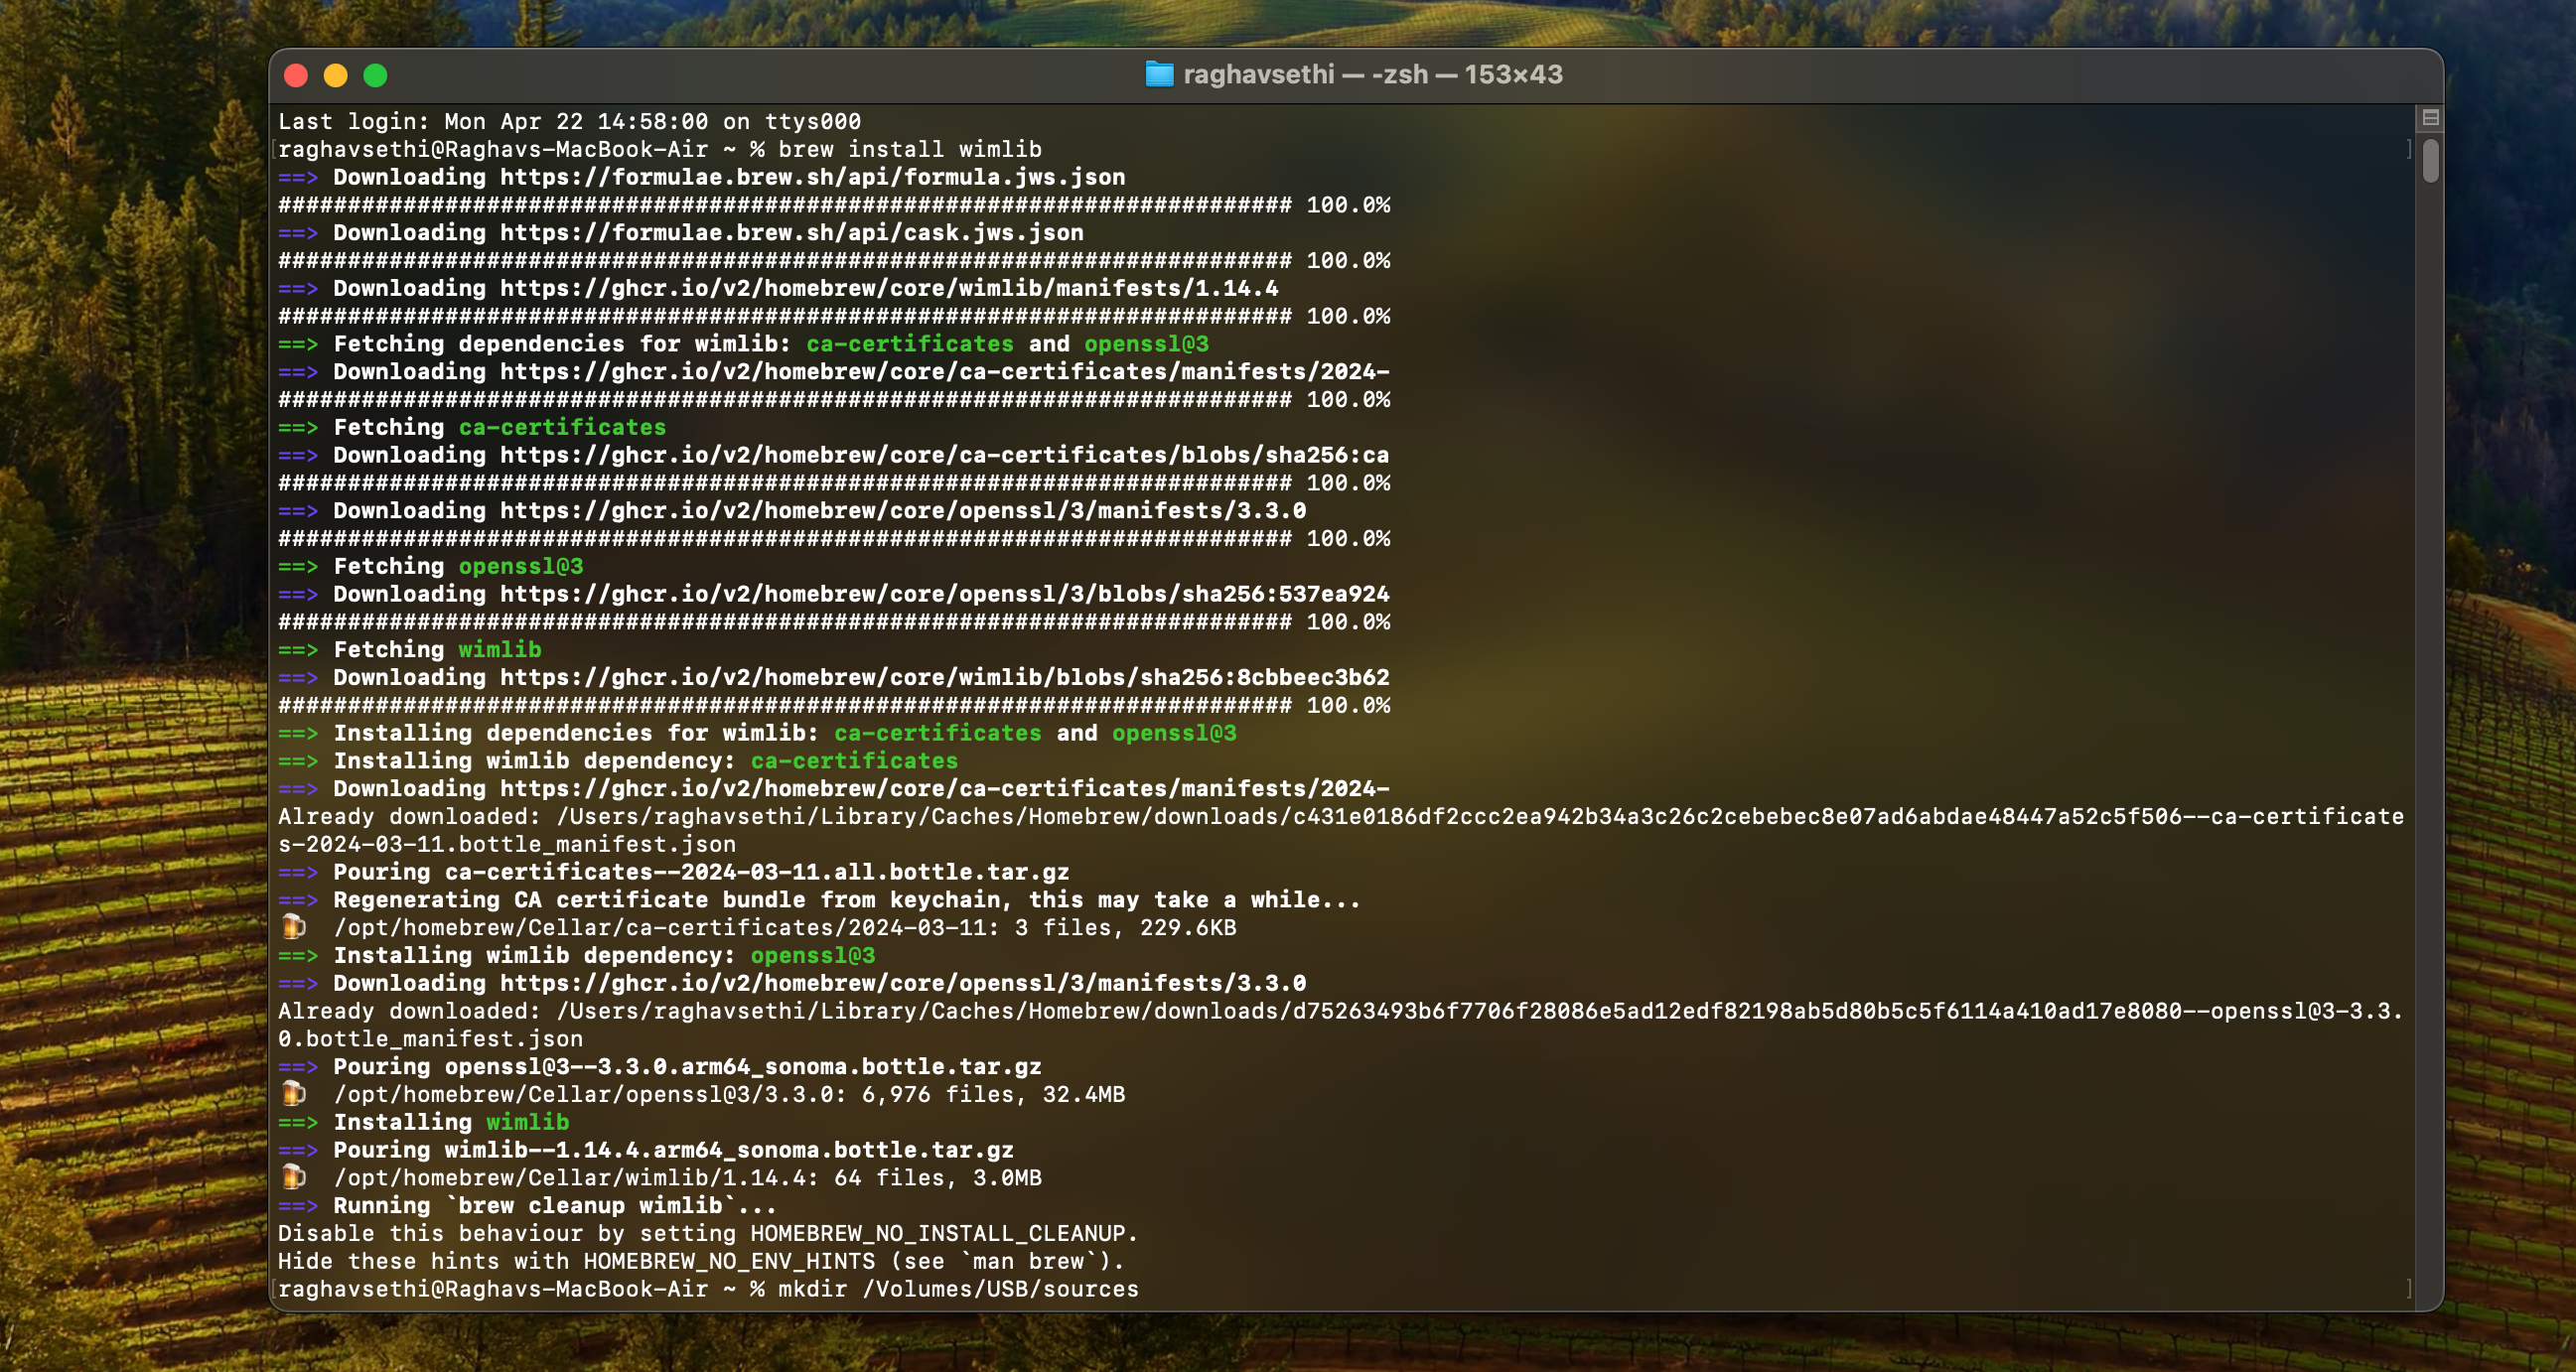
- Next, type the following command to create a folder named sources in the root directory of your flash drive. Make sure to replace USB with the name you assigned to your drive while formatting it.
mkdir sources /Volumes/USB/sources - Now, you'll need to split one of the files into two parts. Otherwise, the installer may not boot. Note that this process may take some time to complete, so be patient.
wimlib-imagex split /Volumes/CCCOMA_X64FRE_EN-US_DV9/sources/install.wim /Volumes/USB/sources/install.swm 3800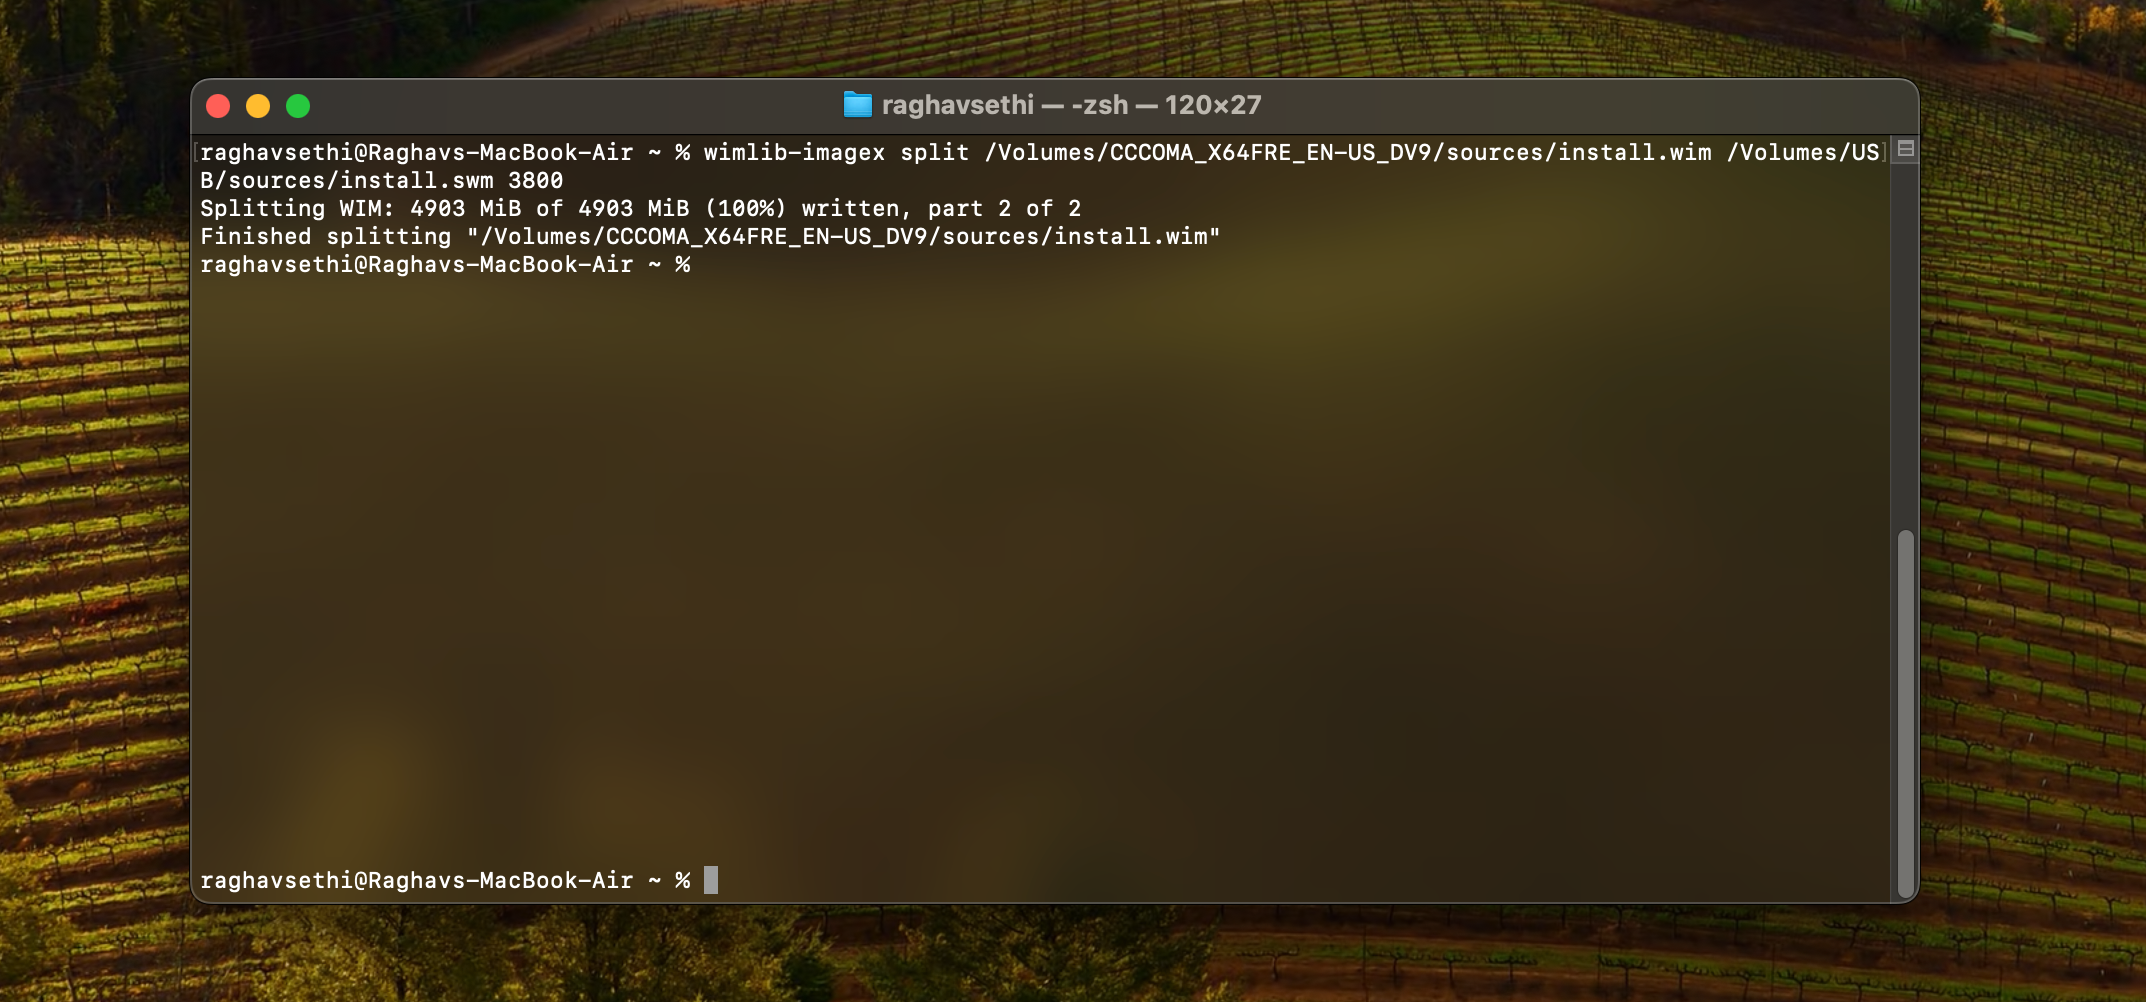
- Finally, you can copy all the remaining files by entering this command:
rsync -vha --exclude=sources/install.wim /Volumes/CCCOMA_X64FRE_EN-US_DV9/* /Volumes/USB
Now that your Windows 11 bootable disk is ready, you can use it to install a fresh copy of Windows on your PC. Creating a bootable Windows installer on a Mac isn't as simple as it is on a Windows PC, so if you're still having trouble, it might be easier to create the installer on Windows directly.
-
 How to delete duplicate photos on Mac?Digital clutter is a common problem, especially with photos. Most people take numerous shots from similar angles, leading to a proliferation of dupli...Software tutorial Posted on 2025-05-02
 -
 Recommended Best Solar Chargers in 2025Whether you often camp off the grid, go backpacking, or grapple with power outages, a solar charger is a nifty gadget to have in your arsenal. It can ...Software tutorial Posted on 2025-05-02
 -
 The ultimate guide to resetting your phone without losing dataRejuvenate Your Smartphone: A Guide to Factory Resets Remember that initial thrill of powering on your new phone? That pristine interface, lightning-...Software tutorial Posted on 2025-05-01
 -
 7 practical tips for Apple's new version of Messages applicationiMessage's Hidden Gems: Mastering iOS 16's Enhanced Messaging Features iMessage, Apple's secure messaging platform, has evolved significan...Software tutorial Posted on 2025-05-01
 -
 How to hide yourself on social platforms such as Instagram, Facebook, XMaintaining online privacy on social media is crucial, even for close friends and family. You might want to limit access to prevent unwanted attentio...Software tutorial Posted on 2025-05-01
 -
 A simple tutorial on how to fax files on your phoneSome organizations still don't accept documents via email—you may need to fax documents instead. No, you can't use your smartphone's phon...Software tutorial Posted on 2025-04-29
 -
 How to delete temporary Mac files? Find and clear methodsClearing Temporary Files on Your Mac: Reclaim Disk Space and Boost Performance Temporary files, often overlooked, can consume significant disk space o...Software tutorial Posted on 2025-04-29
 -
 Is the volume stuck at 100% in Windows? Try these solutionsWindows volume stuck at 100%? Easy to fix! Computer volume issues are a headache! If your Windows volume is stuck at 100%, don't worry, this Min...Software tutorial Posted on 2025-04-29
 -
 How to delete your data from a person search siteThis article was last updated on February 24, 2025. Many people are unaware that a significant amount of their personal data is readily accessible on...Software tutorial Posted on 2025-04-21
 -
 How to disguise an iPad as a laptopThis updated article (originally published October 31, 2019) explores how to transform your iPad into a laptop alternative using iPadOS 16 beta featur...Software tutorial Posted on 2025-04-21
 -
 How to clean Mac mailbox cache? How to delete it on Mac?This guide explains how to clear the Mail cache on your Mac, addressing common issues like slow performance and email loading problems. The macOS Mai...Software tutorial Posted on 2025-04-21
 -
 How to prioritize the allocation of WiFi to the most needed devicesModern homes usually have multiple devices connected to Wi-Fi access networks simultaneously, which often leads to bandwidth tightness, especially w...Software tutorial Posted on 2025-04-19
 -
 McAfee antivirus software review: Is it enough? 【Function, Price】McAfee: A Veteran Antivirus, But Is It the Best for Macs? McAfee, a long-standing and reputable name in cybersecurity, offers a robust antivirus suite...Software tutorial Posted on 2025-04-19
 -
 OnePlus Watch 3 is postponed to April due to funny issuesAfter the long-awaited OnePlus Watch 3 smartwatch is released, the purchase plan may require a slight adjustment. A ridiculous production problem has...Software tutorial Posted on 2025-04-19
 -
 Tips to make the most of the tap function on the back of your iPhoneOver the years, Apple has developed a large number of tools to make using iPhones more convenient. Although the "Tap Back" feature is dull,...Software tutorial Posted on 2025-04-18
Study Chinese
- 1 How do you say "walk" in Chinese? 走路 Chinese pronunciation, 走路 Chinese learning
- 2 How do you say "take a plane" in Chinese? 坐飞机 Chinese pronunciation, 坐飞机 Chinese learning
- 3 How do you say "take a train" in Chinese? 坐火车 Chinese pronunciation, 坐火车 Chinese learning
- 4 How do you say "take a bus" in Chinese? 坐车 Chinese pronunciation, 坐车 Chinese learning
- 5 How to say drive in Chinese? 开车 Chinese pronunciation, 开车 Chinese learning
- 6 How do you say swimming in Chinese? 游泳 Chinese pronunciation, 游泳 Chinese learning
- 7 How do you say ride a bicycle in Chinese? 骑自行车 Chinese pronunciation, 骑自行车 Chinese learning
- 8 How do you say hello in Chinese? 你好Chinese pronunciation, 你好Chinese learning
- 9 How do you say thank you in Chinese? 谢谢Chinese pronunciation, 谢谢Chinese learning
- 10 How to say goodbye in Chinese? 再见Chinese pronunciation, 再见Chinese learning


