**How to Create a REST API with Nest.js and TypeScript**
Nest.js is a progressive Node.js framework for building efficient and scalable server-side applications. It uses TypeScript by default and is inspired by Angular, making it easy to create well-structured, modular applications. In this guide, you'll learn how to create a basic REST API using Nest.js and TypeScript.

Prerequisites
Before you begin, make sure you have the following installed:
Node.js (version 12 or higher)
npm (Node.js package manager)
Nest CLI (you can install it with npm install -g @nestjs/cli)
Step 1: Create a New Nest.js Project
First, create a new project using the Nest.js CLI:
nest new my-api
Follow the instructions to set up the project. Once created, navigate to the project directory:
cd my-api
Step 2: Create a Module
Nest.js organizes the code into modules. We are going to create a module to manage an entity called “users”:
nest generate module users
Step 3: Create a Controller
The controller handles HTTP requests. Let's create a controller for the users:
nest generate controller users
This will create a users.controller.ts file in the src/users directory.
Step 4: Create a Service
The service contains the business logic. Let's create a service for users:
nest generate service users
This will create a users.service.ts file in the src/users directory.
Step 5: Define the User Entity
Let's define a basic user entity. Create a user.entity.ts file in the src/users directory with the following content:
TypeScript

Step 6: Deploy the Service
In the users.service.ts file, implement methods to handle users:
TypeScript

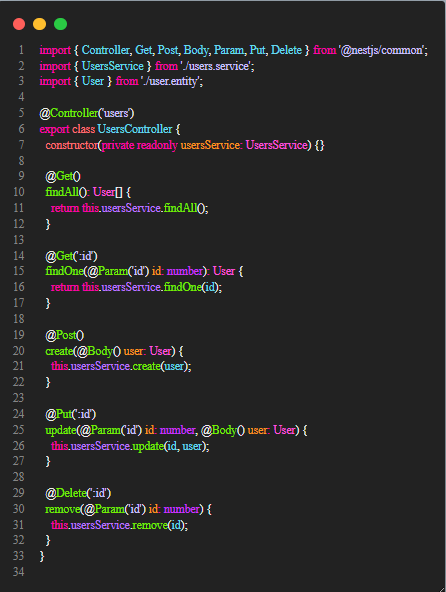
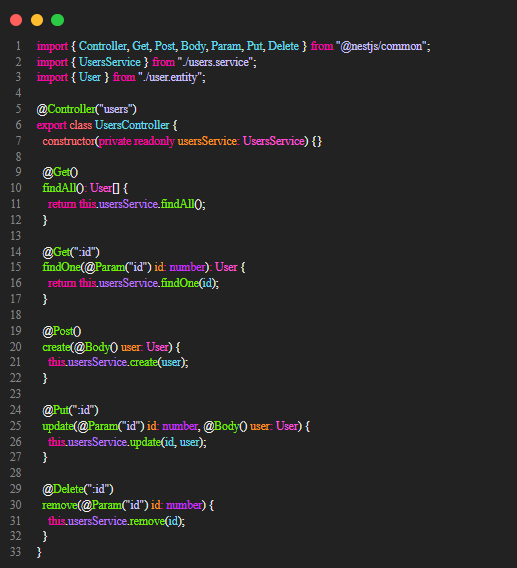
Step 7: Implement the Controller
In the users.controller.ts file, define the routes and methods to handle HTTP requests:
TypeScript

Step 8: Run the Application
Finally, run the application:
npm run start
Your REST API will be available at http://localhost:3000/users.

Conclusion
Congratulations! You've created a basic REST API with Nest.js and TypeScript. From here, you can expand the functionality by adding authentication, data validation, and connecting to a database such as PostgreSQL or MongoDB.
I hope this guide is useful to you.
Thank you for reading and leave me your comments! ??
? Did you like it? Share your opinion.
Full article, visit: https://lnkd.in/ewtCN2Mn
https://lnkd.in/eAjM_Smy ?? https://lnkd.in/eKvu-BHe
https://dev.to/orlidev https://lnkd.in/ecHHabTD Don't miss it!
References:
Images created with: Copilot (microsoft.com)
ByAMillionFriends #MakeYourselfVisible
-
 Why Does Microsoft Visual C++ Fail to Correctly Implement Two-Phase Template Instantiation?The Mystery of "Broken" Two-Phase Template Instantiation in Microsoft Visual C Problem Statement:Users commonly express concerns that Micro...Programming Posted on 2025-02-28
 -
 Why Isn\'t My CSS Background Image Appearing?Troubleshoot: CSS Background Image Not AppearingYou've encountered an issue where your background image fails to load despite following tutorial i...Programming Posted on 2025-02-28
 -
 How to Check if an Object Has a Specific Attribute in Python?Method to Determine Object Attribute ExistenceThis inquiry seeks a method to verify the presence of a specific attribute within an object. Consider th...Programming Posted on 2025-02-28
 -
 Why Do Arrow Functions Cause Syntax Errors in IE11 and How Can I Fix Them?Why Arrow Functions Cause Syntax Errors in IE 11In the provided D3.js code, the error arises from the use of arrow functions. IE 11 does not support a...Programming Posted on 2025-02-28
 -
 How do you extract a random element from an array in PHP?Random Selection from an ArrayIn PHP, obtaining a random item from an array can be accomplished with ease. Consider the following array:$items = [523,...Programming Posted on 2025-02-28
 -
 How Can I UNION Database Tables with Different Numbers of Columns?Combined tables with different columns] Can encounter challenges when trying to merge database tables with different columns. A straightforward way i...Programming Posted on 2025-02-28
 -
 Why Am I Getting "Invalid utf8 Character String" Errors When Saving Emojis in My MySQL utf8mb4 Database?Saving Emojis in MySQL utf8mb4 Database: Troubleshooting Invalid Character ErrorsWhen attempting to store names containing emojis in a MySQL database,...Programming Posted on 2025-02-27
 -
 How Can I Remove a Div Element While Keeping Its Contents Intact?Eliminating a Div While Preserving Its ElementsTo move elements from within a div to outside of it for varying screen sizes, an alternative to repeati...Programming Posted on 2025-02-27
 -
 How Can I Sort an Associative Array by a Specific Column Value in PHP?Sorting an Associative Array by Column ValueGiven an array of associative arrays, the task is to sort the elements based on a specific column value. F...Programming Posted on 2025-02-27
 -
 How Can I Emulate Capturing Groups in Go Regular Expressions?Capturing Groups in Go Regular ExpressionsIn Go, regular expressions utilize the RE2 library, which lacks native support for capturing groups as found...Programming Posted on 2025-02-27
 -
 How to Ensure Hibernate Preserves Enum Values When Mapping to a MySQL Enum Column?Preserving Enum Values in Hibernate: Troubleshooting Wrong Column TypeIn the realm of data persistence, ensuring the compatibility between data models...Programming Posted on 2025-02-27
 -
 How can I install MySQL on Ubuntu without a password prompt?Non-Interactive Installation of MySQL on UbuntuThe standard method of installing MySQL server on Ubuntu using sudo apt-get install mysql prompts for a...Programming Posted on 2025-02-27
 -
 How to Combine Multiple Rows into a Single Comma-Separated Row in MySQL?MySQL: Converting Multiple Rows into a Single Comma-Separated RowWithin a MySQL database, you may encounter a situation where you want to condense mul...Programming Posted on 2025-02-27
 -
 How to Add Horizontal Scrolling to HTML Tables?Extending HTML Tables with Horizontal ScrollingWhen dealing with extensive data tables, it becomes necessary to enhance the user experience by providi...Programming Posted on 2025-02-27
Study Chinese
- 1 How do you say "walk" in Chinese? 走路 Chinese pronunciation, 走路 Chinese learning
- 2 How do you say "take a plane" in Chinese? 坐飞机 Chinese pronunciation, 坐飞机 Chinese learning
- 3 How do you say "take a train" in Chinese? 坐火车 Chinese pronunciation, 坐火车 Chinese learning
- 4 How do you say "take a bus" in Chinese? 坐车 Chinese pronunciation, 坐车 Chinese learning
- 5 How to say drive in Chinese? 开车 Chinese pronunciation, 开车 Chinese learning
- 6 How do you say swimming in Chinese? 游泳 Chinese pronunciation, 游泳 Chinese learning
- 7 How do you say ride a bicycle in Chinese? 骑自行车 Chinese pronunciation, 骑自行车 Chinese learning
- 8 How do you say hello in Chinese? 你好Chinese pronunciation, 你好Chinese learning
- 9 How do you say thank you in Chinese? 谢谢Chinese pronunciation, 谢谢Chinese learning
- 10 How to say goodbye in Chinese? 再见Chinese pronunciation, 再见Chinese learning


